Ventilation in the kitchen: Installation instructions Climate

The kitchen is the cherished place of each mistress, because It is in this room that culinary masterpieces are born. But an integral part of this process is a pair emanating from the stove, the smell of burnt dishes and dwarked windows. Get rid of such inconvenience will help ventilation in the kitchen, which can be installed independently. Consider in detail its varieties and installation procedure.
Content
Classification of Extrazhkov
Ventilation hoods are divided into species in two criteria:
- on the principle of action;
- at the installation site.
According to the first criterion, the design is divided into flow and circulation models. The flow of flow-up hoods is to pull the contaminated air into the mine. Circulation structures paste air through the absorbing odors filter element, after which it comes back to the room. From the flow hood, you can make a circulation structure. For this, the air duct needs to be replaced by a coal filter.
The most popular are flow models. Circulation exhaust ventilation in the kitchen does not provide complete air purification, and the filter element must be changed periodically. In addition, these designs do not remove excess heat, as the flow hoods do.
At the place of installation distinguish:
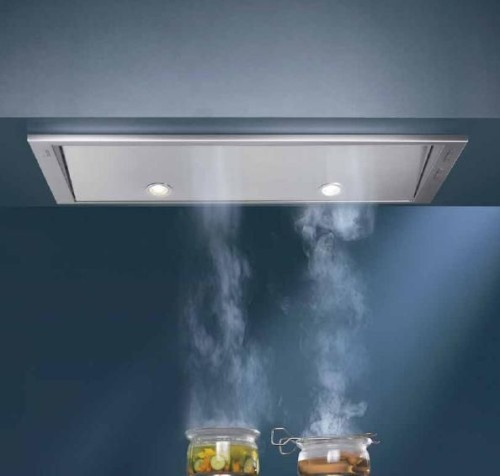
- ceiling;
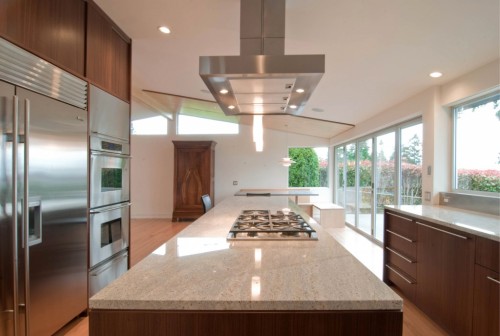
- fireplace;
- desktop;
- built-in models.
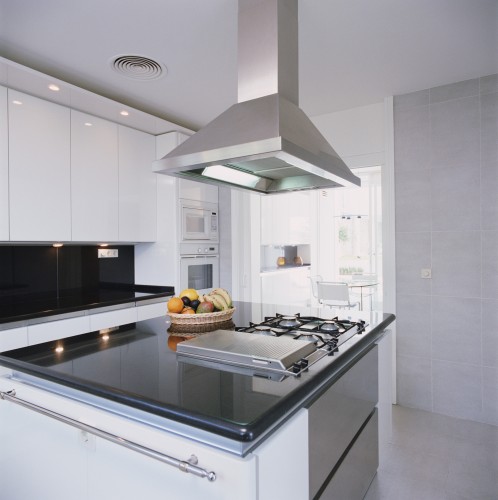
Hoods related to the first type, how to judge from the name are attached to the surface of the ceiling. To install it, it is necessary to have a false-brake and air duct system. The fireplace model is manufactured by a special project. Desktop models are used in professional kitchens and are horizontal oblong constructions.
Required power potential
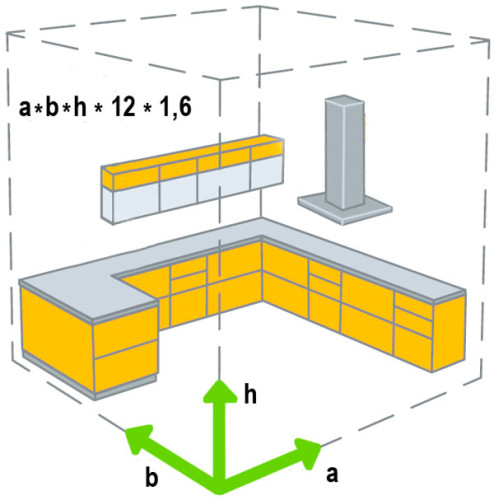
One of the main performance of the drawing is the indicator of its power. That is, the volume of cubic meters of air, which the design skips for 1 hour of work. An indicator of a regular functioning drawing is air update 12 times during the specified time interval. It is possible to determine the required power according to the following formula: the area of \u200b\u200bthe kitchen room x the height of the ceilings x 12.
In the calculation process, power should be taken into account, which will be lost due to the length of the ventilation mine and the bends of the air duct. Therefore, 30% must be added to the resulting indicator. Calculation of kitchen ventilation is as follows. Suppose the kitchen area is 7 m 2, the ceiling has a height - 2.6 m, then the calculation will be like this: 7x2,6x12x1.3.
Security measures
Since the exhaust work is provided with electrical energy, then before installation you need to take measures aimed at creating safe operating conditions. Kitchen room due to increased humidity and high temperature can not be called an absolutely safe place. For this reason, the connection of the exhaust to the power supply is carried out by three wires. This is land, zero and phase. Before making ventilation in the kitchen, you must take care of a reliable ground:
- This procedure will not cause difficulties if there are euro seals in the house and ground contour.
- To the plug terminal, which can be recognized by three parallel lines, the ground wire is connected. But far from all houses are equipped with such a contour. In this situation, it is necessary to take care of themselves. You need to connect to a deaf neutral element. Cannot be used for this purpose gas, plumbing or heating communication.
- To take the required measures to open a shield. The wires that are included in it come from the pipe placed in the wall. It should have a thread pin. This is a deaf neutral. From it to the place of installation, a flexible wire is carried out having a section of 2.5 mm 2.
- The ventilation system in the kitchen with the network is connected by 6.3A by means of an automatic disconnector.
- If other grounds connected to a deaf neutral are detected, they cannot be disconnected. The terminal should be thrown over them and fix with the nut.
Ventilation in the kitchen. Photo:
Ventilation
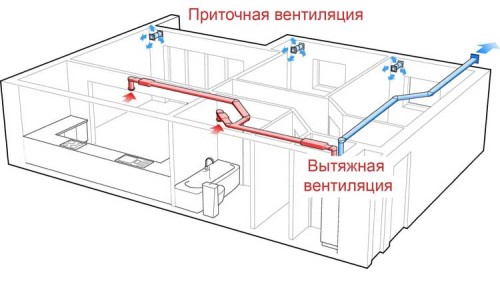
When installing the hood covers the standard ventilation, which can disrupt its operation. You can get out of the position by breaking through the additional window to the street or in the ventilation channel. But this way is difficult to call effective. Additional opening in the ventilation progress does not increase the size of its cross section. The exhaust structure at the same time can remove 75% of the contaminated air, 25% will return to the room. This is under windscreen weather. With severe wind gusts in the kitchen, the entire air volume can return.
With the arrangement of an additional opening, the integrity of the carrier wall will be disturbed. Therefore, to carry out this procedure, you need to create a project and coordinate it with the relevant authorities responsible for the operation of the building. Also, this method contributes to sedimentation on the motor motor and in the air duct condensate, which increases the possibility of breakdown.
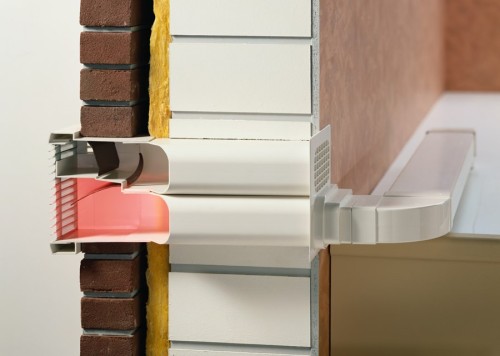
The most optimal option is to install an additional fragment of the aircraft equipped with a flap valve. It has the following structure. In the box there are opening of a square shape. His side of size is equal to the three quarters of the diameter of the air duct. This provides identical indicators of the opening area and the air duct element. The perimeter will slightly give up the length of the circumference of the air duct, which facilitates the connection process.
The design is equipped with a damper. It can be made of aluminum, as well as non-combustible leaf hard or thin plastic. Experts recommend to make a choice in favor of the aluminum flap. This part is pulled by a spring.
Air duct to ventilation
Installing ventilation in the kitchen cannot be made without an air duct. However, it is worth considering that it does not enter the base kit, this item must be purchased separately. To make the right choice should be familiar with its varieties:
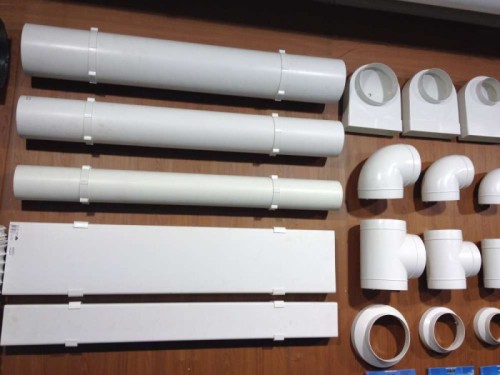
- Plastic parts work silently. Thanks to the smooth surface, the air, passing by such an air duct, does not occur resistance.
- Another variety of the air duct is an aluminum corrugated pipe. This part can be given the desired size, noise does not occur during its operation.
Neutralizers smell
Significantly the amount of extracts is equipped with elements that neutralizing the smell. They are divided into three types:
- ultraviolet;
- electricalionization;
- chemical.
Read the operational characteristics of each type. The work of ultraviolet neutralizers provide lamps that need to be cleaned regularly from Gary. Complete replacement is carried out 1 time in 2 years. It should be borne in mind that they are not cheap. But the advantage of this neutralizer is absolute health safety. Ultraviolet radiation, which it produces, less intense than sunbeams. The lamps also emit bluish or white light, so they can serve as an additional light source.
The neutralizers of the electricalionization type on the structure resemble an air ionizer. The difference is the intensity of the discharge. This neutralizer creates a stronger discharge, since air over the stove contains a greater number of negative components than air in other areas of the room. When working with an exhaust, equipped with this neutralizer, you need to take into account the safety rules. The design can become a source of high voltage of electrical energy.
Chemical type neutralizers are not distinguished by a long service period. The element that ensures their work is covered with fatty film, which leads to the loss of operational properties. It is often happening when the active element has not yet spent its potential. Also, certain evaporations come from these neutralizers in the air, which may cause self-election deterioration. These evaporations do not smell, so they will not recognize them.
Installation order
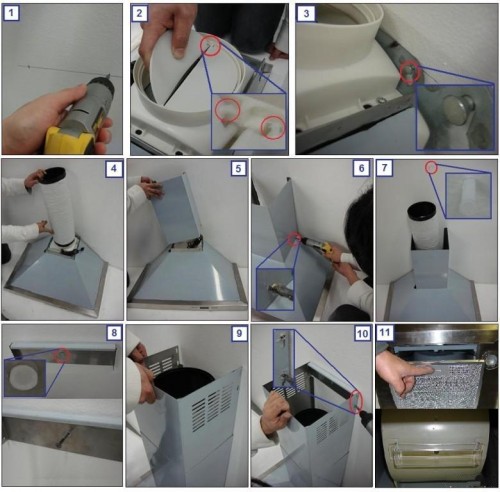
Installation of ventilation in the kitchen depends on the design variety. Consider the installation of the built-in model:
- Work begins with the manufacture of the box. To do this, you can use galvanized sheet or aluminum material.
- Manufacturing is carried out according to the scheme described earlier. Next you need to try the housing by installing it on the wall closet. At the same time, the corresponding markups are made.
- The cabinet is then removed from the wall, in the bottom wall with the help of an electric bike, a hole is cut into the lower part of the structure.
- This operation is performed in the following sequence. Initially, the hole in the markup center is drilled with the help of a large drill.
- Next to this zone is inserted with the Pillet Electrolzka and the necessary form is cut.
- Similarly, the holes for the air duct are performed on the inner shelves. In the upper wall, it is necessary to cut the opening of a square shape under the flap, leaving a stock of 3-5 mm.
- At the next step, you need to connect the air duct. For this, the pipe is focused on the prepared holes, in the upper wall it is given a square form.
- Next, the air duct needs to be cut, leaving a small supply, make cuts in the corners area and bend them into the outer side.
- Then the cabinet with the pipe is attached to the wall. The junctions of the air duct must be treated with a sealing agent, in the opposite case, during operation, its power will decrease.
- Now you can install a box on the closet. It will perform the role of the connecting element between the ventilation shaft and the corrugated pipe.
- Silicone is used as a fixing agent, and the gaps are filled with mounting foam.
- Next to the cabinet is installed extractor. It should be attached to a screw or dowel. Firmly fix on the hood pipe helps the clamp. Processing with sealant This zone is optional.
- With direct connection, the air duct should be connected directly to the ventilation mine. For convenience, you can apply a special lattice having a round hole.
- Plastic ducts are installed in a similar manner.
How to install ventilation without a closet
Cabinets above the slab are far away in all kitchens. Owners are afraid of damage to the furniture as a result of the effects of high temperature and humidity. In this situation, a P-shaped frame is installed on the wall. It can be made from the corners, and the dowels should be used as fasteners. The case is mounted on this design.
Not always the hood manages to attach with a dowel. Preferably, this situation occurs when the kitchen ventilation arises with a gas stove due to the presence of a pipe that does not allow the mount. Plumbing screws-stud will help to get out of this position. From one edge, these fasteners resemble ordinary self-tapping screws, from the other, have a thread with a nut. They need to be screwed into the wall. By the method of use, these elements are similar to a dowel. After that, you should fasten the housing, observing the required distance from the wall surface.
The final stage of the work is to connect the design to the network. For this purpose, a socket or a protective machine is used. Wiring is paved in advance. When using a socket, it can be carried out for furniture. If the connection is carried out by means of a machine, the wiring is placed in a plastic box, which is located behind the trim or under the plinth. It should be remembered that it is initially connected. It will help to take the voltage from the body in the process of functioning the fan. On this ventilation in the kitchen with your own hands is ready.
Conclusion
Ventilation in the kitchen in a private house and the apartment allows you to solve the problem of unpleasant odors indoors. The installation assumes several steps and depends on the type of ventilation model. Installation can be performed on its own without the help of specialists, since this process does not provide for complex technological actions.
Video. Features of editing and transferring ventilation:


