Milling Machine with your own hands Instruments
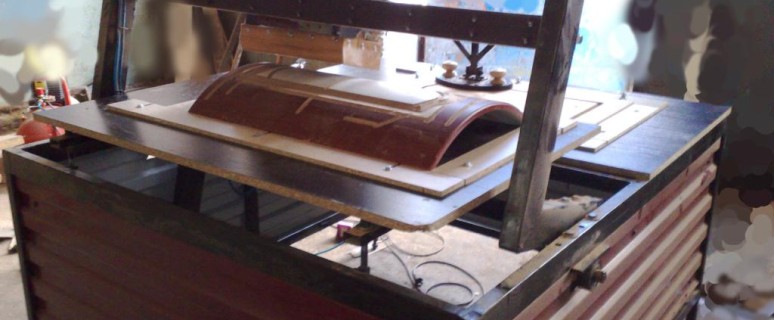
The milling machine on a tree or metal in a personal workshop greatly facilitates the life of a homemade craftsman. True, not everyone on his pocket. And if you make it yourself? This is quite possible, it is worth wanting. And we will tell you in this article how to do it.
Content
What is the homemade milling machine
Most often we need a milling machine for processing a tree when required:
- cut some kind of curvilinear surface or blank incorrect shape;
- select grooves, folders, slots, etc.;
- perform transverse planing.
Device milling machine
The main elements of the milling machine are:
- stanina;
- drive unit;
- table;
- cutting tool.
How to make a milling machine so that and worked correctly, and did it inexpensive? Next, consider everything in stages. The technical characteristics of the milling machine depends on such parameters:
- wall dimensions;
- maximum weight and size parts that can be processed on it;
- drive power;
- number of revolutions.
We make table
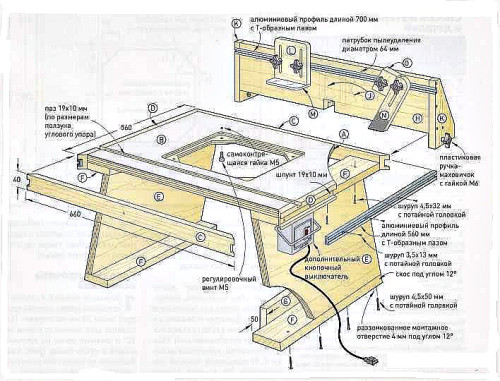
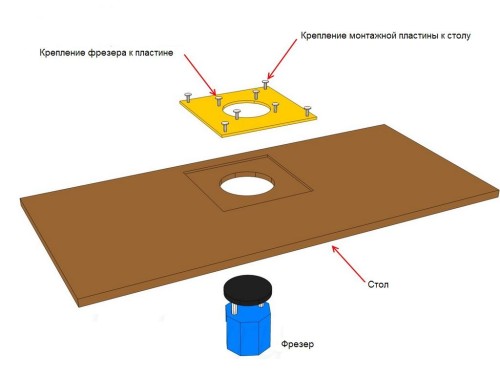
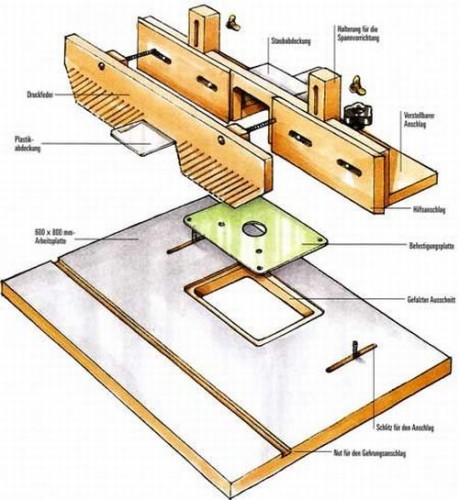
There are many milling machines schemes, but we will look at the design of the table for the machine, the sketch of which is shown below.
What is needed for its manufacture
To make the table of the milling machine with their own hands, you will need:
- Plywood, plexiglas, steel or duraluminum sheet, textolit, MDF, chipboard, in general, which is more accessible to you. This material will go to the manufacture of the table.
- Glue contact.
- Scotch bilateral.
- Small-grained sandpaper.
- Electrolovka.
- Mill with copy mill with upper bearing.
- Clamps.
- Jointer.
- Hardware.
- Plexiglas 6 mm for a shield.
- Board with a thickness of 20 mm.
- Aluminum, polycarbonate or phenolic plastic for the manufacture of the mounting plate.
- Aluminum profile with T-shaped groove.
- From the equipment you need a cutting machine or circulating saw.
Production of the lid.
Let's start with the lid. As a material, we use the phaner with a thickness of 19 mm. The dimensions of the lid are as follows:
- width - 0.5 m;
- length - 0.6 m.
To improve the characteristics of the milling machine, increase the strength of the table, make cladding from the textolite with a thickness of 2 mm. To do this, cut out a sheet of the same sizes as the first of the plywood.
Important: When cutting the lid and cladding to the specified sizes, be sure to add an input of 2.5 cm.
Move on:
- We apply a layer of glue on the opposite direction of the textolite and the top of plywood.
- We retreat from the edge of the plywood sheet of 0.3 cm and glue the textolit, walking on it with a rubber roller.
- We set the workpiece on the cutting machine or the circulation saw in such a way that the edge of the plywood sheet is pressed to the slope. We retreat from the stop 6 mm and we cry the Faneur and cladding from the textolite at the same time. We turn over the workpiece and repeat the same from the opposite edge.
- Move the treated edges before the stop and cut the slab to the desired size.
- Cut from plywood longitudinal and side linings with dimensions:
- for longitudinal - width 0.4 cm, length 70 cm;
- for side - the width is the same, and the length is 60 cm.
- Now we will make an auxiliary item to exactly glue the edge lining:
- we take 4 pieces of plywood with a size of 10x10 cm;
- cut out in each 5x5 cm groove;
- fix their clamps at the corners of the lid;
- lining fastened glue to the edges of the table cover and fix clamps, placing something from wooden waste under the bottom.
7. We press our lining to the installed auxiliary part and glue them to the edges of the lid. Through the grooves done earlier, we can see whether the pads in the corners were rushed correctly.
8. We set a 19 mm thick disk mill on the cutting machine, and attach a 25 cm high-height overlay to the focus.
9. Customize the mill and focus, so that you can select the sheets in the edge lining. Settings are needed accurate, so first check them on unnecessary trimming.
10. The cover is pressed to the slope, a side covered with textolite, and select the tongs in the side edges. They are needed to establish an aluminum profile.
11. We take any trim and drink a spool in it with the same disk cutter. We check how the corner stop goes in it. If it moves normally with minimal backlash, we cut the same groove in the lid, placing it up.
Important: At the end of the trajectory of the disk cutter, chips may appear, so substitute under the table cover some support.
Preparing a place for mounting plate
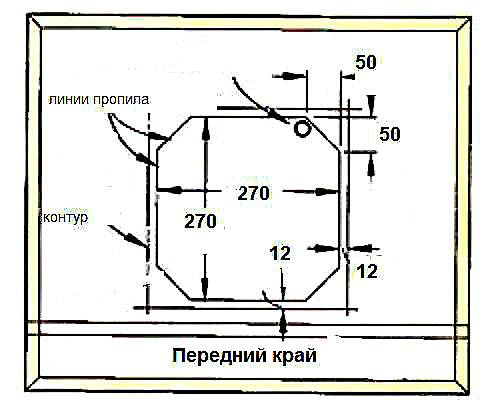
To install the milling plate of the milling plate, you need to make a cut in the table. All this is done in such a sequence:
- Cut the square with a side of 29.8 cm from aluminum or other material. This is a mounting plate.
- On the lid, we carry out a line by retreating from the front edge of 12.5 cm, then divide it in half.
- We place the mounting plate on the table so that the point of intersection of the diagonals of the square coincided with the middle of the conducted line. Combede the plate on the contour.
- We remove the plate and retreating the edges of the contour of 1.2 cm, applied outline outline:
5. Drills a hole so that the jigscription passed and cut the cutout.
6. We lake the plate into the contour and fix it with a 2-sided tape.
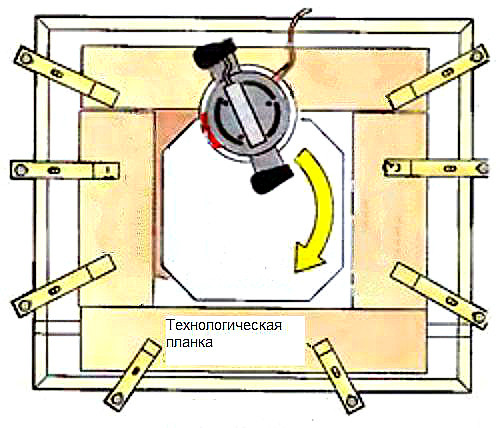
7. According to the contour of the plate, first the cardboard pads, and then the technological planks and fix their clamps.
8. We remove the gaskets and the mounting plate. We take the mill, and resting it with the sole in the technological planks, set up the tool to the depth of milling of the table of the table 0.3 cm.
9. Manage the bearing of the cutter so that it passes through the edges of technological planks. At the same time, we make shallow passages with a gradual increase in the departure of the cutter. Works finish when the sampling depth becomes 0.5 mm more than the thickness of the plate.
To complete the manufacture of the table of the milling machine with their own hands, perform the following operations:
- we grind the longitudinal and side edging overlays using sandpaper;
- remove the edge of the plastic around the deepening under the plate assembly.
We make the foundation
For the manufacture of the base of the self-made milling machine, we use the same fane with a thickness of 1.9 cm as for the table cover:
- Cut 2 legs with a height of 52 cm and width 29 cm.
- We harvest 4 ties, the width of which is 8 cm, and the length is 52 cm.
- The edges of the screeds and legs make up 12-degree skeuses.
- To secure a network cord, drink a plank with dimensions of 19x50x42 mm under it.
- Screeds and legs glue each other and fix the design using clamps.
- Drills holes for screeds. Then we insert screws into them, and we remove the clamps.
- To the tie glue bar for fastening the cord. Fix it with clamps.
- The legs are grinding small emery.
- I turn over the lid and putting it on the workbench, we connect to it with the help of glue, the collected design. We perform fixation by clamps.
- In the screed, we perform holes penetrating further into the cover, under the screws with a diameter of 4.5 mm, a length of 3.2 cm with a secret head.
- We apply screws, and the clamps are removed.
Pop and clamping comb
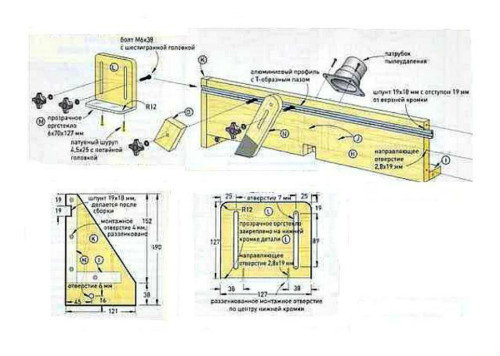
On this circuit, the milling machine shows a longitudinal focus and comb clamp.
We start making the stop:
- We cut the wall with a size of 1.9x15x66 cm.
- We make the basis. Sizes - 1.9x8x66 cm.
- We cut 2 jams of the nozzle of dusting. Dimensions - 1.9x6.5x8 cm.
- Perform cutting 2 end plates with dimensions of 1.9x12x19 cm.
- We process with one edge on each billet.
- We cry out the raw edges on the cutting machine or circular, by setting the longitudinal focus at a distance equal to the finishing width of the part + 1 mm, and then perform their fugging.
- We measure the finished cover, add another 0.1 cm. We perform the abillation of the stop and its base, having coordinate its length with the size of the lid.
- In the middle of the stop and base, we cut the jigsaw of the grooves 3.8x3.8 cm.
- We glue these 2 parts and clamp clamps.
- We cut 2 billets, from which we will subsequently produce end plates. The dimensions of them are 1.9x12x19 cm. Glue them with scotch.
- We carry out on the top blank the diagonal, which is the cutting line. We retreat from the nose of the plate 1.6 cm, and from the left edge of 4.5 cm and we carry out straight, their intersection will be the center of the hole with a diameter of 0.6 cm.
- Drink the details. Grind edges, drills a hole, we divide the details.
- The finished plates we connect to the adhesive to the slide, fix the clamps and perform the guide holes, we screw the screws.
- We cut the disk cutter grooves. The width of it is equal to the width of the profile of aluminum.
- We carry out the final grinding of the finished stop.
The turn to make a shield:
- First we cut the holder from plywood in the form of a square 12.7x12,7 cm. The upper corners are spinning, r \u003d 1.2 cm.
- Perform slotted holes with an electric jigsaw.
- We take empty paper and spit item well.
- We cut the plexigla shield. We do the same roundings on the upper corners as on the holder.
- The shield and holder connect the scotch, then drill holes for mounting.
It remains to make a fit-comb and locking elements:
- We make 2 blanks for the clamping comb size 1.9x5.1x46 cm from the board.
- We perform on the cutting machine 30-degree sites at the end of the workpiece.
- We retreat 6.7 cm from the ends with the beas and conduct transverse oblique lines. In the upper ends, place radii.
- We do it propyl to the laid the line, setting the workpiece on the cutting machine and pressing it to the slope with the edge of the larger length. At the same time, the 3-mm disk rises above the table with a 5 cm machine.
- Deploy the item 180 degrees and make the same from the other end.
- Displacing the stop by 0.5 cm from the initial position and repeat the actions through the same intervals. As soon as the stop moves to a 4.5-centimeter mark, the milling disc should be reduced to 2.5 cm and cut the edge of the workpiece to the width corresponding to the drawing.
- From the rounded edge of the clips, we retreat 2.3 cm. At this point, in the center of the ridge, we perform 1 hole with a diameter of 7 mm, laying 2.2 cm with its center and make another, retreat 5.1 cm and drills the third hole.
- We connect the 2nd openings with parallel straight, take the jigsaw and cut the slothing hole.
- We proceed all emery.
Retained blocks manufacture by the following technology:
- we drink 2 billets from the board with a size of 1.9x4.5x7.6 cm;
- drills in the center of the opening Ø 0.7 cm;
- spit items and tightly connect them with long edges of the comb.
Final work on the device milling machine
- We cover all the wooden parts of the self-made milling machine with oil impregnation.
- Cut with a hacksaw aluminum profile, focusing on the length of the table and the stop. One piece of profile is freshended to the table, the other - to the elusive.
- Install switch.
- Freak to the brace holder safety. Then this node, as well as the ridges, together with lock blocks, set to the focus.
- Parallel focus assembly mounted on the table.
- On the back side of the stop to shocks by mounting the dusty nozzle.
- Insert the mounting plate on the lid insertion.
Drive for milling machine
The selection of the engine for inclusion in the circuit of the milling machine depends on what you are going to perform:
- to obtain simple blanks with small samples, there is enough 500-watt engine;
- for work more complex it is necessary to choose the engine from 1.1 square meters. Any cutter is suitable for such a drive;
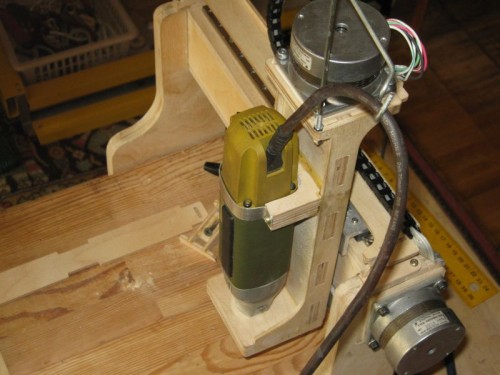
- on milling machines, made with their own hands, install stationary electric motors or are used as a drive hand power tools for high power;
- with a greater number of revolutions, the cut is better.
Look at the homemade milling machine video:


