
Wiring in the house do it yourself. How to protect wires in the walls Insulation,Useful advice
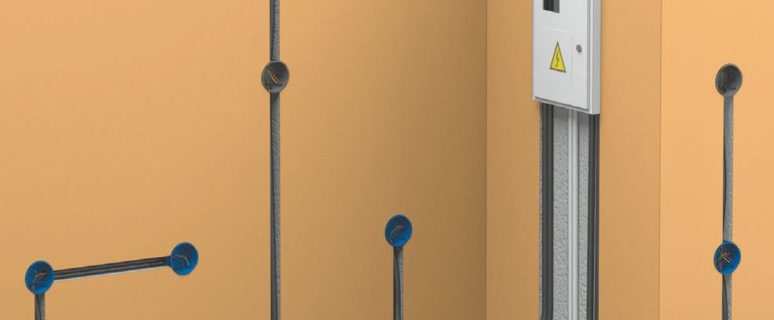
In a modern house it is impossible to do without electricity. All kinds of equipment that supports the comfort and life support of the inhabitants of the house, needs a high-quality and secure power grid. Competently performed electrical wiring, providing safe and uninterrupted food of the house of electricity, the task is not simple, but quite under the power of many owners. The main thing is to correctly understand and comply with all the principles and requirements of the work on the electrification of residential and utility premises.
Content
Wiring in the house. Concepts and definitions
In order to correctly perform the installation of the inner line of the house wiring, it is necessary to deal with the types of electrical wires, their purpose, as well as with other basic concepts.
Wires and cables
- Electric wire - Metal electric current conductor. It can be made of aluminum or copper wire. It consists of one or more isolated or uninsulated lived.
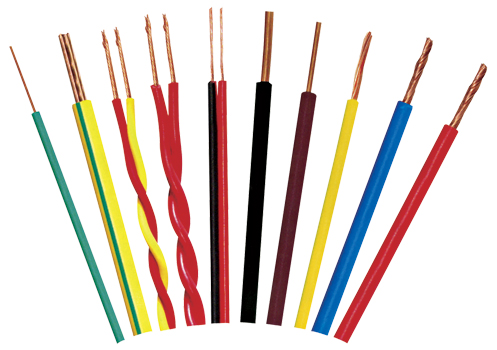
Often, aluminum wires are used for internal wiring, although they are inferior to a copper wire for many characteristics. The only advantage that aluminum wires possess is not a high cost. With the same current loads, the cross section of the aluminum wire must be greater than the cross section of the copper wire, and this is inconvenient. The physical properties of the metal of aluminum wires cause less reliable connection than copper wires. In addition, aluminum has high oxidation, which affects the electrical contact of aluminum wires with each other and with wires from other metals. Because of this, all mechanical contacts of aluminum wires require periodic torture, otherwise heating will be heated at the point of contact and, as a result, possible ignition. In addition, oxidizing, aluminum affects the vinyl insulation of the wires and it is collapsed over time.
The modern market offers many solutions to such problems mentioned above. This is a whole range of single-core and multi-moist, solid and multi-breed copper wires of the PV series, whose cross section can be selected for any intended current load. Increased reliability, wires with double insulation of the VNG series (vinyl - vinyl - naked) and therefore are very convenient for external and internal wiring in rustic and cottage construction. In those rooms where enhanced requirements are presented to the reliability and safety of wiring, the PUNP wires can be used (wire - universal - flat) with enhanced insulation.
- Electrical cable -several isolated electrical wires having a common protective shell. Also to protect against external influences on top of the ordinary shell, metalworking (steel spiral tape or metal braid) can be performed.
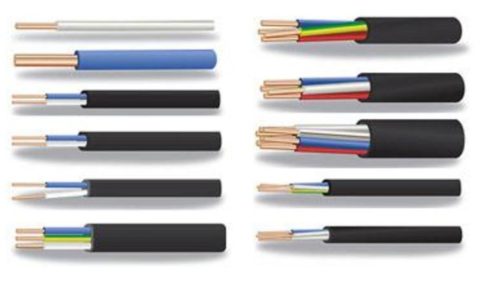
In specialized stores, many proposals for the choice of electrical cables. Among the various types of cables there are stranded and single-core. For stationary wiring it is better to choose a single-core cable. Such a cable has an increased resistance to mechanical effects, it is less susceptible to oxidation and loss, as a result, contact. In the same place, where the wiring is subjected to displacements (for example, when replacing electrical lamps or movement of electrical appliances), the use of a flexible stranded electrical cable, such as PVS (wire-vinyl - connecting), more preferably.
In rooms with an increased fire hazard, it is recommended to use NYM cables.
NYM - German name indicating:
- N - manufacturing standard (Normenleitung);
- Y - PVC insulation material;
- M is an external protective shell (MANTELleitung).
These cables have a firefare when heating highlighting antipyrenes. For rooms with elevated temperature, for example, sauna, etc. There are heat-resistant cables withsting temperatures up to 800 ° C. In addition, such moisture-proof and plastic cables.
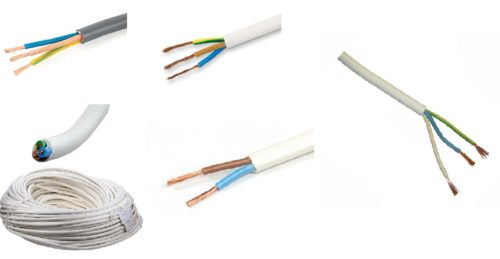
- Electric cord - a multi-proper flexible electric cable designed specifically for connecting electrical appliances to the network through electrical dispensings (sockets).
Characteristics of electrical conductors
Parameters characterizing various electrical wires are divided by the dependence of the area of \u200b\u200bcross section from the permissible value of the undergoing current. In order to determine the required area of \u200b\u200bthe wire cross section, it is necessary to know the estimated maximum strength of the current passing through the wire, taking into account the heating of isolation. The permissible working temperature of the heating of the electrical wires should not exceed 65-70 ° C (depending on the insulation material). When the room temperature is valued 25 ° C, the allowable heating isolation is 40-45 ° C. Considering these conditions on the cross section of copper and aluminum wires, using the tables given, you can determine the permissible current loads. 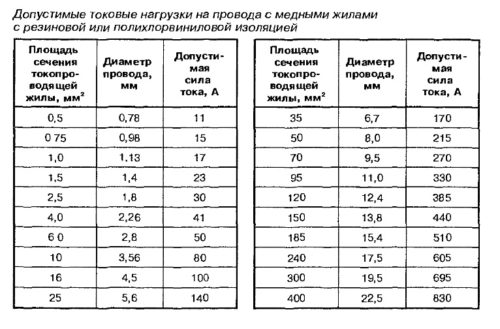
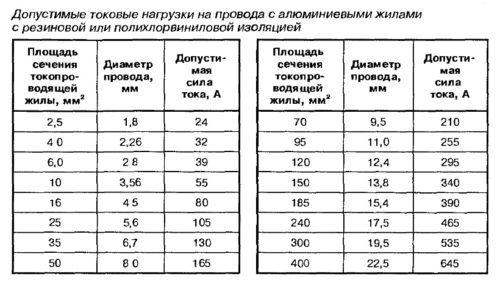
If the cross section is unknown, it can be calculated by the formula:
S \u003d 0.785 · D²,
where S is the cross-sectional area in mm², D is measured (caliper) wire diameter in mm.
The cross section of the stranded wire is determined by the summation of the sections of all lived in the wire.
The most used modern cable for laying electrical wiring inside the house is the Copper cable of the VGH with two layers of isolation. Such a cable is calculated on a voltage current of 600 and 1000 V, and a frequency of 50 Hz. When applying this cable, you can use the following recommendations for secting:
- Wiring for lighting and security systems - 1.5 mm².
- Wiring for consumers with a power consumed not more than 3.5 kW (including under sockets and other electrical discs) - 2.5 mm².
- Wiring for consumers with a capacity of more than 3.5 kW, but not more than 5.5 kW - 4 mm².
Electric wiring inside the house
Electric wiring inside the house is laid in two ways. The first method is an open wiring. The second way is the wiring is hidden.
Open wiring
Open wiring is used if the walls are already fully fulfilled and finally lined or not necessary or desire to hide the wires. In the wooden houses, open wiring is the norm of modern security requirements. In a wooden house (in contrast to the stone), the wiring may be damaged by rodents, and the accumulated wood dust is instantly flammable with a short circuit.
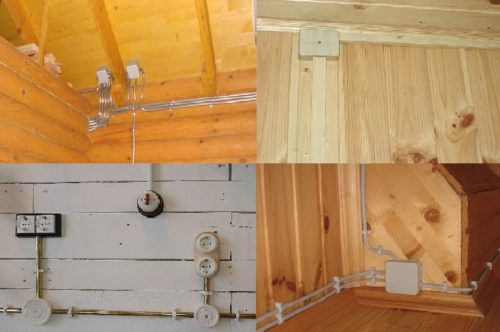
Open wiring is simple when installing it, it is easier to maintain and control, and if necessary, you can move or supplement. If earlier, when performing open wiring on the wooden walls, the wire with a tree was not allowed (it was necessary to withstand a distance of 15-20 mm), now it is permissible. Wires can be laid on the wall surface, fixing them with the help of electrical clips of suitable size. The distance between the clips is selected based on the rigidity of the wire, but not more than 1 m. The main condition for contacting the wires with a wooden wall is the presence of a double, at least, isolation (VG cable).
An open electrical wiring can be performed in a corrugated polymer pipe. A few wires can be placed in such a pipe at the same time. Although in this case, security will be observed, but aesthetics of such wiring, especially in residential premises, will be desired to be desired. In addition, if necessary, access to a separate section of the cable (or a separate cable) will require a dismantling of a large amount of wiring.
Pretty gently and harmoniously, the wiring, made in the polymer cable channels with a removable lid. They exist different sizes in terms of capacity, there are different colors and are made of non-combustible plastic. Cable Channels are easy to install and are convenient when servicing wiring and when adding additions and changes. Cable channels have many additional devices - turns, external and internal angles, tees and plugs.
Copper wires are used for open wiring. If you use aluminum, then when passing the combined wall structures, it is necessary to use a layer of sheet asbestos with a thickness of at least 3 mm and protruding on each side of the wire at least 5 mm. It is uncomfortable and inestore.
Hidden wiring
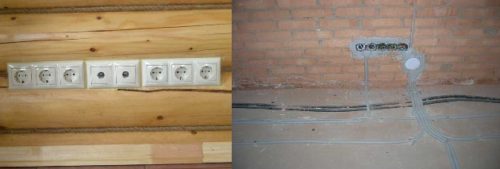
Hidden wiring, as a rule, is performed before the start of plastering or facing. The advantages of hidden wiring are:
- reliable wire protection with a layer of plaster out of mechanical, thermal and light impacts;
- the possibility of conducting wiring between two connecting boxes or liners to the rosettes and switches with the crossed way, which will save the wire (but only strictly vertically and horizontally under security conditions);
- aesthetic effect.
Installation of wiring
Required tool
Depending on the material of the walls and other conditions, the list of the necessary tool will change. However, there is a list of tools, without which it is not necessary anyway. Be sure to need the following tools:
- Screwdrivers of various sizes, both flat and crusades.
- Passive and active probes.
- Construction knife or stationery.
- Passatia.
- Sideboards or nippers.
- Tool for stripping wire isolation.
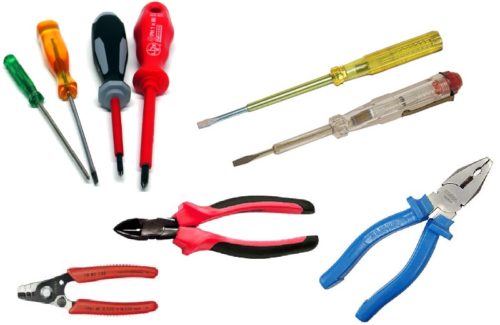
Marking of the highway electrical wiring
In order to conduct wiring, you need to know the installation locations, distribution boxes, sockets, switches and lamps.
- Electrical boards.
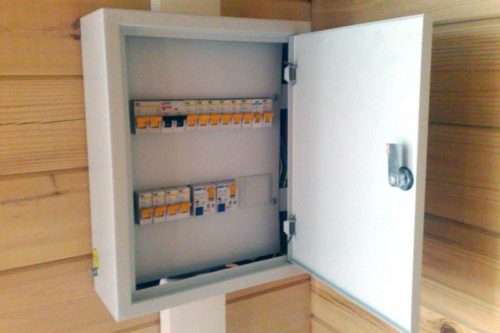
Electrical boards are usually installed in the immediate vicinity of the entrance to the house and, as far as possible, the input of the outer electrical cable. The place for the electric craftscher should be protected from dampness (moisture) and possible mechanical effects (for example, when entering or removing furniture and pr.). The electric boards to the wall or other rigid construction, which is not subjected to shockers, away from heat sources at height from the floor is 1.4-1.7 m.
Electrical stops must be easily accessible for maintenance, as well as turn on and off the common switch and safety devices.
- Sockets.
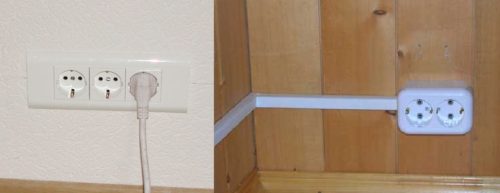
Outlets are placed taking into account the planning of the room and the number of possible electrical appliances. Outlets are not unnecessary. It is better to establish more sockets, including double or even triple and quadruple, than then abuse extension cords and tees.
The sockets are better placed at an altitude of 300 mm from the floor, and located above the writing tables and in such places - at an altitude of 1000 mm.
- Switches.
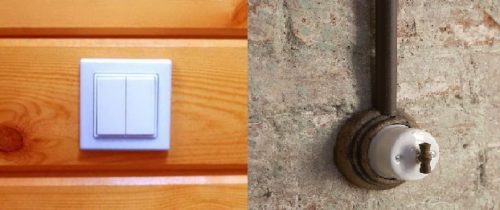
Separate spaces under the room circuit breakers, depending on the placement (ceiling and wall), type (stationary and mobile) and the number of lighting devices.
Switches can be somewhat (for each lighting device) or one multiclave for several lamps.
The height of the placing switches is selected approximately at the level of the eye (1600-1800 mm from the floor) or at the palm of the palm of the hand (700-900 mm from the floor).
- Junction box.

After all the places for the shield, sockets and switches are defined, choose space for junction boxes. Moreover, they need them less, the better (additional compounds are the complexity of installation and source of additional danger).
Distributive (recycling) boxes can be placed both in the indoor and corridor. Depending on where the total line passes, at the same level (height) and the junction box itself is located.
- Wiring.
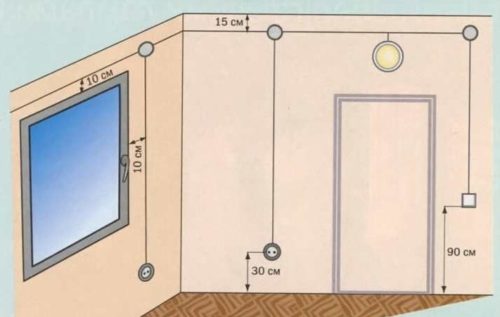
Posting line place:
- for sockets directly at the same level where they are located;
- taps to lamps and switches vertically, to avoid the risk of short circuit when climbing nails or dowels upon subsequent arrangement of the room;
- for lighting and sockets with separate groups (highways);
- for computer equipment a separate highway.
Laying wire
After the markup is made, proceed to the direct laying of the wire.
Laying the open wiring wire does not cause special difficulties. In addition, the main methods for fastening and laying the cable have already stipulated above.
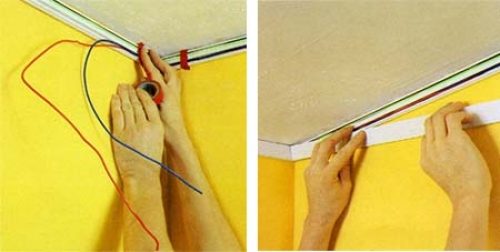
The main thing in any method of laying wiring is accuracy and compliance with all rules for the safe execution of the household of the house.
When mounting the hidden wiring, the wire lays into the grooves made in the wall. The groove (channel or shit) is made of the required width (a little wider than the diameter of the wire or the cable protection used). The cable is fitted into the groove and is fixed by alabastrome or cement mortar. After the end of the installation, the grooves are screaming.
Simultaneously with the grooves under the wire, nests are made for distribution and installation boxes, sockets and switches.
In brick, block or concrete walls, the grooves are chosen using a grinder (with the desired type of disk) and the perforator. If there are seams in the wall (block or brickwork), the grooves should be combined with them (both horizontally and vertically).
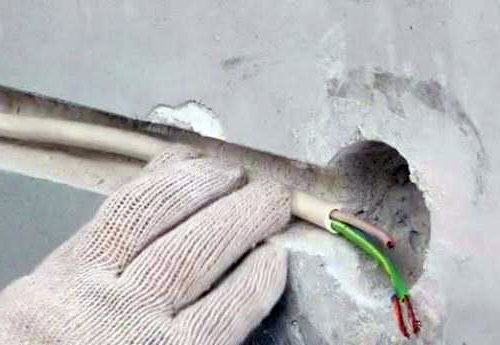
The width of the grooves is performed slightly larger than the diameter of the round or thickness of the flat cable, and the depth of 8-10 mm is greater than the diameter of the round cable or width of the flat.
After the junction boxes are installed (and the input and output windows are correctly oriented), you can start laying the prepared cable segments or wires into the grooves. The free ends of the wires at the same time begin in the distribution boxes with a reserve of 150-200 mm.
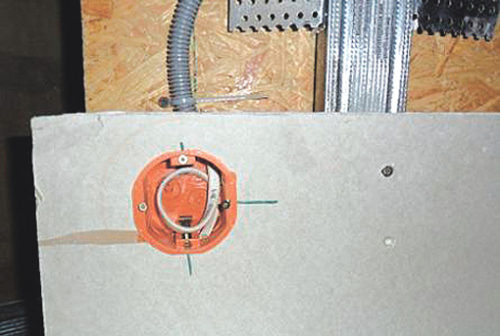
If the walls are made of drywall or other facing material, the cable is stretched behind the lining from the box to the box along the shortest path. In the drywall (or other material of the facing) cut holes for distribution boxes (special for this material), and then mounted them using special fastening screws.
When laying the cable in metal or plastic pipes, the cable is pulled in them with a conductor (steel wire or cable).
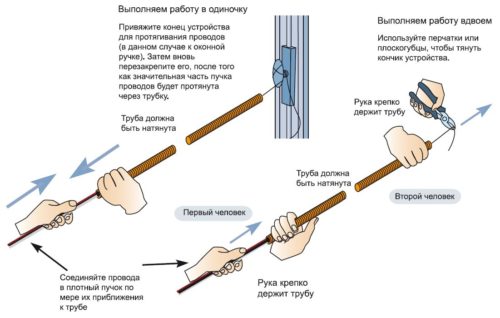
Wiring in the house. Installation of sockets, switches and lamps
Sockets and switches have special terminals in their design to connect the wire. Distinguish between four varieties of terminals:
- Screw with washer.
- Screw with square nut and terminal plate.
- Terminal and screw on the side.
- Special mechanical clamp with spring (without screws).
Special care requires the operation of stripping the end of the cable, this is done like this:
- A sharp assembly knife is made incisions along the outer insulation of the cable (it is necessary to act gently so as not to damage the insulation of the wires inside).
- An incision is performed along the length of that wire that connects to the most remote terminal.

- Cut part of the outer cable shell bend, freeing internal veins, and trim.
- Each of the lived to cut to the required length, taking into account the location of the terminals.
- To determine the insulation of each core, leaving a segment of a non-insulated wire with a length of 6-12 mm (the edge of the insulation of the wire should be as close as possible to the terminal, which decreases the risk of short circuit).
- To stripping the ends of the wire in the right place to perform a ring incision of insulation (neatly and rigorously, so as not to damage the wire), and then pull the insulation by the passage.

- The remaining annular scratch can lead to the formation of a crack, and then to the cliff of the wires at the terminal. Therefore, when the blade is insulated, the knife blade must be kept at an angle to the dwelling, and it is better to use a special tool for stripping isolation.
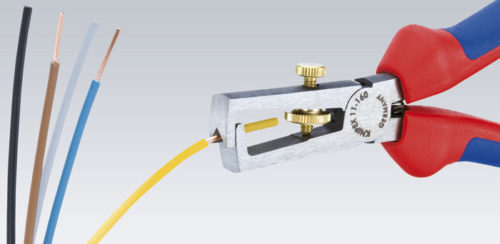
After stripping the ends of the wires, they must be connected to the terminals. The wires in the cable usually have different isolation colors. It is customary for the phase wire to use the core of blue (brown) color, for zero - black (or white), and for grounding yellow-green. But the most important thing is that in all rooms at home the labeling was the same.
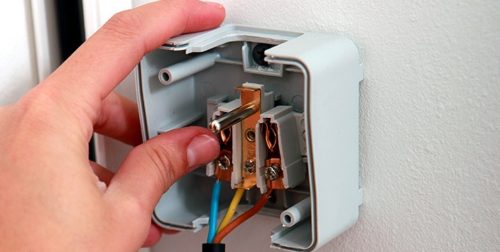
When laying a home electrical network, the installation boxes of sockets are simultaneously used as commutation. Each terminal is attached simultaneously and the entrance, and the discharge wire.
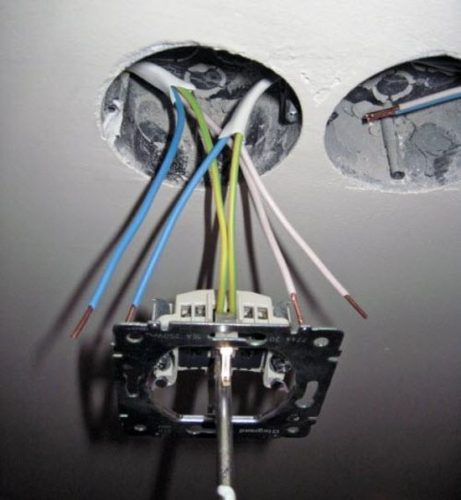
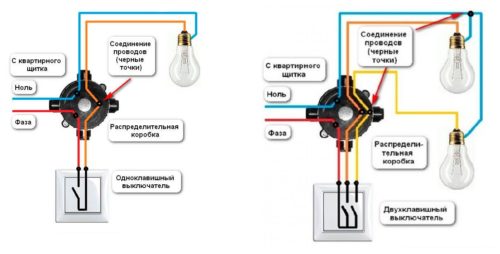
When mounting the switch, the phase wire is attached to the mobility terminal, and zero to the terminal of the fixed contact. If the switch has several keys, it has all mobile contacts are displayed on one terminal (to which the phase wire is connected), and zero wires are connected to the stationery terminals. Zero wires are summarized to lamps (or groups of lamps) as phase, they are connected to the central contact of the electrical cartridge. The wires from the threaded contact, which is screwed down the base of the lamp, is connected to zero wire.
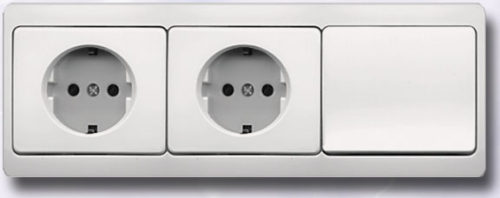
If you need to install in one place several sockets (or several sockets and switches) in one case, you can use special installation boxes with adapters that combine all devices into one block.
Wiring in the house. Switching wires
Electric wiring at home consists of a variety of elements. All these elements will ultimately need to be connected to a single network. Each connection (switching) must be reliable and secure. All connections should be carried out only in the junction box. The junction box should always have free access to it (not to be plastered or tightly sewn lining) and be located in the available places (without additional action to free access to it).
Basically, the switching of wires is used to twist them between them (twist).

This method requires, to ensure its reliability and safety, one of the following additional operations (clause 2.1.21 Pue):
- soldering;
- crimping;
- welding;
- or crimping.
Soldering
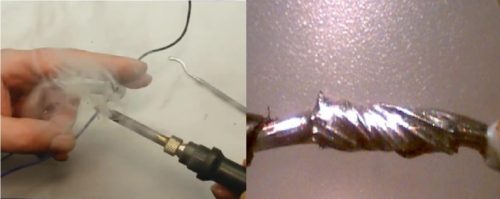
This is not the easiest technological execution method, but giving a very high reliability of the wire connection. To carry out soldering, it is necessary:
- Pick the desired solder (depending on the material of the wire).
- For flux (substances intended for removing oxides from the surface of the wires and improve the spreading of solder), the rosin is suitable.
- Prepare a soldering iron (turn it on and warm it up).
- Stripped from the isolation of the wire to polish sandpaper.
- To twist the switched wires (50-70 mm long) using the passage. Twist the wires are needed tight, but not much so as not to deform them before breakdown.
- Heat the wiring seat with a soldering iron (or a gas burner if the axles are thick).
- Apply a flux on the wires throughout the twist.
- Fully cove your wire twist with a hot solder.
- Give coolet on wires and check the reliability and completeness of soldering .
- The connection is to be securely isolate with a tape or other way.
Pressing
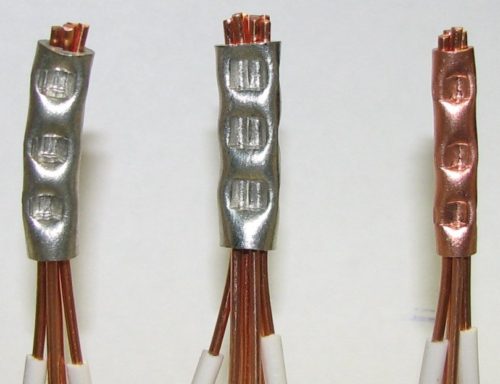
For crimping, you will need a tool with which you can reliably compress the location of the wire connections and a special lug sleeve. The liner lug (or Gao - aluminum sleeve for crimping) is an aluminum tube with or without lubricant. As a crimping tool, you can use manual press clamps, passats, mechanical or hydraulic press. Next, the following steps:
- From the ends of the wires, insulation is completely removed from the edge (depending on the length of the prepared Gao).
- Metal wires to shine is cleaned with sandpaper.
- The wires are tight, but neatly twisted with each other.
- It is selected suitable in the diameter of the secting of the Gao twist (better with lubrication, otherwise you will have to apply a quartz-vaseline paste on your own).
- The sleeve is put on the twist of the wires.
- Gao is completely crimped with a prepared tool.
- The quality of the compression is checked for the complete absence of the possibility of movement lived wires in the sleeve.
- The connection is securely isolated with a tape or other way. .
Welding
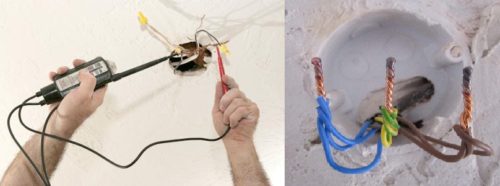
Welding is the fusion of metal metal into one core under the influence of an electric arc. The method is very effective, but requires a special welding machine and is more suitable for professionals than for independent execution.
Crimp

Crimping The most affordable method of strengthening and isolation of switching, and no less effective than previous ones.
Clamp crimping is performed using terminal blocks, CES caps (connecting insulating clamps), or WAGO clamps.
Terminal blocks allow switching copper and aluminum wires, as they do not have direct contact. These products exist under various sections of the wires and easy to use. Switching in such pads is possible in two ways:
- Each wire under its screw.
- Each wire through the entire terminal under both screws.
Caps Sizes With a strengthen, screw on the twist of the wires. Under the influence of efforts, the conical spring of metal inside the cap is moved and reliably compresses the veins of the wires of the wires. To prevent oxidation when switching aluminum wires, a paste is added to prevent oxidation.
Wago clamps tighten the wire by spring force. They do not have screws also allow the connection of copper and aluminum wires, the wires are under a different stiffness and stranded. WAGO clamps vary in the number of applications (disposable and reusable) and lived on the number of simultaneously switched (up to 8). Use of such clips is very simple, it is necessary to:
- if one-time clip, simply insert the wire into the slot until it locks;
- if reusable clamp, insert a wire into the socket and then snap lock.
Protecting the electrical cables inside walls
Wiring inside the walls, when there is insufficient protection against operational risks can cause a short circuit or even a fire. If the wiring is old, it is better to replace, but the new wiring necessary to carry out already in compliance with all measures to ensure the protection of electric cables.
Currently, there is ample choice of means providing protection for the wiring inside the walls. For these purposes, use the following products:
- Metal tubes.
- Plastic pipes.
- Corrugated plastic pipe.
- Metal bronerukav.
Metal and plastic tubes
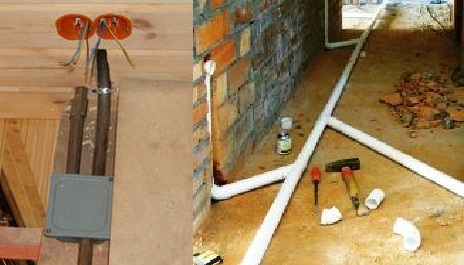
To protect allowed to use steel and plastic pipes. A metal tube (if it is not special) previously necessary to prepare, for which:
- necessary to cut the workpiece;
- if appropriate bend tube trubozagibochnym device from the calculation: - More diameters 6 - when laying flush; - more than 10 diameters - the laying of the concrete;
- remove burrs at the ends of the tube.
Wiring in the steel and plastic tubes are well protected from mechanical damage and adverse environmental conditions. If only supposed protection from mechanical influences, the line runs not sealed. To protect against adverse external effects of the environment and the pipeline is still sealed. For sealing gaskets are applied in the joints between the tubes themselves and the inputs and outputs of the junction boxes and electrical load.
When mounting wiring in pipes of metal and plastic must consider the possibility (if necessary) extraction wires for replacement or maintenance. For this, if there are two or more pipe bends, the distance between the boxes should be selected not more than 5 m, and the straight portions perform no longer than 10 m.
Minimum sectional lived copper wires laid in plastic and steel tubes constitute - 1.0 mm² and aluminum - 2.0 mm².
Corrugated plastic pipes
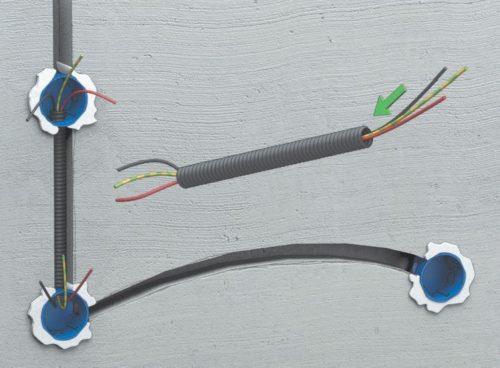
The corrugated plastic tube of plastic ("corrugation") with self-refining, not supporting combustion material has a certification according to the existing Fire Safety Rules of the NPB 246-97. Such a product provides sufficient protection of electrical wiring from mechanical effects and reliably protects from the fires of fire hazardous elements of the material and wall decorations located near the wire.
This type of protection is easily mounted and is not very expensive. "Gofra" can be laid both inside concrete and stone walls, and inside frame made of wood.
Metal Bron Enterprise
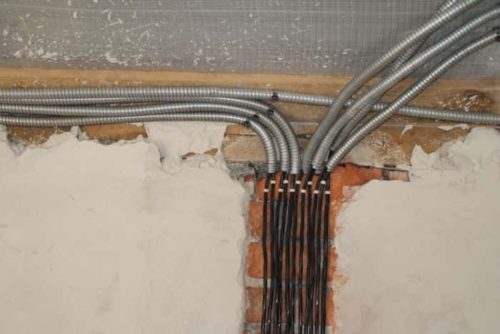
This method of protecting the electrocable is suitable where there can be significant mechanical and thermal effects on the electrical wiring.
Metal bronper is a flexible corrugated hose with a plastic tube inside.
The electrical wiring in such a product can be performed both leakage and hermetic with the help of seals.


