
Adirondak: Leisure Chair in the country Interior items
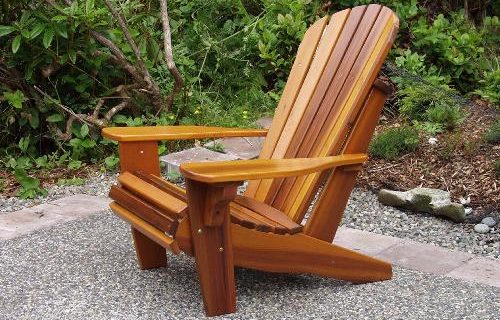
Adirondak (as his first creator called) - a comfortable wooden chair for relaxing in nature. Such an armchair does not find it difficult to make it easily if there are all the necessary tools and materials in the house. How to do this, you will learn from this article.
Content
Required tools and materials to make adirondak
Most tools from the following set will be found in the farm, the rest can be rented:
- disk hand saw;
- lobzik electric;
- milling cutter;
- electric planer;
- clamps (2 pcs);
- roulette;
- electric drill with a set of drills;
- carbonity coal;
- metal line 1m.
List of materials:
- planed boards (thickness 20-25 mm, width 150 mm) - 15 m;
- self-tapping screw 4.5 × 40 mm - about 100 pcs;
- bolts 10 × 60 mm;
- nuts with washers.
Ariardak chair do it yourself: drawings
Difficult details are absent in this product. Processing the board and gather them according to the scheme, we will make a tree chair with your own hands. All edges are recommended to round up with an electroll · on the tool sole for this there is a special groove.
Wooden chair design is shown in the diagram.
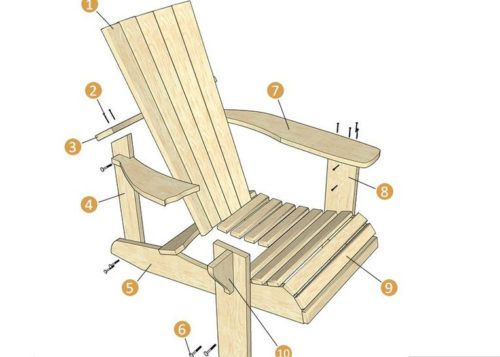
Designations:
- 1 - Planck backrest armchairs;
- 2 - Self-tapping screws;
- 3 - upper transverse plank;
- 4 - rear leg;
- 5 - side support;
- 6 - screws;
- 7 - armrest;
- 8 - front leg;
- 9 - seat strips;
- 10 - Support for armrest.
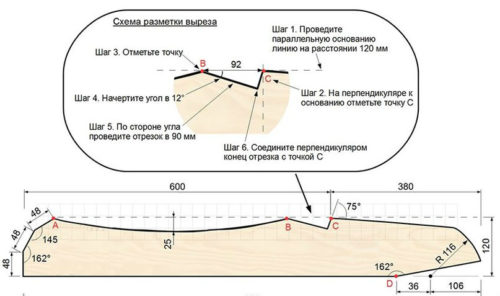
It is recommended to make a side support template on 1: 1 on paper. It will look like this.
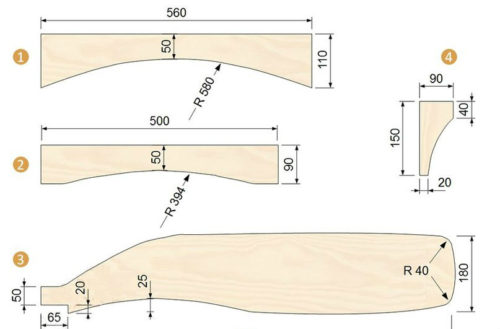
The drawings of other details will also be necessary:
- 1 - the upper heading of the chair;
- 2 - lower transverse backrest;
- 3 - armrest;
- 4 - focus for armrest.
In the following drawings:
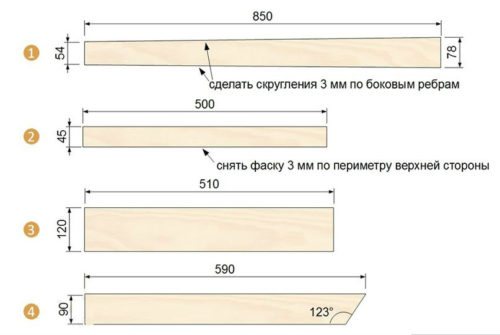
- 1 - Planck of the backrest of the chair (they need to be made 7 pcs);
- 2 - Planck Seats (their number - 8 pcs);
- 3 - front legs;
- 4 - rear legs.
Production of details and assembly of adirondak chair
After the drawings are ready, you must do the following.
- Drawings of parts are projected on the workpiece. In this case, the accuracy of the accuracy when applying rounded items is not required.
- Paired parts are obtained by a mirror method, for which the same patterns use.
- Details are cut off by an electroll bison.
- The ends and the edges of the details are grinding.
- All items are covered several times with an antiseptic and decorative varnish.
- The chair is going: the parts are connected according to the diagram with the help of self-tapping screws and screws. Hats of hardware are deepened in wood and close with decorative plugs selected in tone. At first, the right and left sides of the structure are collected, after which they begin the back and straps of the seating.

Appendix Armchairs Stand Foot
Ariardak Rocking Chair do it yourself
The rocking chair is made independently even easier: it consists of two large-sized parts with a rounded lower surface, several connecting crossbars and seats planks.
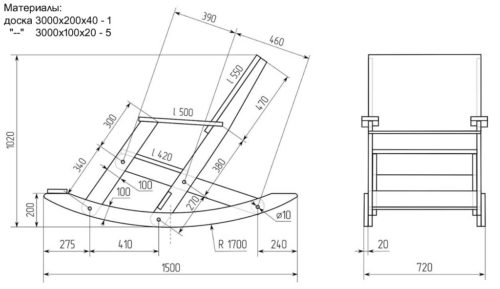
Rocking chair do it yourself: drawings
After everything you need will be at hand, proceed to business.
- Ready drawing to be transferred on the board. Using pine pine boards with a thickness of 40 mm (for the manufacture of sidewalls) and 20 mm - for crossbar and seats planks.
- Drink from the blank boils.
- We process the workpiece: remove the chamfer using the electrolack, spinning the surface.
- Cover parts by antiseptic and varnish, dry.
- Collect the chair.
Tip: In order to draw semicircular details, you can use a metal ruler: bent it between two nails driven into the board, we get the necessary patterns.
If you can sew a cover on the chair with your hands from a dense tapestry with liners from the foam rubber - it will get comfortable furniture for recreation.
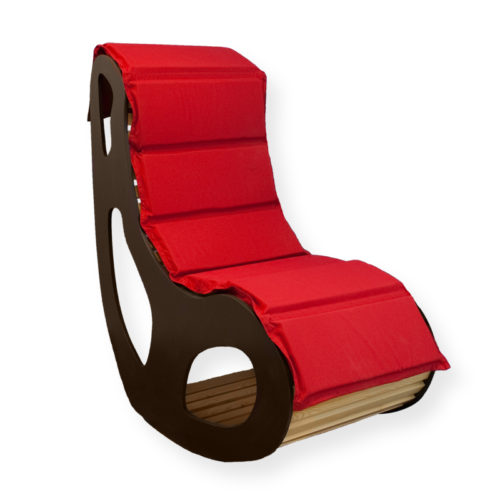
Suspended chair do it yourself
A comfortable armchair can be made of two wrap, braided with a cord. Hoops use gymnastic or made independently - from a plastic pipe for water supply.
On the drawing of the suspended chair indicates the place of attachment of the sling.
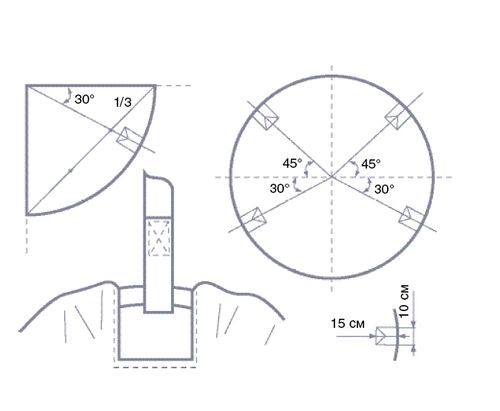
To make such a chair with your own hands (see below), the following materials are needed:
- two hoops with a diameter of 1100 and 700 mm (the size is approximate, deviations are allowed);
- polyamide or Capron cord with a thickness of at least 4 mm in an amount of about 1000 m;
- sylrops for the suspension device - about 12 m.
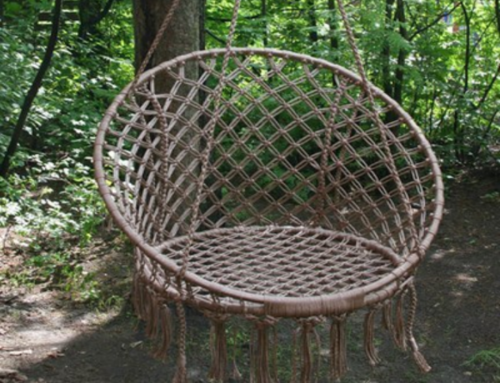
How to make a chair do it yourself: a phased description.
- We like the cord of both hoops so that the braid is distributed in the circles evenly.
- Weave the grid, fixing it on the braid. In places intersection of cords, knit nodes, leaving the decorative fringe on the bottom side.
- We combine braided hoops at the beginning at one point, pulling them to each other. On the other hand, hitting a pair of ropes woven from the same cord. The purpose of the rope is to hold the hoop at a distance of about 0.6 m from each other. As a result, it should be a comfortable seat.
- Breeping in four places of the slings and hang the chair to a reliable design.
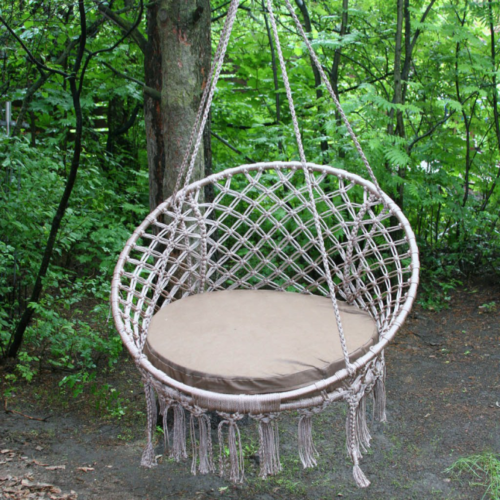
Tip: In order to rest in the hanging chair it is more convenient, you need to put a round cushion from the foam rubber.
Armchair bag do it yourself
Frameless furniture can be any shape and sizes. The simplest for self-making option is a pear. For its manufacture, materials will be required:
- synthetic fabric (for the inner shell);
- tapestry or other dense fabric, leatherette - for an external cover;
- millimeter paper - for global;
- two zippers - 40 and more than 100 cm;
- rivets with holes in the middle - for the ventilation device;
- filler - balls of dense foam in the amount of 500 liters.
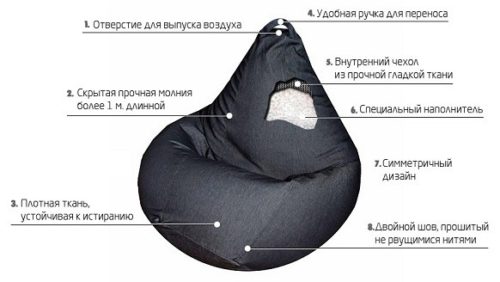
The algorithm for the manufacture of a chair provides for the following procedure.
- We make the pattern (as shown in the diagram).
- We carry the pattern on the synthetic tissue, cut the parts and stitch them with a durable thread. For filling filler, one of the seams of the back side of the chair we sew a short zipper.
- Fill in the inner shell of the foam crumb. Waste zipper.
- By the same pattern, we make parts of the tapestry (or other material). We sew them together. Lightning with a length of about 100 cm should also be sewn from the back (rear of the back).
- At the top of installing rivets with holes and securely sew the handle for carrying the chair. I make a handle from the same tapestry, folding the fabric several times so that it turned out a narrow strip.
- We refuel the inner shell with filler into an external case and zipper. You can use lacing.
Important: Seam both shells should be reliable double inner seam. You can not allow breaks: Repair may be troublesome.
In conclusion - video tutorial with a demonstration of some nuances of the process of making a chair.


