Dolets under professional flooring with your own hands Construction
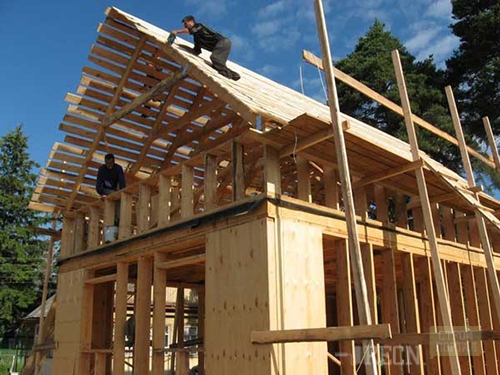
The construction of the roof refers to the last global construction operation. The quality of it, especially the laying of the professional flooring, largely depends on the quality of the execution of the crate.
Content
The popularity of professional flooring has determined its properties. Immunity to the effects of atmospheric phenomena in the form of rain, snow, hail, to the action of direct sunlight, resistance to corrosion. Essential advantage is its weight, which depends on the thickness of the sheet used, the weight of one square meter is from 5.5 to 9.5 kg. In addition, simplicity of its installation, low price. All this makes the material stably popular among homeowners and installers. A person who has minimal building knowledge and skills is capable of laying a professional flooring.
Application of profiled sheet
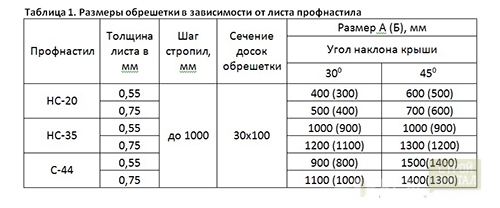
Profile can be used both on ordinary and on broken roofs. The arrangement of the roof requires calculations. In our climatic zone, calculations on snow, wind load are relevant. If the calculations were not conducted or done correctly, it is not a fact that the roof will be at least one season. The calculation of the crates under the professional flooring is part of all settlements carried out in the preparation of work on the arrangement of the roof. Based on the calculations, the material is selected, which will be applied to the roof improvement. Deciding with its type, choose the material for the crate under the professional flooring. The overall dimensions of the board are entirely dependent on the professional flooring applied, see Table 1.
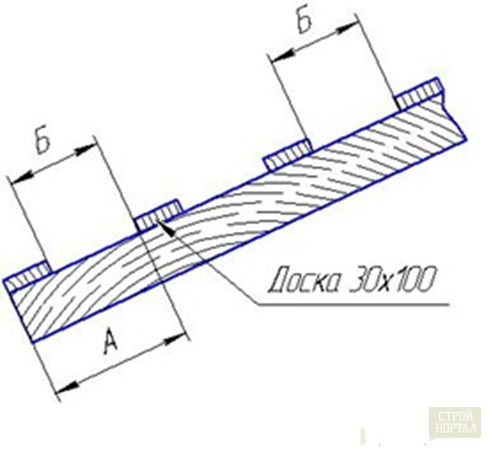
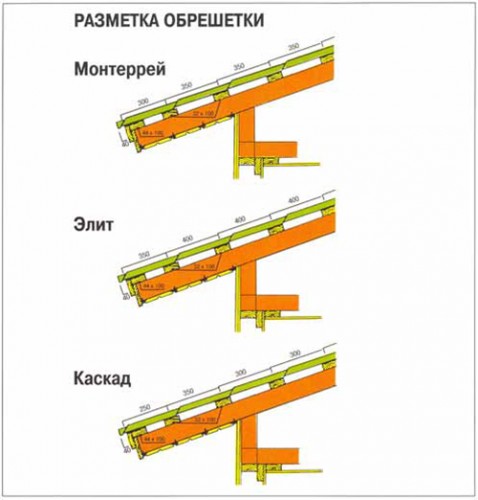
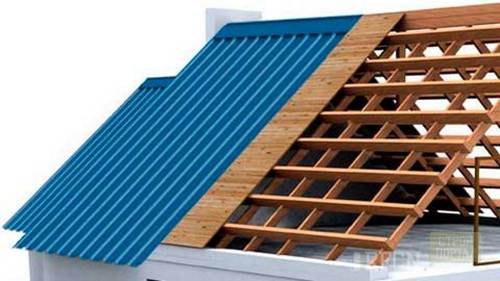
The size of the cross-section of the cerebral boards determines the ability of the professional flooring to withstand the loads rendered by external factors (snow, wind, etc.). Recommended average size of boards, the shaft step under the corrugated floor is shown in Table 1, laying scheme in Figure 1.
Scope roofs are recommended to coat sheet with a corrugation height of at least 20 mm, to the number of recommended NS-20, NS-35, C-44. The profiles of grades H-60 \u200b\u200band H-75 are most often applied on the roofs of industrial premises. For roofs of this type, all the settings of the lattice are specified in the project on the building.
When the roof is erected, it is allowed to use the unedged board (which is more often done), but the distance would be preferably to withstand. The thickness of the crate under the professional flooring is desirable not less than 30 mm, this size is optimal at a rapid step to 1000 mm, in case it is greater, then accordingly changes upwards and the size of the board cross section.
Installation of crates for professional flooring
Like any work, the installation of crates under the professional flooring requires preliminary training. Pick up material, fasteners, tools, stairs, etc.
The process of arranging the roof, in addition to the crate, includes a device for thermal and hydraulic isolation. We will not concern these questions.
Boards used to create a crate must be dried. Otherwise, they will be deformed after the end of the installation, which can lead to a disruption of sealing. Each board should be treated with compositions that prevent the appearance of bacteria and various wood insects. In mandatory, swipe flame retardant processing. Such a precaution will allow you to avoid fire or at least slow down its fire. After the board was treated with refractory composition, it can only burn if there is an open flame and goes out when it is absent.
For directly laying, you will need:
- Hammer.
- Nails with a length of 100 - 150 mm.
- Ladder.
- Assistant.
- Wooden hacksaw.
- Roulette.
The execution of work on the installation of the crate is preferably carried out in dry weather. Before starting work, it makes sense to raise the harvested boards and the entire necessary tool.
The device of crates under the corrugated floor begins from the ridge of the roof
- Step 1: Marking of the position of the boards on extreme rafters, the departure of the board for the edge of the rafter is determined by the roof project.
- Step 2: On the entire length of the skate, we place the place of attachment of the boards to the rapid vehicle, if surface defects are detected, they must be eliminated by the screwdrivers.
- Step 3: Staying the first board begins from the skate, according to the applied markup.
- Step 4: In accordance with the marking applied earlier, begin to navigate the board.
As already noted above, the attachment of the boards to the bruis is carried out by nails 100 or 150 mm.
What should pay attention to?
Since the length of the boards may be less than a skate, they have to splicer. The junction between the rafting boards was located on the rapid timber, it is undesirable that these seams did not go in a row, and were located at least in neighboring bars.
In order to avoid the split of the bar, when driving nails, they need to be shifted relative to each other.
After the work, the lamp should be a smooth surface. The presence of convexities or depression as a result adversely affects the quality of the fastening of the professional flooring.


