Suspended ceilings Armstrong: Features, Photo, Installation Ceilings

Alternative to stretch ceilings and drywall structures are the suspended ceilings Armstrong. They use well-deserved popularity due to their characteristics. Armstrong ceilings will be installed easier after exploring the following information.
Content
- Pros and cons ceiling systems Armstrong
- Ceilings Armstrong: System Calculation
- Varieties of ceilings Armstrong
- Parameters of the main elements of the ceiling systems Armstrong
- What materials and tools are necessary for installation
- Step-by-step instructions for installing the ceiling Armstrong
- Features of mounting knot
Pros and cons ceiling systems Armstrong
An important advantage that the ceilings Armstrong possess - the price of the system and the cost of installation work are acceptable. In addition, the ceilings of this type have the following advantages:
- easily mounted: do not require the use of special skills and tools;
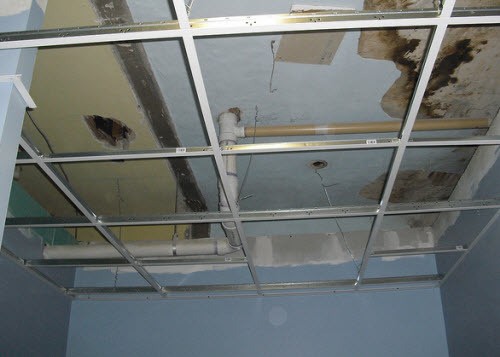
- allow you to hide various engineering communications;
- provide access to communications for maintenance and repair;
- aesthetically attractive, thanks to a large variety of tiles;
- possess good heat and sound insulation properties;
- high performance: the damaged panel is easy to replace the new one.
In the photo: Armstrong suspended ceilings can hide various engineering communications.
Armstrong refers to the disadvantages of the ceilings:
- "Office" of the system: It is mainly used for the device ceilings in public and production buildings;
- reduce the height of the ceilings;
- tiles have low strength, fear of dampness;
- cannot be used to create curvilinear structures.
Ceilings Armstrong: System Calculation
The purpose of the calculation is the choice of the optimal configuration of the design and determining the number of necessary materials. This is performed in accordance with the following rules.
- At first, the perimeter is calculated. For this, the lengths of all walls are measured, and the amount is rounded to the value, multiple to three (largely). It should be borne in mind that the wall profile in the corners can be bend, having cut off one side. Plates cut no more than half of their widths (that is, at least up to 300 mm). Otherwise, cells are formed that require excessive consumption of materials.
- It is allowed to gradually reduce the width of the plates along the walls. This does not spoil the appearance of the Armstrong ceiling and does not affect the increase in costs, since all materials used are relatively cheap.
- A row with cropped plates are placed along the opposite of the wall inlet.
- In order to obtain the correct layout of the plates, it is necessary to add the width of the trim to the width of the whole plate, then split the resulting result. Tiles of this width are located along the opposite walls. It does not increase the number of frame cells.
- Bearing profiles are attached to short walls. This makes the design stronger and cheapens the installation.
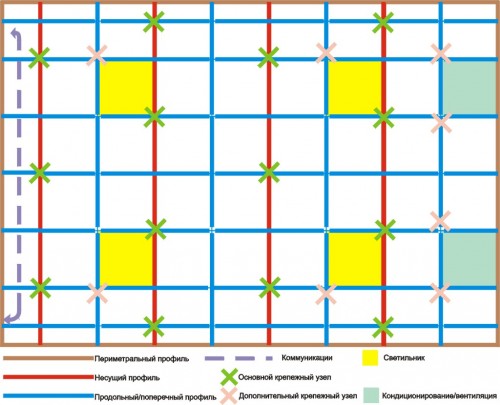
Fastening the Ceiling Armstrong Profile Scheme
During the calculation, they are focused on the norms of consumption of basic materials, which for the premises of the rectangular shape (square or with the aspect ratio of ¾) are as follows:
- bar profile - 3700 mm by 0.8 m² ceiling;
- transverse profile - 600 mm by 0.8 m²;
- profile longitudinal - 1200 mm per 1.6 m²;
- profile of perimetral - 300 mm by 0.5 m²;
- suspension - 0.6 pcs. per 1 m².
For rooms with a different aspect ratio of the flow rate increase by about 10%. All calculated values \u200b\u200bmust be rounded up to values \u200b\u200bequal to standard profile lengths. The fastening of the perimeter profile is performed in increments of 0.3 - 0.6 m (depending on the material of the walls and the load of the ceiling). From here, the number of dowel-nails is calculated. Armstrong ceilings whose dimensions exceed 100 m² are calculated using a special program.
Varieties of ceilings Armstrong
The carrier function performs the design of metal profiles and suspensions. Decorative elements are presented in the form of panels and plates made from various materials. With their help, the Armstrong ceilings are collected, the photos of which are presented in this article. Most often used:
- mineral fiber;
- plastic;
- mirror;
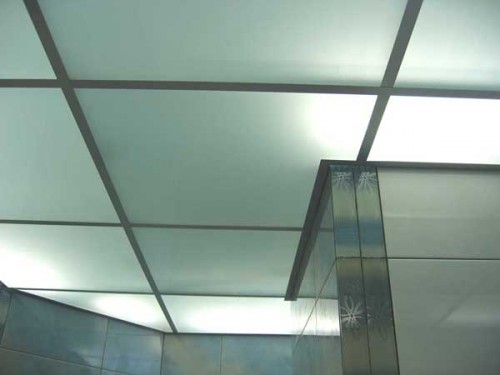
- glass;
- aluminum sheets.
There is the following classification of plates for ceilings Armstrong.
- Economy class: used in office, industrial, commercial premises, in sports complexes, etc. These include Tiles of the Oasis series, Oasis Plus, Tatra, Bajkal, Cortega. They are characterized by high practicality, durability and good sound insulation.
- Prima ceilings: These include the Tiles of the Duna Plus series, Cirrus, Plan, Casa, Fine Fissured and Adria. Elements of ceiling systems of such a class are characterized by greater (compared to economy plates) moisture resistance and mechanical strength. Their surface is characterized by the presence of decorative textures.
- Moisture-resistant ceilings are constructed using the MYLAR and NewTone Residence tiles. They can be separated surfaces in pools, laundries, terraces, in saunas, etc.
- Acoustic ceilings are needed to decorate visual halls, schools, music institutions, restaurants, hotels and hospitals. NEEVA and FREQUENCE series tiles are used.
- Hygienic ceilings are needed for catering and pharmaceuticals and healthcare. They are represented by the Bioguard series products.
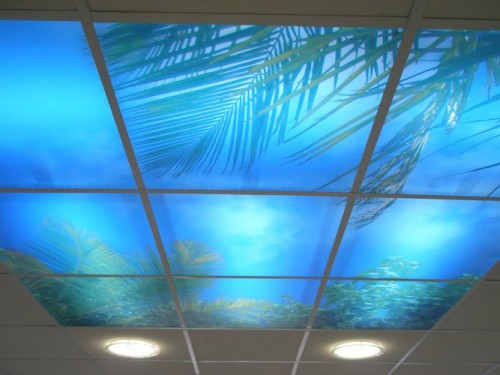
- Designer ceilings are designed to create original interiors in various destinations (bars, offices, shopping chairs, discos, hotels). Plates of such systems may differ from each other with thickness, texture and installation technology. Such includes Cirrus Image Series, Cirrus Doric, Graphis (Diagonal, Cuadros, Linear), Visual V49, Cellio.
The names of the series may differ slightly, which depends on the specific manufacturer.
Parameters of the main elements of the ceiling systems Armstrong
- Profiles - made of steel or aluminum, can be painted or plastic coated. Profiles with golden spraying or "under silver" are manufactured. The form of perimetral (wall) - M-shaped, bearing and transverse - T-shaped. The width of the shelf depends on the model (there is 15 or 24 mm). All profiles have special mustache and spring locks to connect with each other, as well as hanging holes.
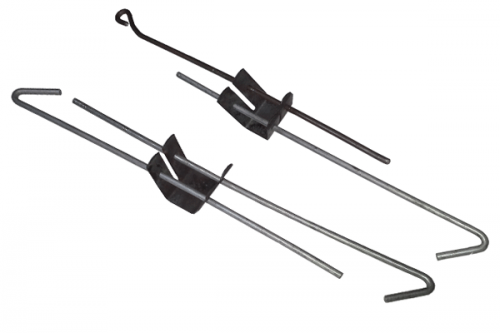
- Suspension is a design of two pulls with an eye connected by the plate ("Butterfly") with elastic elements. Shifting thrust in the plate, adjust the length of the suspension. The thrust is made of metallic rods with a diameter of 6 mm.
- The mounting unit is a dowel-nail or self-tapping screw with a plastic filler. For an enhanced suspension device (when installing split systems, lamps, ventilation equipment), metal collet is used.
- Plates are soft (manufactured from organic or mineral raw materials) with perforation or rigid - from glass and metal. For fastening hard slabs, more rigid profiles and suspensions are needed.
Important: Plates must correspond to the type of suspended system (respectively, T-24 or T-25). There are plates on the type of edge: with smooth edges (SQ and Board) and with a wide step (SLT and Tegular) - for the suspension system with a width of the edge of 24 mm; With a narrow step (FL and Microlok) - for profiles with an edge of 15 mm. It should be considered when choosing plates: Mineral wool based on mineral wool can be harmful to health. Organic - on the contrary, harmless.
What materials and tools are necessary for installation
Before proceeding with work, you need to prepare the following tools and devices:
- perforator;
- screwdriver with a set of nozzles;
- passatia;
- hammer;
- level (Waterpas);
- pencil.
This will require materials from the following list:
- angular profile;
- carrier rails Lencies 1.2 and 0.6 m;
- suspension with a clamping spring (twisted);
- dowel-nails;
- ceiling panels 600 × 600 mm.
Important: Before starting to work, a detailed assembly circuit is drawn up, in which the characteristics and size of a particular room are taken into account. This is necessary in order to purchase the desired number of all materials and choose the optimal layout of all items.
Step-by-step instructions for installing the ceiling Armstrong
After purchasing the necessary tools and materials, with the use of which the Armstrong ceilings are installed, the installation begin with the perimeter markup. At a certain distance from the ceiling (at least 100 mm), a horizontal line is carried out with a marker or color cord. This requirement is associated with the need to install lamps. Recommended for marking apply a dispenser or laser level. Next, the installation process is as follows.
- By the marked line, the perimeter profile is secured. For a wooden wall, we use a screw of 35 mm long, for brick and concrete - dowel-nails. The step of the fastener should not exceed 0.4 m.
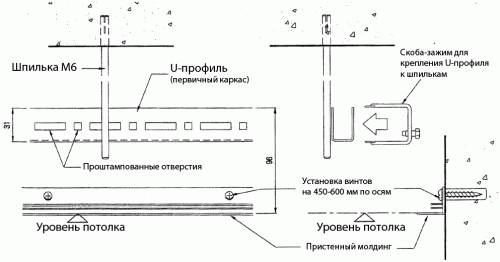
- In the event that the walls are trimmed with plasterboard, it is necessary to provide for the installation of a horizontal metal profile at the desired height. Without it, the perimeter profile can be enshrined by an anchors like "Butterfly".
- The next step is to install carriers. The standard length is 3.7 m. If necessary, they are lengthened by attaching to each other using locks. The installation of the rails is made in parallel with the wall at the exact distance of 1200 mm from each other. During the diagonal layout, the mounting of the carriers at an angle to the wall is allowed.
- Simultaneously with the installation of the rails, suspensions are installed. They are necessary for fastening carrier ceiling raques. The closest point to the wall is located at a distance of 600 mm, the step between the suspensions is 1200 mm. Fasten the suspensions to the ceiling by self-draws and dowel-nails.
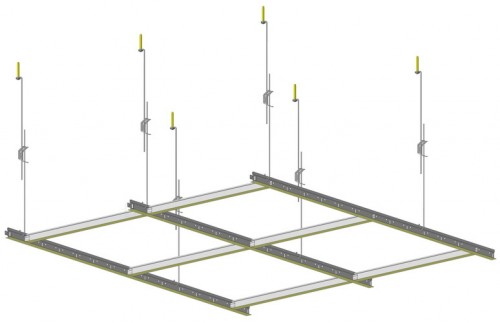
- Perpendicular to the carrier, with a step of 0.6 m, the profile of a transverse 1.2 m is fastened. In this case, the wall retreats to a distance of 0.6 m.
- Parallel carrier fasten the longitudinal rails (their length is 0.6 m). The distance between the elements is strictly observed - 1.2 m. This requirement is dictated by the size of the panels that should be well to bed in the cell.
- Luminaires are installed immediately at the end of the frame mounting.
- Plates are laid in the cells. If it is necessary, the trimming is performed by an electroll bike or a hacksaw for metal.
IMPORTANT: Tile color is performed until their laying in cells. This is necessary in order not to affect profiles.
Features of mounting knot
The rules of the Armstrong suspension system device provide suspension of carrier profiles. This is performed in compliance with the following conditions.
- Bearing profiles are fixed to the base of the ceiling in 1.2 m.
- The maximum distance from the wall to the nearest suspensions should not exceed 0.45 m. If this condition fails, the suspension nodes are placed in a checker order.
- In places of fastening equipment (lamps, elements of ventilation systems) it is necessary to provide for the installation of additional suspensions (diagonally from the main nearest).
- Heavy equipment is fixed (air conditioners) closer to the wall over all four corners.
- It should be borne in mind that the hook of the suspension can be a hindrance when installing additional equipment. In this case, the suspension is shifted to the desired distance.
- In compliance with the accuracy with the markup of the installation locations of the needless, there is no need: with a deviation to the side, they change the height than the deviation is compensated.
In order to better understand how Armstrong Ceilings are going - video to your attention.


