How to change the rosette yourself Useful advice

As they say, nothing is forever and even the highest quality things fail. Everything will once break, wear out, fails, from fashion or simply loses its relevance. Outlets and power grids are also no exception. Many residential buildings built during the time of the USSR have worn wiring and discharged sockets. Often there is a temptation to correct the state of affairs during repair, so that both the quality and the appearance matched the modern style, and simply because the outlets often fail without having survived a short circuit.
Content
The location of the rosette on the wall also underwent changes. If earlier they have been standard at an altitude of about 1 m above the floor, now it is fashionable to place them at 40 cm from the floor level.
When a question arises how to change the outlet, then several options for solving the problem appear in my head. Of course, without having the necessary experience, there is only 1 way to correct the situation - call an electrician or a all-knowing neighbor. But since this nuisance is a matter of life, that is, it makes sense to delve into the basics of the principles of electricity and understand the task itself.
Types of sockets and their characteristics
Since you have decided to replace sockets, it is worth studying their varieties in more detail. You may want to choose outlets with additional features, but for this you need to know about their existence.
Socket with grounding
Grounding is a big advantage for connecting and operating electrical appliances, because this is an additional safety factor. But in order to buy sockets with ground, you need to be sure that there is a grounded wire in your electrical network. Otherwise, there is simply no need to spend money on sockets with such a property.
For powerful electrical appliances, grounding is extremely important. After all, a small household device without a grounding can slightly pour into the current, and as a result of electricity from a powerful device, you can suffer more seriously, and even lose your life.
Overhead or built-in socket
It is more difficult to install the built-in socket, but it practically does not take place. It is all the usual types of sockets that are mounted in the wall and have conversion. They are used both for external wiring and internal.
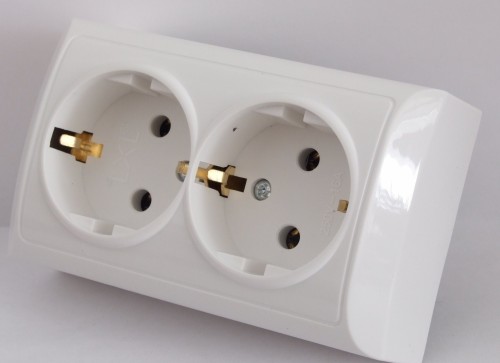
The overhead socket is easy to install, because you do not have to make a big hole in the wall for the opposite. To install such a socket, you need to drill 2 holes in the wall, for which the socket will be mounted using a dowel. Such sockets are not very common due to their strongly protruding design.
Double and triple sockets
In order to simultaneously work several household appliances, which has long been unusual for a long time, double or triple outlets are installed. Their connection and the cost of slightly differ from single sockets, and conveniently becomes all family members.
Additional functions
- The socket may have additional protection that will protect children from its use is not intended.
- Socket can have a lid. It happens in demand when the socket is installed in places of accumulation of a large amount of moisture: in the bathroom, shower, sauna, bath.
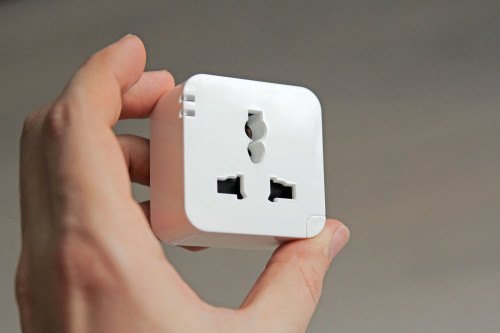
- Socket with timer. The socket is capable of disconnecting the operation of the electrical appliance according to the time that it is programmed.
- Socket with switch. You can turn off the working device, do not take it out the plug out of the outlet, but by clapping the switch. As a result, the socket and fork will serve much longer.
- Outlet with backlit. It is useful in the dark when a person is difficult to get a fork into a socket without additional lighting.
- Outlets can have different power, which is listed directly on the device itself. When installing, it is necessary to take into account this, since when connecting a powerful electrical appliance in the inappropriate, a circuit can occur and failure of the outlet.
- Sockets of weak power are designed mainly for telephone and Internet.
Dismantling of an old outlet
The main rule in front of any actions with power grids is to de-energize the apartment or at least the room in which you want to replace the switch. You probably know that it can be done in the general corridor of your floor, using the power switch on the shield. The main thing is not to confuse, and not to de-energous neighbors.
If you need to urgently change the old outlet in the dark, or when it is somewhat smumes, then immediately prepare alternative lighting in the form of a lantern.
Replacing the socket is impossible without the minimum necessary tool set. Can be useful: voltage pointer, hammer, pliers, nippers, screwdrivers.
How to quickly catch all the subtleties of the process and safely change the outlet, you can see on the video. Replacing the old outlet takes place in several stages:
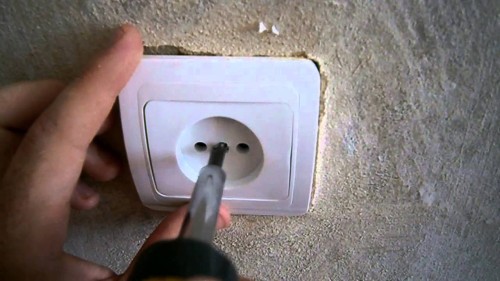
- Remove the old panel. To do this, you need to pull the central bolt with a suitable screwdriver.
- Check the lack of voltage in the network using the indicator. If there is electricity in the network, the voltage pointer light lights up when it is turned to a phase wire.
- If the tool is working, and the light bulb does not light up when contact with both wires of the outlet, then you can easily begin work.
- Weaken 2 screws of the spacer plates, the fastening screws also remove.
- Gently use the rosette from the pickle and get to the feed wires that need to be disconnected by twisting the clamping screws.
- There may be surprises here. The number of wires may differ. In old houses you can see only 2 wires - phase and zero, in modern buildings 3 or 4 wires. The third wire is the ground wire, and the presence of the fourth says that another outlet is connected in this or adjacent room, driven using an additional wire.
- In old buildings you can meet the situation when there is no pickup, and the socket was simply mounted in the wall. Such nuances are no longer allowed, and if such happiness fell, it is better to correct the situation by setting a new outlet already with the opposite.
- Thus, we have disassembling the old outlet and have a hole in the wall with wires sticking out of it.
- Sometimes people want to know how to change the rosette to a new one. This is a very complex and responsible step, which requires a clear understanding of all risk factors. Such a need arises quite rarely, and always better to turn off the electricity before performing work with power grids. But in some cases you have to work with a voltage in the network.
- There are a number of rules that need to be clearly followed when performing actions in an increased risk. Protecting from shock to current can gloves from a material that does not conduct electricity, as well as special insulated tools.
- Use only those screwdrivers, work with which is provided in such cases, and never touch the wires and other elements of the rosette with your hands.
Installing a new outlet
- Installation of a new outlet begins with the installation of a new opposition. Convenient when its size is exactly suitable for a hole in the wall, but if it is not so, then it can be cut to the size we need or vice versa, gently increase the size of the opening.
- After fitting the opposition to the wall, it is necessary to secure it with the help of cement or gypsum solution. It is possible to prepare it by mixing dry material with water, bringing the consistency of the mixture to such a state so that it can be fixed in the wall in a non-frozen form.
- With the help of a spatula with a solution, the hole is filled in the wall, and the mixture is evenly distributed across the edges of the opening. In the submersion, the window is taken to make wires. Then a little solution is also superimposed onto its end. Wires stretch through the bottom of the bottom of the submerged and fix the part in the wall.
- Correct with a mixture of damage in the wall and fill it all available slots.
- After that, safely wait for the moment when the solution completely dries and hardens, and continue the process of installing the outlet.
- With the help of bodies, we get rid of insulation on the wires and shorten the excessive length of the veins. If confuses the excess length of the wire, it is better not to shorten it, but put in the built-in part of the outlet. It is possible to extend the wiring with additional parts of the new wire.
- Go to connecting a new outlet and fix it in the wall.
- Having twisted the bolt, remove the panel from the switch. We place the wires in the contacts of the socket and fix them using the bolt fixing the bolt.
- Typically, different wires differ in color. In this case, the phase wire has a white, red or brown color, zero wire - blue or black color and ground wire painted in yellow or green color gamut.
- In the absence of color differences on the wire with a phase, it is desirable to put a marker mark. Check the availability of current in it, it is necessary even before connecting to the new outlet using the voltage pointer. Phase wire is made to connect to the right contact.
- After that a new socket put in podrozetnik, correct its position on the wall and fasten with screws.
- The final step of installing a new outlet is to secure its lid by means of a central tightening screw.
- Check the efficiency of a new outlet by connecting any electronic device. Thereafter, resuming power supply by placing the switch on the board to the appropriate position.
- To the process of replacing a new outlet for the first time was more comfortable for you, and the above remarks on how to change the outlet itself, were widely understood, watch a video with detailed demonstration of all these actions.
How to change a single outlet on the double
- The process of replacing a single outlet in practice is quite a simple task. Let's try to complicate it and replace the single socket dual. it happens very often justified, as the number of electrical appliances in the apartments is growing exponentially. The majority of electrical devices have a so-called Euro plug that does not fit the old Soviet-style sockets.
- If necessary, pay attention to the video explains in detail how to change a single outlet in the apartment on the double.
- For a start will widen the hole in the wall for the new, wider box outlet, in other words, have to gouge the wall.
- If you find yourself in the wall 2 cables, each of which has 3 wires, then follow these steps:
- unwind the wire pair using pliers;
- do the 2 holes in the new Enclosures, place them in special pads and pull them through the cable wires;
- connect wire pairs together: phase conductors 2, 2 null wires and the grounded wire 2;
- each pair attach to their corresponding socket terminals, paying attention to the terminal designations: L - phase, N - zero, E - grounded.
- If there is 1 cable with 3 wires, then in the housing socket 1 punch a hole through which pass the wires. Attach the appropriate wires to the terminals of the socket.
- It remains only to fix and secure the socket in the wall.
- If you were able to independently carry out the replacement of a single outlet on the double, then you do not have a question, how to change a double socket on a similar new one in case of need or failure of the old.
How to change home triple outlet
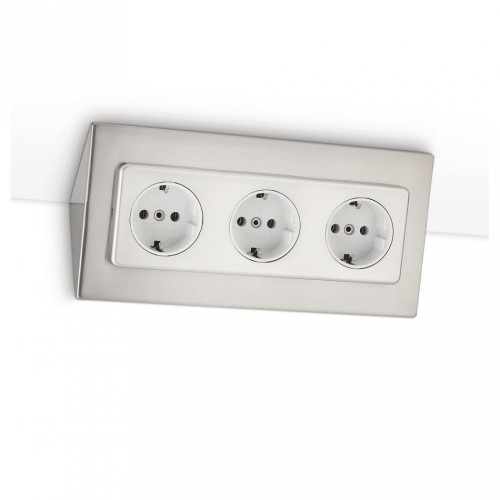
- Sometimes a triple outlet becomes an output from a situation with a large number of connected electrical devices. It can be mounted in 1 large hole in the wall, and may consist of 3 separate sockets located near and hidden under 1 lid.
- This method deserves more trust than the use of tees and twins, which can lead to short circuit.
- If you have a wall of plasterboard, then you should do 2 additional nests in it for individual outlets will not be much difficulty. But if you have to deal with concrete or brick, it is better to install a block of 3 outlets in 1 larger hole in the wall.
- Buying a triple outlet, worth paying attention to its quality. Well, when all contacts are made of brass, and the outer panel is made of special plastics, resistant to ignition.
- Connecting a triple outlet is similar to the double socket connection process. It can easily be installed on the site of an old single outlet. In the case of mounting a triple outlet in a new place, you will have to work more volume.
To figure out how to change the rosette in the apartment itself, you need to do a completely small job to find the necessary information and not be afraid to apply new knowledge in practice. Then your home will be the place where it is comfortable and to enjoy warm and comfortable.


