Drainage with your own hands: tips and recommendations Useful advice
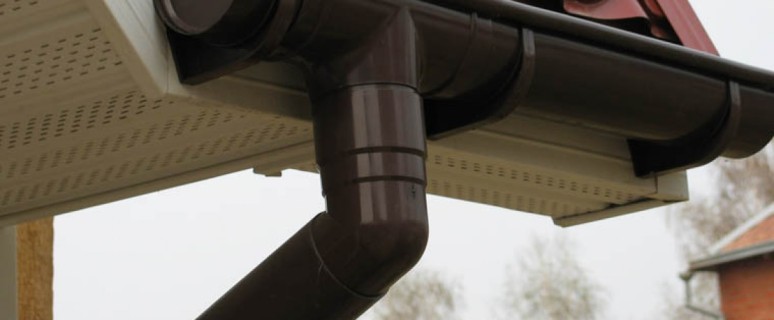
At first glance, the drain, it would seem, not such a necessary thing. But it is worth encountering dripping rainwater throughout the perimeter of the roof, you understand that you should not save, and it is better to make it comfortable for many years.
Content
Also, a big nuisance appears not only to flow the waterfall on the head, and the destruction of the tile or concrete break during strong rain rains. Therefore, if you purchased a house or decided to independently begin to build it, you need to take care of the drainage system.
Often, the drains are installed with their own hands, since there is nothing complicated in this process, but it is better to have an assistant to keep the design in the case. In this article we will tell you how to install a drain channel for the roof with your own hands, about the varieties of materials for the drain and about its views.
Why do you need drainage in the house?
- Passing by houses can be immediately determined where there is no drainage system, because the absence of drainage leads to the loss of the external attractiveness of the house due to wet walls, dampness and mold. Not only is it not aesthetic, it can also be discontinuously affected by the general state of the structure.
- If this problem does not pay due attention after some time the foundation begins to weaken, the basements in the period of shower are filled with water, and the house gives cracks. In addition, fungus and constantly wet walls have a harmful effect on people who live in such a structure.
- Subsequent endless financial costs are unlikely to fully help to correct the situation, so in order to solve so many problems in one felling, it is necessary to establish a good water output system from the very beginning.
Watering system: device
The drainage systems are used in all buildings for the removal of melting and storm rainwater, and they serve as a barrier during the snowfall. Consider more, from which elements the drainage is.
Main elements
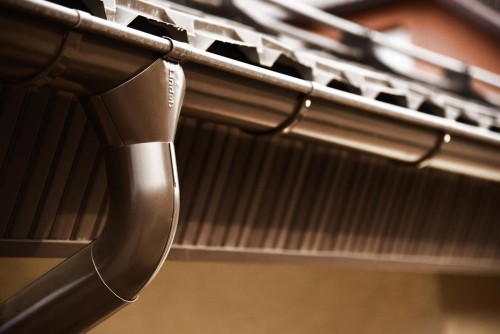
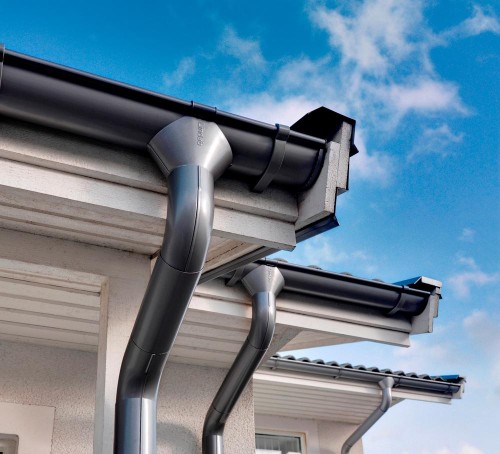
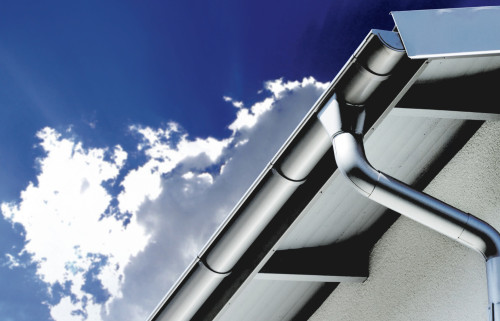
- Chute. They are a drain eaves under the roof of the structure that transport wastewater to the drain pipes. They have several forms: in the form of a trapezoid, semicircle, rectangle and seized.
- Pipes, the size of which is determined depending on the load of the rainwater on the linear meter of the roof.
- Connecting elements. With the help of brackets or special hooks, the gutters are attached to the walls, the pipes in turn are fixed with clamps, and the compounds between the two systems are fixed with the help of funnels.
Additional elements
Which of the architectural delights today will not meet, in connection with this, experts think over additional elements for drainage systems that help cope with moisture tap from the surface of any roof designs. These include:
- corner components of gutters that are designed to establish drain pipes to the wall of the building as close as possible, and they are used as the final elements of the drain;
- heads for gutters;
- knee for pipes so that it was possible to heat the facade of the building;
- tips to complete the entire design.
Thanks to such a drainage, there is a removal of rain and melt water directly into the sewer. Having established the correct diversion of moisture from the roof surface, you will protect your structure from destruction, save relatives from noise that creates dripping water, and prevent the occurrence of mold and dampness on the surface of the walls.
Drainage: Materials
Properly selected type, shape and size of the drainage system, in combination with a suitable material and color of the drain channel, will give your home completed look and ideally emphasize the transitions of the facade of the structure. All components for the drainage system should be chosen depending on the climatic conditions of your area and the monetary component. Consider the most popular types of materials for drainage systems.
- Galvanized steel is a strong material, however, with time it can start rust. For the manufacture of elements of galvanized drainage, a specialist will be required. Such material is the cheapest, so it can be found on public use buildings.
- Plastic drainage is a very popular material, it is very durable, light and durable. But there is one disadvantage in it - with sharp drops of temperature and with severe frost plastic can just crack. Therefore, the masters recommend installing such drainage channels in the southern regions where there are no strong cold.
- Metal with polymer coating is perhaps one of the best and durable materials. He is able to withstand and heat and cold. It has a wide color palette, so you can pick up the drain into tone to the color of the roof or the facade of the house. Its only minus is that it is not enough insulating material, so during the rain an increased knock of the drops will be heard.
- It is especially elegant with copper drainage, which can mostly be found in elite houses.
Water removal systems: varieties
- There are 2 types of drainage systems: outdoor and internal.
- The inner drainage is installed in the regions with a harsh climate and in rooms with flat roofs, for example, in a warehouse, in the garage, etc. This design is required to schedule in advance, before the construction of the roof itself. In addition, in this case, it is necessary to think about and plan the storm sewer.
- In all other options use the outer drain system. Make an outdoor drainage with your own hands, having a little experience in construction, will not submit any difficulty.
How to install the drainage system with your own hands
- In front of any construction work, the calculation of consumables is required. The main criterion for counting the required consumility is the roof area, from which the number of gutters and funnels will depend. The gutter is often manufactured by 3-4 m in length. The required length of pipes depends on the height of the structure and on the number of plums.
- The design of the systems depends on the configuration of the structure than creatively in it architectural design, the more you need to calculate the angular elements and knee pipes. Pipes are installed at an angle of 45 ° C immediately before the level of land. Fasteners are fixed at a distance of 1 m from each other.
- To install plastic drainage, we will need it:
- all parts of the drainage system;
- water level;
- drill;
- construction pencil, roulette;
- hacksaw;
- screwdriver.
- The installation of the drain starts with the attachment of the brackets or hooks for the gutters. Brackets are divided into three types: short, long and adjustable. They are fixed on the bottom of the roof, the so-called crate. The lamp is the base under the future roof, a very stable and reliable construction consisting of boards located in two layers.
- One layer is stacked horizontally, to it and fastened brackets, and the second is vertically. Then above are already placing the roof material.
- We try so that the distance between the brackets was no more than 50 to 60 cm. In addition, they need to be fixed under a slight bias, so that a natural drain of water is possible.
- To correctly calculate the angle of inclination, you need to know how much brackets will be required on one side of the roof, as well as calculate the difference between the extreme brackets in height.
- To do this, you just need to put them all in a row and outline angle of inclination with the help of a construction pencil. Then the brackets will be attached to the already designated places, and they can even be numbered for convenience.
- If you have chosen a short type of fasteners, then it is better to fix them directly to the vertical layer of the crate.
- Create brackets with a screwdriver and screws. If you are the owner of a big country house, then for him it is worth making a few slopes. To do this, we establish two gutters in the middle of one half of the roof and mark the angles that will go to different sides in 2 funnels.
- Before installing the grooves, it is necessary to make holes in them so that water under the slope to the funnel. In this matter, the main thing is not to rearrange, so that she does not flow past the hole.
- You can make holes with a hacksaw. Then it is important to provide for the place of attachment of a funnel with a gutter. To do this, it is necessary to designate it exactly in the center of the funnel.
- Further, we proceed to the fit of the funnel to the groove, on the one hand we fix the method of folding, and on the other, the retainer bend. Also, a chute with a funnel can be fixed with the help of latches and glue, if it is plastic drainage.
- After the brackets are fixed, and the holes in the chutes are cut, begin to collect the design. The gutter hang on the mounted fasteners and clamp them with the help of special bracket secrets.
- Next turn plugs. They must be with a rubber retainer to prevent water flow. If initially they go separately in the kit, and not on the tip of the plug, it must be installed uneven side up in the groove of the system. Then the plug is tightly dressed on the chute and tapping a slightly rubber hammer so that there are no gaps.
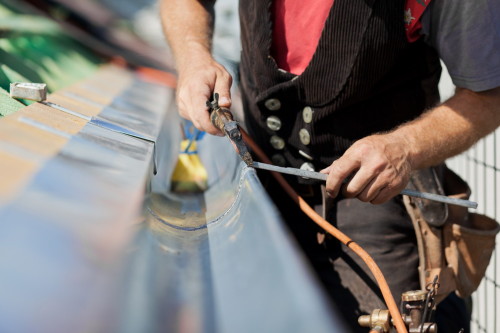
- The gutter with each other is fixed by special connectors depending on the type of material. For plastic drainage, latches or special glue are usually used. For the steel chutes use special holders or brackets. And in the case of aluminum systems, resort to the use of paste or glue.
- The first knee of the pipe dress immediately to the funnel, so that it is directed to the house, as the drain pipe must go along the wall wall. Then another knee aimed down and the straight pipe is already attached to it.
- If after installing two knees anyway between them and the wall still remains a long distance, you should add a small segment of the pipe.
- Next, the drainage system is collected as a puzzle. The trumpet dresses onto the knee and fixes the clamp. Clamps are divided into 2 types: for the structure of wood and brick. In the second case, he must go with a special pin.
- With the help of a perforator or drill in the wall, a hole is made, a dowel is inserted into it, and then the pin is already. Clamps are fixed with bolts from two sides on the pipe.
- Already directly near the level of land on the pipe, another knee, the so-called plums. Thus, the installation of the entire drainage is done with their own hands throughout the perimeter of the roof.
Treatment system from undergraduate materials: Recommendations
In the field conditions, a person can make a lot and drainage system from the girlfriend with their own hands to him also. Of course, such a drainage is not intended for permanent use, but only for a short period, for example, if you have fields and they need to irrigate during the season, or there is a need for a long stay in the forest more often to collect seasonal fungi. What can be done? After all, intending to such a campaign, only an elementary supply of food, water and behavior of essentials is envisaged in advance.
Drain
The following devices can be one of these things:
- aluminum pipe;
- wire 6 mm;
- turbine disk on metal;
- bucket.
- We take the aluminum pipe and with the help of a turbine cut it in half throughout the length.
- I fix it with the help of wire, which you initially need to cut and build improvised brackets from it.
- Instead of drain pipes, buckets are perfect. Thus, you can save and spend time in comfort.
Drain using sewage pipes
Interesting and inexpensive material for the manufacture of the drainage system can serve the sewer pipes. To build drains with your own hands from sewer tubes, you need to make a lot of effort. But in this process there are two solid advantages - it is the cheapness of construction and durability, since initially such pipes are intended for aggressive drain. The principle of installation is the same as we described earlier, but there are small nuances.
- When calculating the number of materials, do not forget that the sewer pipe you will be poured using the hacksaw or the grinder in half, and therefore the material you need twice as smaller.
- Here they will need tees that will connect pipes.
- For even sawing pipes, it is better to prepare a wooden pattern in advance.
- The brackets can also be made by yourself, but for this you will need more time, and in this matter you will save a little.
- Between the extreme brackets stretches the thread to correctly measure the angle of inclination.
- The gutter is mounted with aluminum clips.
- A sealant is used for a dense compound.
For fans, something to build with your own hands can be tried to make pipes independently and all components for the drainage, but for this kind of work it will take a significant amount of time and strength.
Tip: Before starting to install or manufacture a drainage with your own hands, we will advise the specialist and browse the video installation of such systems on the Internet to explore the whole process thoroughly and during installation everything went like oil.


