
How to align the floor Floors
It is impossible to flatten a new flooring on an uneven basis. It's not just that the floor in this case will look aesthetically unattractive. Mounting technology of most materials (laminate, parquet, ceramic tile, etc.) requires preliminary preparation of the floor surface.
You should not go to the wooden floor, spend money on new boards, if there are no signs of rotten or damage insect pests. There are methods that allow you to put it in order. In this article you will learn with what materials and how to align the floor in the house.
Content
How to align the wooden floor: diagnostics of its condition
We will deal with how to repair the boardwalk and prepare it for further work. Wooden floors are the most common in homes and in the apartments of the old planning.
It is necessary to find out the cause of surface irregularities. This may be:
- boxing of boards or chipboard of chipboard due to the lack of compensation gaps;
- surface wear due to uneven load;
- mounting errors (long distance between lags);
- use of boards, a thickness of less than 40 mm;
- surface warming due to high humidity;
- silvering due to operation in high temperatures and dryness.
Ways to determine the state of the floor.
- When you move on the floor, the places of excessive deflection of the flooring are revealed (it should be noted by the marker).
- Using the rule applied in different places to the surface, the gap is determined. If it exceeds 2 mm, this place should be noted.
- The surface of the floor must be carefully inspecting: all protruding under the load on the nails are required to be replaced with the self-tapping screw.
- With the help of the nail remove nails and take out one board. Turning it over it, inspect on the presence of insects and posting.
- The deviation of the floor from the horizontal is checked using a laser level: the device is installed at the highest point and projected the beam on the walls, after which the distance is estimated.
Wood floor alignment technology
There are several ways to bring the wooden floor to order, prepare it for laying a new coating. This is carried out:
- cyclical;
- with a sheet material (plywood, chipboard or OSB plates);
- using a self-leveling mixture;
- putty with PVA glue.
How to align the wooden floor with a cyclical
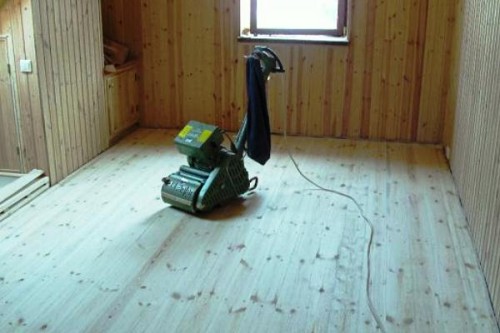
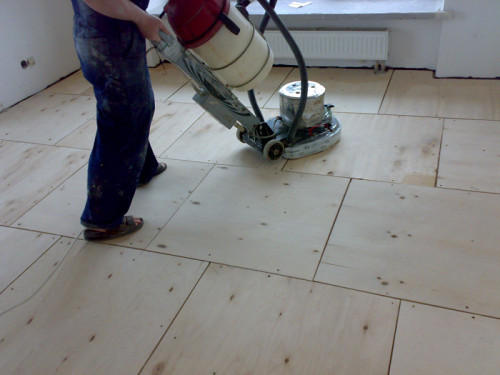
This is a time-consuming, but the most effective way. A cyclove is performed using mechanical means or manually. It is best to use a cyclum machine: it will significantly accelerate and facilitate the process. Work is performed in stages.
- From the floor surface remove all the furniture, flooring, remove the curtains. Bulky furniture, which is impossible to be taken, protect against dust film.
- Nails and self-tapping screws should be extracted from the flooring to avoid damage to the cyclical machine.
- After the preparation of the equipment, you can proceed to work, putting protective glasses, respirator and gloves.
- Cyclication begins near one of the walls. Moving from the angle to the corner, remove the top layer of wood, after which they treat the adjacent site. So continue on the entire area of \u200b\u200bthe room.
- Difficult places (at the edges and in corners, plinth) are handled manually.
- The discovered gaps close up with a putty, selected under the color of the wood.
- Strongly damaged boards can be turned over if the other side is preserved better. Otherwise, they are subject to replacement.
- After the putty dry is driving, conducting a re-cyclical.
- Dust and chips are cleaned, the floor is wiping with cotton cloth with a cleansing agent.
- A protective paintwork coating is applied on top of the smooth surface or laid outdoor material.
How to align the floors in the apartment with a putty and glue PVA
This method is relatively new. The mixture for work is prepared from sawdust (which are pre-slightly wetted) and PVA glue. Thinking, it becomes very strong. The advantage of this method is in the cheapness and availability of components. Alignment is performed in the following order.
- The floor is released from furniture, purified from garbage.
- With the help of a laser level, they make horizontal marks and the rails are applied.
- The prepared mixture is laying out between the rails and align the rule.
- The thick layer is applied in several stages: after the first applying, the putty must dry completely, after which the next layer is applied. The number of layers is not regulated.
- The surface quality is controlled by the level. Small errors are aligned with putty.
- After complete drying, the finishing material is stacked.
Important: To lay a ceramic tile, the base with a putty applied from PVA glue must be strengthened by plywood sheets or OSB plates, chipboard.
How to align the floor by self-leveling mixture
Some outdoor materials require careful leveling of the base. How to align the floor under the laminate and fast? The best option is using a self-leveling mixture intended for the wooden floor. This material is able to eliminate all irregularities, hide defects. The thickness of the applied layer is from 5 to 20 mm (sometimes - 35 mm). Work is performed with the next sequence of actions.
- The surface is prepared: the boards must be consolidated so that they are subsequently not beaten. For this, additional lags are stacked, screws are screwed. All sticking nails should be deepened or replaced with a self-tapping screw.
- The base must be cleaned from varnish and grinding. Compensation gaps along the walls should be sealing: fill in a rag or mounting foam. The gaps are smeared with a putty cooked from a self-leveling mixture, for which a more dense solution is prepared.
- Dust and dirt on the surface should not be: the gender is required to carefully clean, after which the moisture-proof primer (this contributes to the best adhesion).
- The lower part of the walls is recommended to close (for example, with a painting tape), as well as install a partition in the doorway in front of the door so that the new floor level prevented the movement of the web. Otherwise, it will have to trim its lower edge in height.
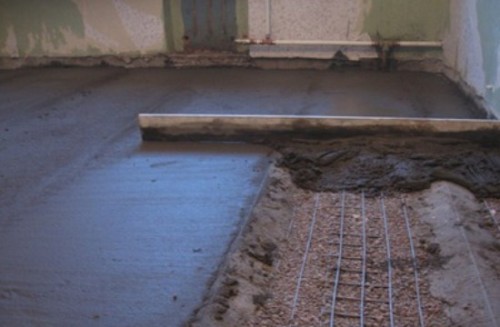
- If a significant increase in the floor level is needed, it should be poured into two stages using the reinforced grid. In places of docking, there should be a turn of 50 mm wide, which (as well as the entire grid) is fixed in several places to the base of the stapler.
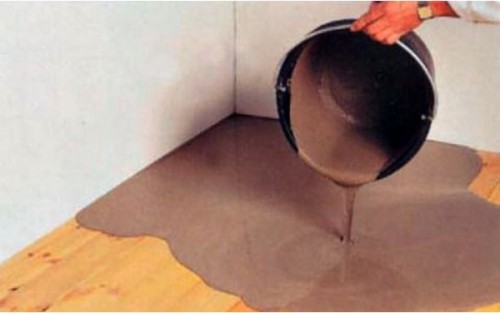
- The alignment mixture is prepared in accordance with the recommendations specified by the manufacturer on the package (label). Exceeding water volume is not allowed. For stirring, the components use an electric door with a nozzle-mixer.
- The mixture should be homogeneous, without lumps. After the stirring, it should be understood 15 minutes, after which it is mixed again.
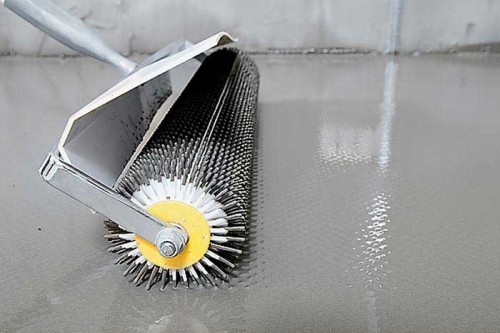
- The mixture is poured on the base of the floor and the air bubbles have a needle roller. Saving the alignment composition should be in those conditions that prescribes the manufacturer.
How to align the floor plywood
This method is universal: after such an alignment, any floor covering can be stacked. This is done as follows.
- On the perimeter of the room you need to screw the screws so that their caps are on one horizontal level. At the same level, self-tapping screws are installed in squares with sides of 300 mm (depending on the thickness of plywood).
- Lags of 300-350 mm long cut out of plywood and strengthen them on the base with the help of PVA glue. Between lags on glue plant bars made up of the same plywood.
- Through this design, longer - 600 mm lags are stacked, and they are plywood sheets with a displacement of 1/3 in each row. The corners of the four neighboring sheets should not coincide. Sheets are screwed to lags with self-draws.
- If plywood is used thinner than 20 mm - laid the second layer. At the same time, the docking sheets of the upper layer should not coincide with the lower.
How to align concrete floor
Inter-storey floors are often suitable from monolithic concrete slabs, the surface of which is not ideal. In addition, there are significant differences in their docks. How to align the floor under linoleum or ceramic tile in that case? How to hide the laid communications (cables, water pipes and heating pipes)? Consider the two most popular ways.
Wet floor screed
The technology of this process consists of the following steps.
- Using the level, the calcination boundary of the leveling cement-sand mixture is determined. The corresponding line is applied on the walls of the room around the perimeter.
- Concrete overlap is cleaned of dust and processed by primer. The waterproofing material is stacked (polyethylene film with a thickness of at least 50 μm) with a solid layer.
- The cement mortar stacked at a distance of about 0.5 m from each other, lighthouses are installed from T-shaped profiles. The distance between the beacons is selected in the width of the rule.
- A solution of cement, water, sand and small rubble is prepared. The mixture is stirred to uniform, creamy consistency.
- The solution is laid out between beacons, distributed evenly and is aligned with the rule. In this case, the tool stretches along the beacons closely.
- After soaring the screed, beacons are removed, and the formed depressions and other irregularities are filled with mortar. The surface of the screed is finally aligned using a grout, while applying a thin layer of the mixture.
- So that the screed does not crack, it should be periodically slightly wetted or covered with a plastic film during drying.
- The screed after drying is processed by primer: it will connect its top layer. A few days later, it is possible to lay an outdoor coating, but the use of laminate and parquet is possible only after 28 days - after complete drying.
Important: When using insulation (foam, polystyrene foam), the screed layer must be at least 40 mm. At the same time, for greater strength in the middle of the layer of the screed, the reinforcing grid is placed.
Dry floor screed
This method of alignment of the floor has a number of advantages over the wet tie. It is different:
- better thermal insulation;
- better sound insulation;
- the lack of a "wet" stage, which accelerates work;
- the floor can be operated immediately after the screed.
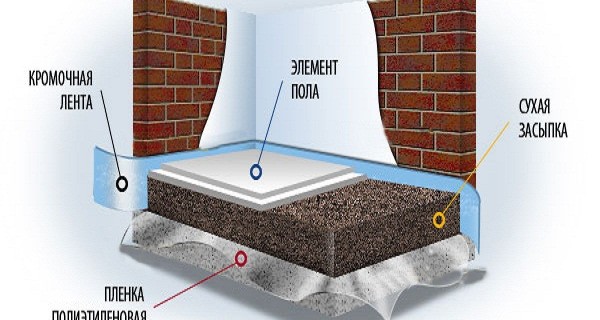
The technology is based on the use of claympsite - porous natural material obtained after the burning of clamping rocks. Phased alignment of the floor with a dry screed can be described as follows.
- Using a laser device or otherwise, the level of the future floor is determined.
- Along the walls attached the edge ribbon - for sound insulation. On the base, the waterproofing film with puff on the walls is stacked.
- At a certain level, parallel to each other rows of lighthouses (from metal profiles) are set.
- Claims falls asleep. The optimal layer thickness is 10 cm. The insulation should be aligned with the rule.
- Moisture-resistant gypsite sheets, plywood or OSB plates with a thickness of 16 mm in two layers are stacked on top of the ceramisite. The lines of the junctions of neighboring sheets should not coincide with the joints of the plates of the neighboring row. The edges are punctured by the construction glue.
- Sheets are fastened with self-draws.
- Putclone close the slots. To obtain the perfect surface, the plywood is grinding.
This method can be aligned both concrete and wooden floor. The disadvantage of it is a significant reduction in the height of the ceiling.
How to align the floor: video demonstrating the installation of a dry screed will help to deal with the details of the process.
In addition to the above methods, self-leveling mixtures (for concrete) are also used to prepare reinforced concrete grounds for laying a clean material. The technology of performing such work is similar to the applied for wooden floors.
Observing the above rules and recommendations of materials producers, you can create a high-quality, flat surface of the floor for laying laminate, linoleum, parquet or ceramic tiles.
New comments
Add a comment
To send a comment you need authorize.





Excellent vidio, everything is clearly shown. I just have to explore the subtleties of the floor alignment, but I already listen to the advice of experienced. Not suggested that the dry mix of M-150 is very good for beginners. I will start with a small room, I will test it from the beginning. I just clarify whether the mesh is needed under such a tie.
The grid does not interfere anyway. You will not make a screed with a thickness of 100 mm? And for 50 mm better with the grid ... and it must be laid in the middle layer.