How to make a mansard window Window
Modern trends in the construction of individual houses are suggested in most cases the device of the attic floor. Such a solution allows you to get a maximum of living space with minimal costs of building materials. With the help of existing technologies, not only high qualityly insulate the room, but also provide natural lighting of residential space.
Content
To access sunlight, windows are installed on the attic floor. They are mounted in the roof slide. It is important to choose the right type, size and location of the windows: the illumination of the underground space depends on it. The correct installation ensures the tightness and thermal insulation of the attic. In this article, information will be set on how the attic men's windows and how to install them correctly.
About the kinds of mansard windows
Mansard windows differ in design by installation method, according to the opening method.
Classification by installation method
By the installation method distinguish the following types of attic windows.
- Vertical - they are installed in a special design, called a birdhouse or in front. The design of such windows is practically no different from the windows of the lower floors. Their disadvantage in low efficiency: due to the vertical orientation, they skip less light than the windows of other species.
- Inclined windows: There are different designs, which depends on the way they are opening. The installation is cleaned with roofing material, so that such windows pass more solar light than vertical. They are made of aluminum or metal-plastic profile, as well as from the wood of the highest grade. The latter are recommended for bedrooms and children's, and PVC windows for bathrooms and kitchens (rooms with high humidity).
Constructive features of windows
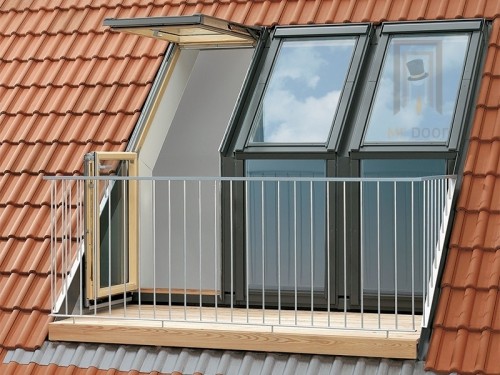
There are various kinds of mansard windows (see the photo below). The classification of mansard windows depending on their design features is as follows.
- Balcony window windows: are made up of vertical and inclined part (in some cases and side). All parts can open: the vertical part is to the left or right, inclined - up. It provides a convenient access to the balcony.
- Standard rectangular windows are most popular. The design consists of a rotary flap with a glass. There may be a "deaf" execution.
- The lower stationary element under the sash: the inclined design, the only possible at the low height of the skate (there is not enough space for the second window from above). Such a combination provides better lighting with such a roof device.
- The oven is a fixed element located above the tuming inclined sash. It serves not only to increase bandwidth (sunlight), but also in decorative purposes. Can be made in the form of a triangle or circle.
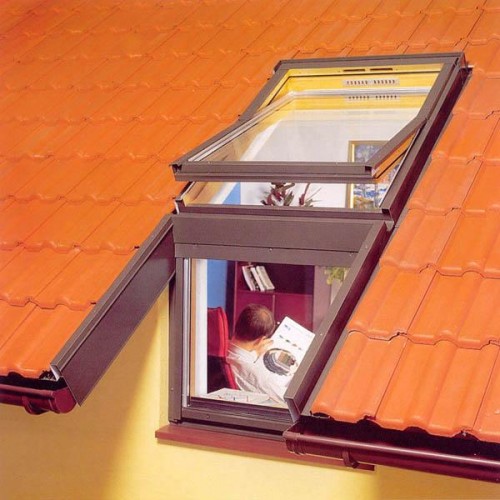
- Farmetic window - installation of such a design is possible in the presence of high tensile. It provides a good review. The fire window consists of inclined top and vertical (bottom). Both parts can open.
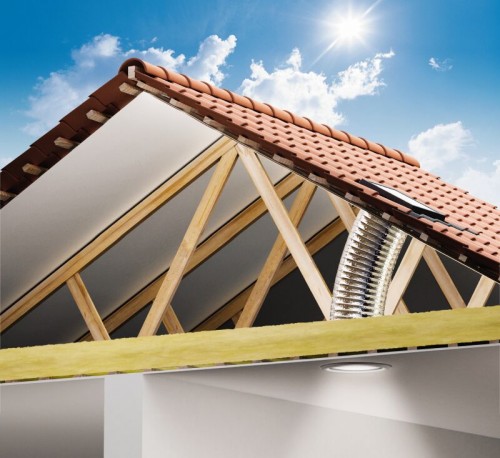
- Light tunnel: It is a design in the form of a window with a pipe of large diameter. The pipe plays the role of a light guide directed into a poorly illuminated area of \u200b\u200bthe lower tier premises. At the same time, the window itself is located on the section of the roof, under which the residential area is not created. The light tunnel is rarely used (in cases where otherwise it is impossible to solve the problem with the illumination).
Classification of windows in the opening method
Mansard windows can open:
- turning on the central axis of rotation: the opening angle of the sash - up to 180 °, so that the window is comfortable to wash;
- by a turning method relative to the displaced axis (it is usually located at a distance of 1/3 from the top plank of the window;
- relative to the combined axis (consists of a displaced and central axes): Due to the displaced (top), the sash opens up to a maximum of 45 ° outward, and further movement is carried out around the central axis;
- relative to the side axis, in the usual way (such windows are convenient to enter the roof);
- with the lower rotary axis - the flaps open forward (used for balcony windows);
- using the remote control (equipped with actuating mechanisms): Such windows can also be equipped with an automatic ventilation system.
Choosing the design and location of the window, take into account the purpose of the attic room, the roof parameters and the peculiarity of the area.
How do the mansard windows arranged
Mansard windows must be strong enough to withstand the wind pressure. This is possible only due to superproof glass. The windows must ensure tightness and have good thermal insulation qualities.
Basic details of mansard windows:
- frame;
- flap with a glass filled with inert gas;
- fittings (loops, handles, other mechanisms).
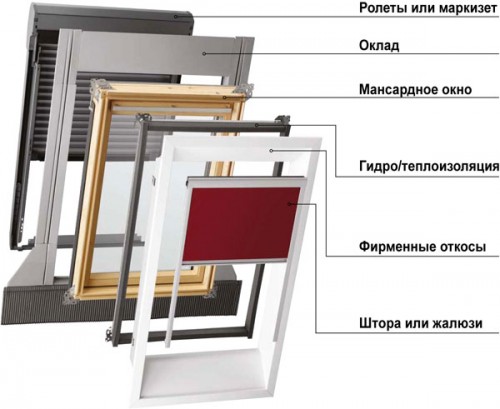
In addition, the package includes aprons (steam and waterproofing), thermal insulation, sealing gaskets, drainage gutters (protects against leaks), protective salary, internal slopes. Additional elements can be rolling, swinging, remote control mechanisms.
Dersighted window installation rules
Make a mansard window with your own hands is impossible. It can be manufactured only in factory conditions using special equipment. At the specialized enterprise, ordered mansard windows. Dimensions and other parameters can be different. To install them, it is better to access professionals, but if you decided to save on it - the following rules should be followed.
- Before ordering the manufacture of the window, determine its size. The distance between the rapid legs and the total area of \u200b\u200bthe attic is taken into account. It will be better if the installation of the window does not have to change the roof design.
- The width of the attic window should be 50 mm less than the distance between the legs of the rafter system. The window area ideally should be approximately equal to 1/10 area of \u200b\u200bthe floor of the attic.
- If the distance between the rafters does not allow you to install a large window - you should install several windows nearby by placing them between the rainstream sections. This decision will cost more, but there will be more light in the room.
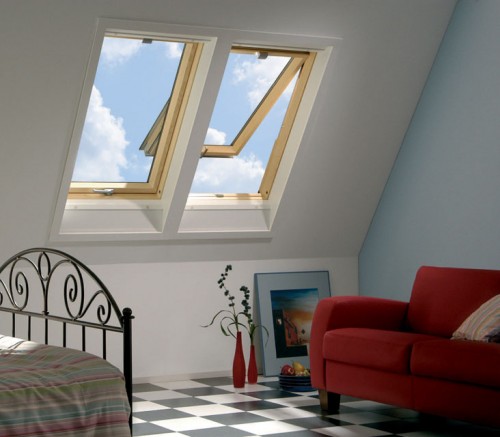
- Regardless of the angle of the roofing angle, the installation height of the floor of the floor of the room should be within 1.0 - 1.1 m, and the upper limit of the window opening should be slightly higher than the level of the adult's eye. It follows from this that with a decrease in the angle of the roof of the roof, the area area should increase proportionally.
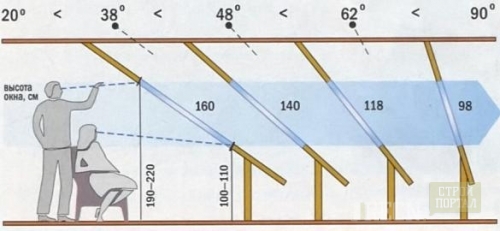
- The window opening handles must be in its lower part, if the angle of the slope is large. On gentle roofing, on the contrary, the handles are installed at the top.
- A type of roofing material can affect the height of the window. For example, it is impossible to cut off the tile: the window opening should be shifted in this case.
- To prevent the icing icing in winter, under the attic window it is necessary to install a heating radiator.
- Accessories for the configuration of the attic window must be one manufacturer.
Preparation for mounting windows
The entire process of preparing for the installation of the attic window can be divided into several steps.
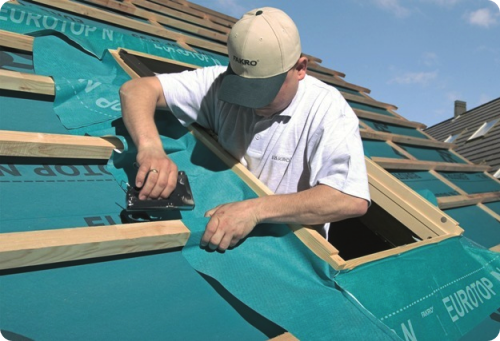
- Marking of places for installation of windows is performed on the waterproofing film before finishing the room. From the rafter, 20-30 mm retreat.
- Folding the window of the window follows to the rafters and to the lower mounting bruster.
- When performing marking, it is necessary to retreat 90 mm from the lower mounting timber to install profiled roof elements or 50 mm - to install flat elements. From the upper boundary of the window, we measure 100-150 mm upwards.
- Slash in the waterproofing film the outline of the window, adding a stock of about 200 mm throughout the perimeter. Stock material wrap inside the room.
- Slap or remove some of the roofing material, as well as the crate (from the rafted, retreat 20 mm).
- By the level of the lower part of the window frame, a mounted mounting bar with a cross section of 50 × 50 mm. Checking its horizontal position using a level. It is necessary to take into account the type of roofing material when determining the depth of planting the mounting timber.
- Wrapped inside the lower edge of the waterproofing film is fixed to the mounting bruster stapler. The side edges wrap out the outside, and the upper buffam to the lap the crate.
Window installation technology
During the installation of the window, the sequence of actions comply.
- It is necessary to explore the instructions for the product: it should contain the order of attachment of the brackets (they are of different shapes) to the crate and rafters. Attention should be paid to the presence of labels that indicate the depth of the window landing. This takes into account the type of salary and roofing material.
- Before installing the window sash must be removed (how to do it - see the manufacturer's instructions.). Removed and other details - you need to leave only the frame.
- To fasten frame brackets required for fixing it to the sheathing, the mounting beam and rafters. With the stapler, the outside perimeter of the frame tacked mineral wool band necessary for insulation construction. The same strip fastened on top of the mounting bar.
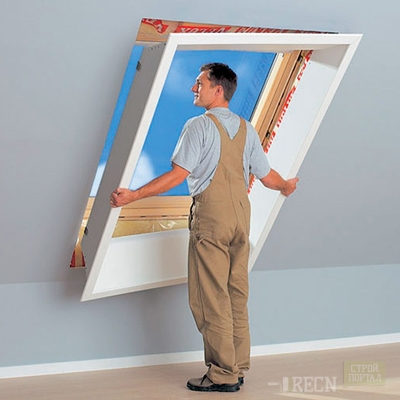
- Frame insert into the prepared opening, pressing to the beam. Screws are screwed through holes in the brackets and the batten wood trusses, checking the position of the frame by means of level.
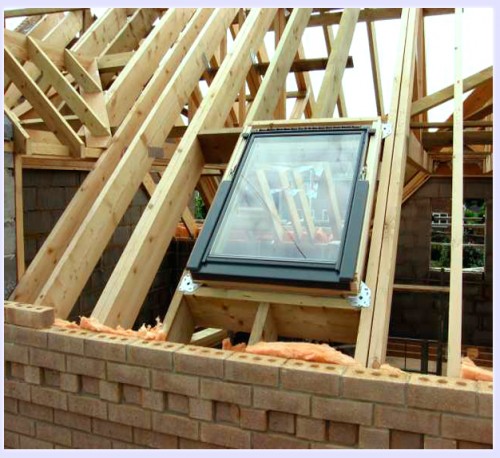
- Set the shutter so to avoid distortions. The width of the gaps on all sides should be the same. If necessary - we produce flap position adjustment with the screws on the hinges. All the screws tight tighten.
- The edges of the waterproofing material fastened to the frame by tucking or trimming unnecessary. On the sides of the frame are laying the insulation.
Installation of waterproofing on the perimeter of the window
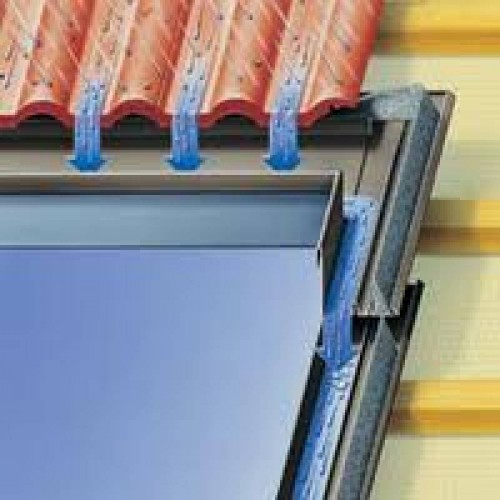
Frame necessarily completed insulating apron. It can be made independently by cutting of thick polyethylene. At the top of the window opening cut out portion of walkable (both sides) so as to be able to install the drain gutter (under waterproof film). He will take the side rainwater and melt water.
The apron should be laid in such a way as to prevent leakage and fastened by a stapler to the beam and rail. The edges of the material laying under the crate. The upper part of the apron is to be under the chute.
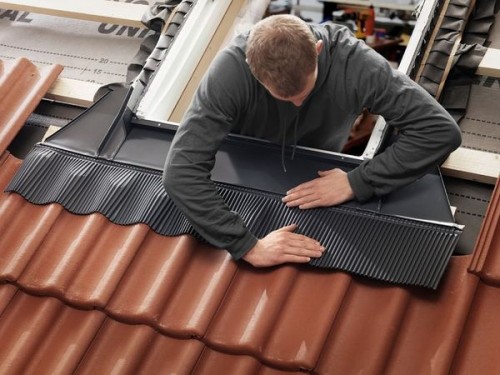
We set the salary
- Work is performed, starting from the bottom: fasten corrugated apron, after which we fix the side portions, and then - the upper. The next step - installation of overlays.
- In the presence of the rubber seal in the kit frame, salary slid under it. If the seal is not - pay bolted directly to the frame, and then set additional details of salary, salary and hide the joints of the frame.
- All elements of the salary docked tightly and fix to the sheathing and the frame. On top of the roofing material fasten the lower apron. Above salary must be set element, which is joined closely to the roofing material.
- Finally hung sash and governed by its position, as well as the work of accessories.
- From the premises set slopes, which should also be warm.
Important: Special sealants are used to seal cracks and joints, and not a mounting foam.
About how atticed attic windows: video to your attention


