Ceramic plinth: Main advantages and installation methods Floors
It would seem that a small element, but is of great importance in the floor arrangement. Plinth is a kind of plank, which serves as a protective element between the wall and the floor. Plinths are different in shape, sizes, materials.
Content
The main value of the plinth is to protect the gap between the wall and the floor from dust, dirt and moisture. In modern repairs without this construction element, it is not necessary. In many houses, apartments have now become practical to put ceramic tiles on the floor, respectively, the plinth must be ceramic.
How to replace the plinth
Ceramic tile is used in the decoration of bathrooms, kitchen, toilet and even a corridor for many decades. Ceramic plinth was created not so long ago. How previously the builders came out of the position and closed the slots between the walls and the floor? The answer is banal - they took the remains of ceramic tiles, which was stoned with the walls and cut them on the desired size. With the help of special tools, it was possible to cut the tile into two, three, four parts, but the quality of the very edge was silent. The edges tried to clean up with the help of priests, and thus it turned out the joint more or less beautifully.
Now the masters for laying a tile recommend not to save on the plinth and purchase a ready-made ceramic plinth. At the price of the plinth inexpensive. It is easy to care for ceramic plinths.
What you need to consider when buying a plinth
First of all, it is necessary to immediately take into account the costs and, acquiring ceramic tiles, immediately choose and plinth. The finished plinth has already has a rounded edge, it looks careful than the homemade, carved from the tile. Ceramic plinth in size coincides with the size of the tile. Do not be surprised if in the store when you are going to buy a ceramic plinth, you saw the products longer than the ceramic tile itself. Manufacturers provide their customers with a fairly wide selection of ceramic plinths such as standard and non-standard sizes.
By purchasing a ready-made ceramic plinth, you automatically get rid of problems such as fitting the joints, filling the slots between the wall and the floor. The finished plinth is easy to install.
By purchasing ceramic plinth, do not forget to buy corners: external and internal, which will greatly facilitate your work.
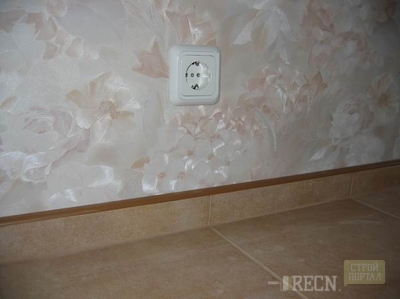
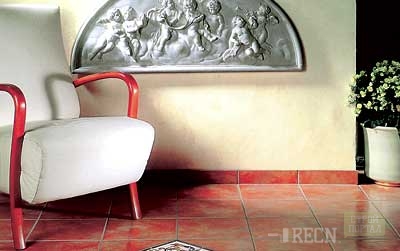
See what the ceramic plinth looks like you can on this photo:
The advantages of ceramic plinth:
- It has high strength, in contrast to plastic plinths.
- Not deformed.
From disadvantages of ceramic plinths, only one can be noted: such plinths can not be subjected to various impacts of solid objects.
Standard triangular plinth. Also, the plinth may be ordinary, direct, have both glossy and matte coating.
Now in fashion ceramic plinths, they have a narrow sole; Direct plinths with a height of about 15 millimeters, they have rounded top. Such plinths do not prevent the installation of furniture, which can be put directly to the wall itself, excluding gaps.
Designer Board: If you install a ceramic plinth for the floor of the same color with the floor itself, then your room will look at one piece. If you are the opposite, get the plinth of the same color as the walls, you visually increase the height of the ceilings indoors.
Laying ceramic plinth
Actions to lay the ceramic plinth for the bath and for sex differ. Consider both options.
We put the floor plinth
First of all, you need to decompose the plinth so that the seam's joint is connected with the junction of the tile itself. The finished plinth has a cut at the top with a rounding. The length of the plinth is equal to the length of the tile itself, so there should be no problems with the stacking.
Materials and tools:
- Ceramic plinth with a set of corners.
- Adhesive mixture for ceramic tiles.
- Spatula for applying a mixture.
- Construction knife or narrow spatula (for removing residues of the mixture).
- Rubber hammer (kiyanka).
- Plastic "crosses" for seams.
- Building level.
- First you need to prepare an adhesive mixture. The consumption of the mixture in dry form is about five kilograms per square meter.
- Then, with a spatula, apply a smooth layer of no more than three millimeters adhesive mixture into a ceramic plinth.
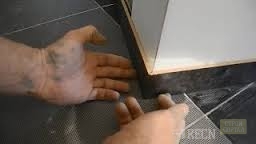
- To put the plinth on the estimated place and the rubber hammer sweep it.
- The upper part to align, using the level and install the plinth in the desired direction.
- Suts between tiles are made using "Crossings".
- With the help of corners (exterior and internal), connect the plinth in the corners of the bathroom, toilet or kitchen. If there are no corners in the kit, then you will have to do corner yourself from the plinth. Plinth will need to cut at a certain angle - 45 degrees.
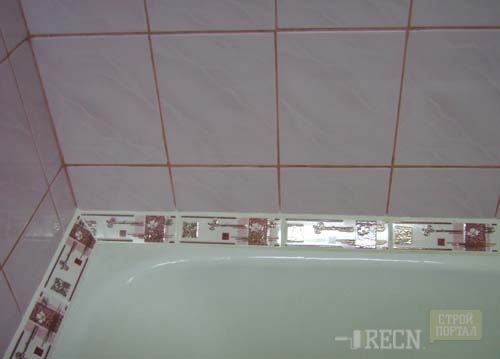
We put the ceramic plinth for the bathroom
Required materials and tools:
- Plinth (take with a reserve).
- One cylinder silicone sealant (preferably colorful).
- Pistol for sealant.
- Adhesive mixture for ceramic tiles.
- Putty knife.
- Nathedral stone, Bulgarian.
- Rubber hammer.
- Places where you planned to install ceramic plinth, it is necessary to carefully clean from dirt and moisture. At the place of the connection of the wall with a plinth, apply a thin layer of sealant and dissolve with a spatula if necessary. Leave to complete drying sealant.
- Prepare, according to the instructions, the adhesive mixture. Plinth, which will be located in the corner, you need to prepare in advance and cut at an angle of 45 degrees. Crop the ceramic plinth is better with the help of a grinder, and clean the slice on the sandpaper.
- Apply an adhesive mixture to the plinth with a spatula and attach to the wall. Watch that there is no clearance. To align the plinth, let's knock on it with a rubber hammer.
- After installing the ceramic plinth on the bathroom, after 24 hours you need to pink the plinth with water. Thus, the adhesive mixture will be well fixed.
And only after these actions can be proceeding for the grout of the seams.
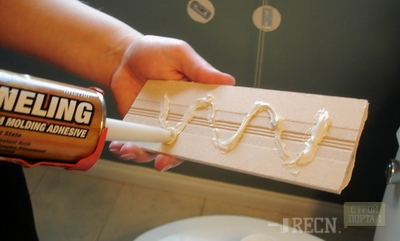
The second version of the styling of ceramic plinth on the bathroom is performed when the ceramic tile on the walls is already installed. Plinth can be laid on liquid glue. Be sure to use waterproof - "Liquid nails".
Apply glue to the back of the plinth, press it with the wall and to the edge of the bathroom. Hold for a while until the glue is grabbing. Try at this moment do not twitch and do not move with your hands, so as not to shift the plinth.


