Floor screed with clay: Step by step instructions Floors

Ceramzite for a dry band screed is a great material that allows you to significantly simplify the process of alignment with a minimum budget, time and amount of labor. About how to make a light tie with your own hands, you will learn from our article.
Content
Advantages of Ceramzita
Floor screed is in any case a time-consuming process that requires time and strength. However, the features of the ceramisite make it possible to get the best result for a relatively short period of time.
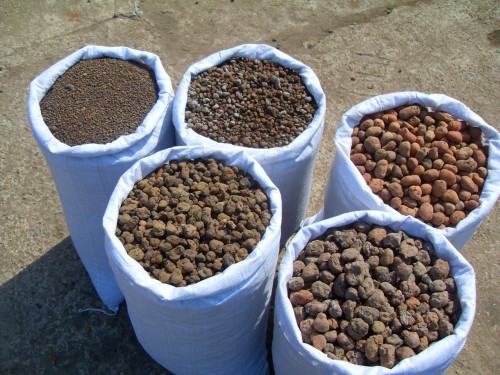
The ceramzite itself is durable, reliable, lightweight, convenient for use and fully environmentally friendly material. It has excellent indicators of sound and thermal insulation. The material is a burnt clay, which due to the impact of high temperature is compacted and hardens.
For you, it will be needed primarily in order to raise the floor level to the desired height, insulate it and consolidate it significantly. Floor screed with claying is much more efficient than sand and cement. Basically, due to the fact that it is capable of passing the desired amount of steam and air.
Among the main advantages are the following:
- resistance to high and low temperatures;
- the ability to use in any residential or commercial premises;
- ceramzite does not ignite, does not rot, it weighs little;
- the ability to level even strong irregularities with which the remaining mixtures will not cope;
- easy to perform a screed even without additional skills.
When do you need a fill with a clamzit?
Included cases when no alternative except for clay simply fit:
- It is necessary to process a plot that exceeds 15 centimeters height. Cement mortar in this case will cost much more expensive, and its strength will be an order of magnitude lower.
- When it is impossible, the screed is strongly added the weight of the building due to a weak foundation.
- The presence of wooden floors (together with the clamzite, it is also recommended to use foam as a low weight heat insulator).
- If you do not have a big budget for repair and want to spend less on the materials used.
How the floor screed occurs with their own clamzit. Preparatory stage and miscalculation of materials
Instruments:
- level;
- construction mixer;
- ruler;
- rope;
- rake and profiles;
- rule.
Materials:
- ceramzit;
- sand;
- cement;
- water.
Initially, you need to get rid of the old coating and bring the basis to the right state - remove the construction trash, clean from foreign objects.
- disassemble the old floor;
- swapping or sweep the fine garbage;
- clean insignificant holes available in the cement.
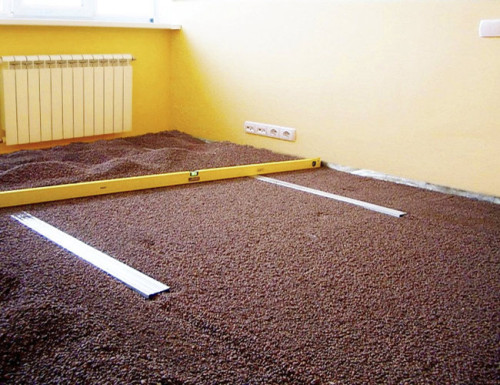
As in most modern construction works, everything starts with marking. Initially, decide on which height will be lifted by the floor, set the beacons around the perimeter. The step between beacons should be up to a meter. All rails need to be set exactly by level.
Important! If the screed is held in all rooms, make sure that the level is the same.
Initially, it is necessary to determine the highest point of the floor. To do this, you can use a laser level (it is more convenient and faster with it). If it is not, you can replace it with usual water. But in this case you will need to use the rope to designate the level with all the accuracy.
Lights. Exhibit from the top point. At the highest point, your screed width in most cases will not exceed 5-6 millimeters, gradually increasing in lower sections of the room. For fixing beacons, you can use gypsum or cement mortar. But the second implies the need to work quickly until the solution froze and did not begin to solve.
Calculate the desired ratio of clay to standard cement mortar is easy. The more this material is used, the better heat insulation will provide a screed. But if you overdo it, then the strength will deteriorate greatly. In the miscalculation, it is necessary to take into account the thickness of the base, the strength of the foundation, thermal insulation characteristics. The optimal ratio of clay and mortar - 1: 1.
Consider that the density of the material of different fractions can be varied within 250-600 kilograms per cubic meter.
The standard number of components on one cubic meter of ceramzite concrete is as follows:
- cement - up to 300 kg;
- sand - 300 kg;
- ceramzite is one cube (weight may differ due to different density, so when buying is guided precisely by volume).
More accurate calculation can be carried out using the following example:
As a standard, take the room with dimensions of 9 square meters and the middle layer thickness of 60-65 mm. We produce calculation: 9 x 0.06 \u003d 0.54 cubic meters. m., which is exactly 540 liters. Solution for screed.
There are several ways to make the floor screed. We offer two simplest and efficient options:
Option of screed number 1
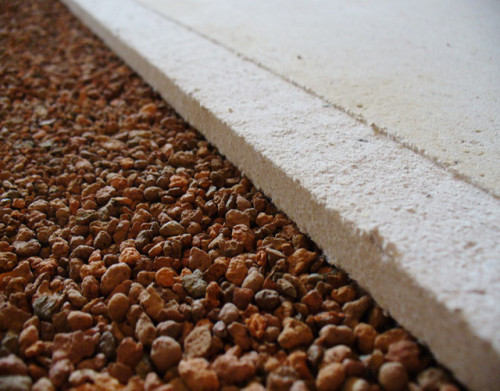
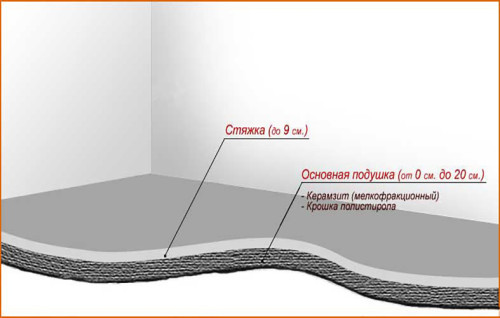
- After performing measurements and make the markup of the screed level, you need to fall asleep fine clamzit throughout the area. A small fraction at this stage is needed that the ceramzite will be better rambling. The layer should be no higher than 2.3 centimeters to the top point of the future screed. Using the level, make a layer of claympsit to fully and distribute it over the surface.
- The resulting layer for better density can be pouring cement "milk".
To prepare it, you need to make a standard solution for a screed, but the water in it should be twice as much. In itself, "Milk" material will not be built, but it forms a film on it, which will prevent the absorbent fluid with a clay. As a consequence, the flow rate of the solution during the pouring will be reduced. For the formation and hardening of such a film, a day will be required. At this stage finished. Now you need to wait.
- After the day, you can proceed directly to the finishing screed. Pull the required amount of clay over the entire area and align once again using the level. Now pour the finished solution to the surface, crush the rule and leave to dry for 2-3 days.
- When the screed is dried, remove the beacons, and the resulting holes close the cement.
Option of screed number 2.
In this case, the ceramzite will also have to put in two layers, but the entire process is taking significantly faster than in the first version.
- Prepare a solution for a screed. So that it is suitable for use, it is necessary to first fall asleep clamzite into a large container, pour water and mix with a construction mixer. Next to the container, add cement and sand in the desired quantity and also mix everything. There is no accurate proportion in this case.
- Gradually add sand with cement into a solution until it becomes a homogeneous viscous mass without lumps.
- The finished composition is pouring to a height of up to 2.5 cm from the floor. Please note that in this case, unlike the previous one, you do not have to wait for a day, but you can immediately continue to work.
- When you proceed to the finishing fill, do not reach the edge of the lower a few centimeters.
- Thoroughly align the top layer of the screed. Perhaps in some areas there will still be irregularities. They need to find and eliminate them on time. Avoid the appearance of puddles, recesses, bubbles on the surface, etc.
Floor tie tips
- If there are wires and any communications under the tie, it is necessary to wind by their polyethylene film and fix in the desired position with a tape or tape.
- Under the clamzite is best put a layer of waterproofing. For this purpose, you can apply mastic, polyethylene film or hydrosol.
- Profiles and rails are optimal beacons.
- A tie for complete drying will be required at least a month with standard room temperature and humidity.
- In the process of drying, you need to regularly water the surface with a minor amount of water to avoid the appearance of cracks.
- If you add a plasticizer to the solution, then the probability of cracking is significantly reduced.
- If you use clamzit mainly to improve heat insulation, it must be at least 10 cm.
- Use the grazit of different fractions to get a more dense screed.
- Ceramzite can be used effectively with bulk floors. By themselves, they greatly equalize the surface due to a sufficiently liquid consistency. If it is mixed with such a solution with such a solution, you can achieve higher strength and thermal insulation.
- During the screed, work the construction rule over the entire surface area.
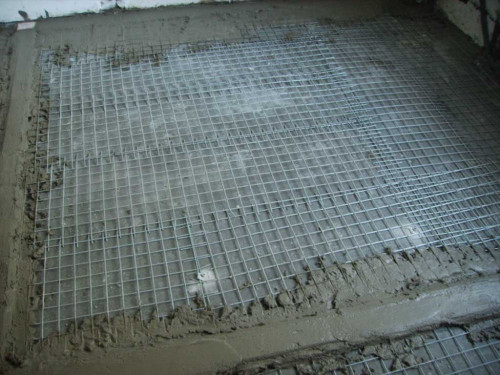
- Reinforcement of the screed surface is optional, but a useful step capable of significantly strengthening it.
As you can see, the fill of the floor with a grainsite with their own hands is a fairly simple method that allows you to get a good result for little money. Without expensive tools and materials.
We wish good luck to repair!


