Wall shuttering with their own hands Walls
In most old houses (and new buildings, too, no exception) the surface of almost all walls is far from being perfect. Sooner or later you will have to align them. And the best tool is plastering walls. How to make all the work independently without attracting specialists, this article will tell.
Content
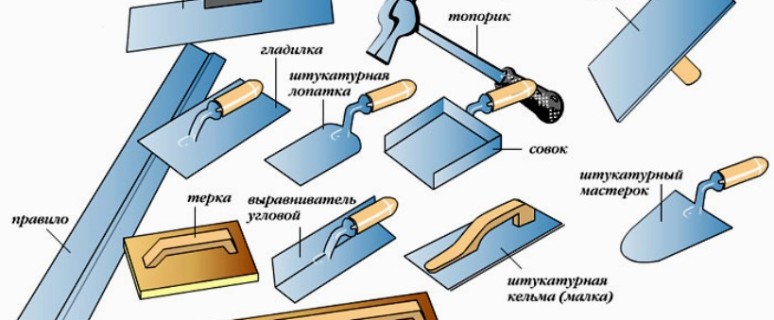
Tools and materials
Instruments:
- master OK;
- rule;
- putty knife;
- level;
- sleeping
- cord;
Materials:
- gypsum or cement mortar;
- dowel;
- self-tapping screw;
- primer;
- light profiles.
Ways plastering walls
The focusing process in most cases occurs in two standard methods:
- Without lighthouses, using the construction rule. The method is suitable only if the surface and so fairly smooth does not have strong defects and relief drops.
- Walking walls by lighthouses. The method allows you to completely eliminate strong irregularities, but requires more time and effort.
Almost all the basic requirements for the plaster itself are indicated in SNiP III-21-73. Whether you will work independently or hire workers, they must be studied. There are three main quality levels of plaster:
- Simple plaster. In this case, deviations are possible vertically up to three millimeters per square meter. But it is necessary to ensure that the deviation does not exceed 1.5 cm. Small irregularities are permissible for every 4 m square. But no more than three pieces. The deviation in the horizontal plane should not exceed three millimeters per square.
- Improved shockting. In this case, the vertical slope should not be more than 2 mm and no more centimeter on the entire area. It is allowed no more than two irregularities by 4 square meters. Their depth should not be more than three millimeters.
- High quality plaster. Here requires an order of magnitude higher and work with the greatest accuracy. Deviation - 1 millimeter per meter and not more than 0.5 cm for the entire area. The deviation horizontally should not exceed 1 mm.
Wall plastered by lighthouses
This method will allow you to remove even the most significant irregularities in old houses. Beacons at the same time serve as a kind of limiter. To work, you will surely need a perforator and a construction bubble level of two meters long. Regarding the choice of the mixture, here are the most popular - gypsum and cement. But plaster for a number of reasons acceptable:
- The layer that can be applied can reach 5 centimeters thickness. At the same time, cracks and other defects are not formed.
- The mixture based on the gypsum composition is not seated during the drying process.
- Gypsum itself is much plastic than cement.
- A small mass and excellent adhesion allow you to align not only the walls, but also the ceilings.
- High plasticity of gypsum.
- Excellent noise and thermal insulation, as well as vapor permeability. Through what the walls are "breathing", and the microclimate in the room is much better.
- Gypsum makes it possible to produce plastering without the use of reinforcing grid.
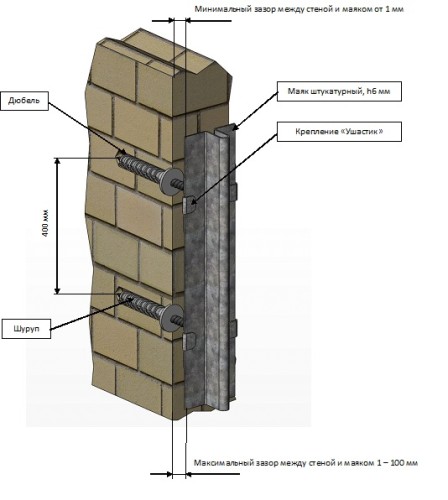
Directly light profiles are a metal profile in which the holes under dowel and self-tapping screw are provided. They serve as limiters in the course of plastering and significantly simplify work with the rule. The standard length is 300 cm, and the depth is 0.6 or 1 mm.
The correct installation of lighthouses is one of the key stages of all work. To do this, you will need to make a full markup. The task is greatly simplified if there is a laser level, but you can do the usual.
Watching brick walls begins with marking and primer:
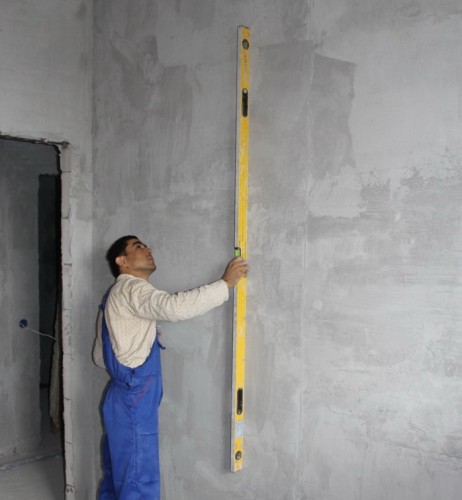
- Initially, it is necessary to carefully study the surface of the wall. The vertical deviation can be quite easily detected by the level, and all sorts of bugs and the depressions become explicit, if you spend the rule on the surface. It must be applied at different angles, and any irregularities denote by a marker.
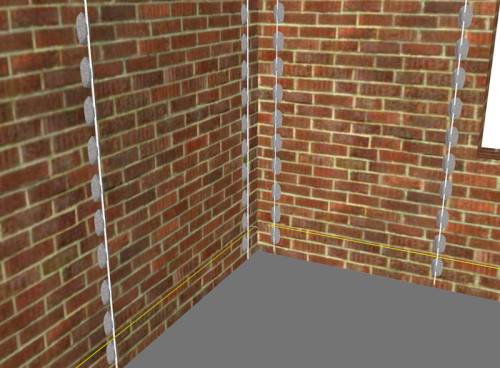
- When all the problem areas are detected, you can make marking on the installed beacons. Markup should be started with extreme. Make a step by 0.3 m from the corners and read the vertical vertical pencil.
- The step between the beacons is approximately one and a half meters or a little more. It is better to start from the side where the door is.
- On the markup lines, it is necessary to make an indent of 15 cm from the floor, put the points here and insert dowels and self-tapping screws. It is necessary that they keep very tight. Now it is necessary to pull a strong cord between extreme without sagging.
- Next, from the resulting line, back up another two and a half meters and repeat the procedure. Thus, you will have two lines that will be completely parallel to each other. Where the lines intersect with markup, put the guidelines. Here you need to do holes and drive a dowel in them.
- As a result, you will receive two flat lines of holes. You can already unscrew the screws in the corners, and let the dowel remain in place.
- Brick and concrete surfaces must be rebounded. If the surface is smooth, you can use concrete contact, if the surface is highly absorbing, you will have to use extremely deep penetrating primer.
- After the priming 4 extreme and two upper screws need to be screwed. But not to the end. The gap from the wall to the cap should be the length to which the wall is rejected at the moment.
- When the self-tapping screws are screwed, substitute the rule to self-stakes and check whether you do not need to fit them more accurately. The line should be completely vertical.
- A similar procedure also with a second pair of self-tapping screws in the corner. At this stage, you need to be as responsible as possible, and check all the level and rule.
- Between the upper hats of the screws, you need to pull the cord right along the hats. Under them must easily undergo a beacon profile. Correct the central screws. They should only slightly engage the cord.
- In the bottom row, do the same. You should have eight screws in the same plane.
How to fix lighthouses and apply plaster
Initially, it is necessary to trim the beacons so that their length is slightly smaller than the distance between the dowels. Next, proceed according to plan:
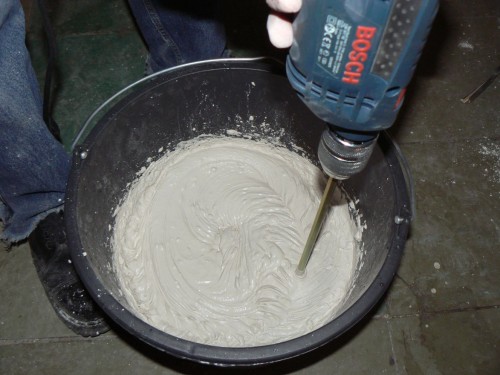
- Prepare a small amount of mixture for plastering. It is needed for the initial attachment. Just mix the mixture with water in any suitable container. Mix it best to the perforator, but you can do and the spatula. It should be similar to cottage cheese in its consistency. The mixture should not be distinguished from the spatula.
- Stucco. Apply along the line with a slight protrusion behind the top face of a hat. The lighthouse is pressed into the mixture with the help of the rule. The main thing is not to overdo the lighthouses do not entered deeper caps. It will be more convenient to work together for one person to be at the top, and the second bottom.
- When lighthouses are installed, believe me evenness by rule and building level. If necessary, adjust the position and pull the screws.
- After adjusting one lighthouse, proceed to the following. And so in order. We recommend after each lighthouse to clean the rule from the extra solution.
When all lighthouses are aligned and securely secured, you can start plastering.
- One third of the water buckets add the solution and thoroughly stiritate the mixer or spatula.
- The thicker layer will be applied, the thicker should be a solution. In no case should not flow from the spatula. Best in this case is guided by the instructions on the package.
Please note that if the surface is highly absorbing, it will have to moisten it before plastering. But it is necessary to wet on the plots before their finish, and not the whole area. If you do not do this, the plaster itself will quickly give moisture wall, dry and cracks. This is especially important if you are plastering wooden walls. The tree is a very active absorbent.
- The solution needs to be applied to the ironing and immediately sparkling along the wall. Professionals simply pounce it on the surface of the wall and flatter. At first you may not work, but nothing terrible.
- The plaster should lie tightly and not go beyond. It is necessary to work the rule in the direction upwards.
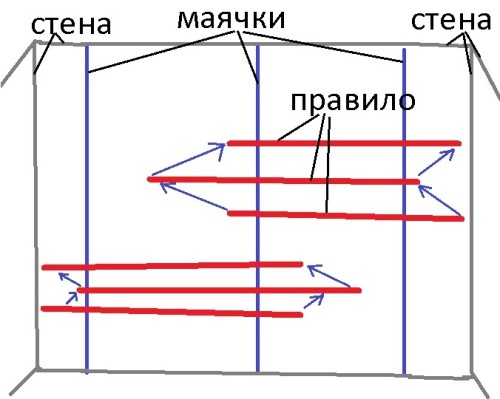
- Next, lead to the Rule for Lighthouses. It must be kept exactly smooth. If it is at an angle, then you can capture unnecessary and you have to apply a layer again. Raise the rule up with zigzag movements and remove everything with an excess spatula.
- If irregularities or bubbles are formed, problem areas need to be converted. For this, the solution in the desired sites must be removed and replaced, aligning the rule.
- Now it is finally passing the rules on the area of \u200b\u200bthe placard wall. But this time without a strong push. So you finally crumple the plaster. According to the final, you also need to walk the rule from the ceiling to the floor.
- When the first step of work is made, swing another solution and continue, reaching the upper face of the solution.
- Plots under the ceiling and above the floor are closed only after the main coating is dry. When you plaster slopes, the solution is recommended to apply to the surface with a small adhesive.
- All empties that are formed around the edges can be aligned without lighthouses, focusing on a flat surface. The rule should be kept vertically or at a low angle.
- To check the quality of the work done, go through the surface by the rule, applying it at different angles.
- When discouraging more than 1 mm, they need to be removed using a smooth. The resulting cracks can be sealed with a liquid solution, after which it is to upload the rule.
- Lighthouses can be pulled out so that they are not exposed to moisture and corrosion. Just uphold them with a screwdriver and take out gently. The resulting shoes also fill in solution. Apply the mixture in this case more productive.
Final finish
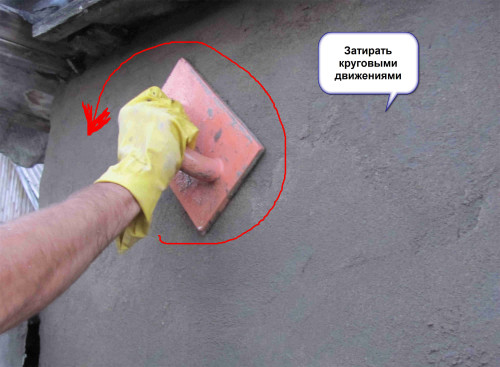
Grout is the last step in plastering. It is recommended to pelt it even until complete graze. At the same time, the surface must be slightly moistened before it starts to frighten. It is most convenient to work on sites about one square meter. Scroll to the smooth and smooth over the surface. At an angle of forty-five degrees strongly press the smoothness to the plastered surface and smear a smooth thin layer. When a solution cannot be collected on the instrument, you can stop movement. If everything is done correctly, the wall becomes perfectly smooth.
Squares need to smooth out the mustache on each other. Try to do everything in one coming without a break, so as not to give the previous square to dry.
The technology of plastering the walls of the facades is practically no different from the above, but the work can be performed only at a plus temperature. In addition, for external work it is better to use a mixture based on cement. It will also be superfluous to install a reinforcing grid to increase strength. Especially if the main wall material is silicate brick.
As you can see, plastering walls with your own hands, the process is quite time consuming. Nevertheless, you can save big money if you do everything yourself. Good luck.


