Plumbing for toilet: installation tips Plumbing
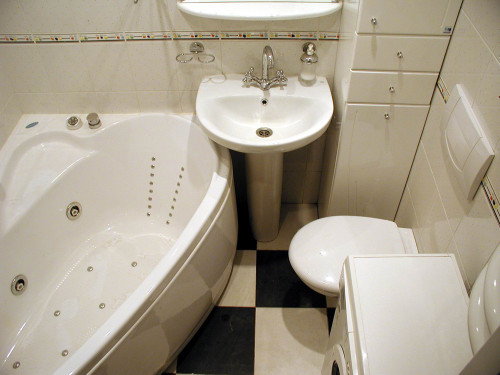
Plumbing for the bath and toilet must be installed correctly so that there are no problems during operation. It is also important to find the optimal position for each device to rationally use the room area. In order to fit the toilet plumbing in small bathrooms, the repair involves combining the toilet with the bathroom.
Content
Advantages and disadvantages of united bathrooms
The advantages of combining bath with toilet are obvious and consist in the following.
- Useful area significantly increases due to the "dead" zones not used earlier.
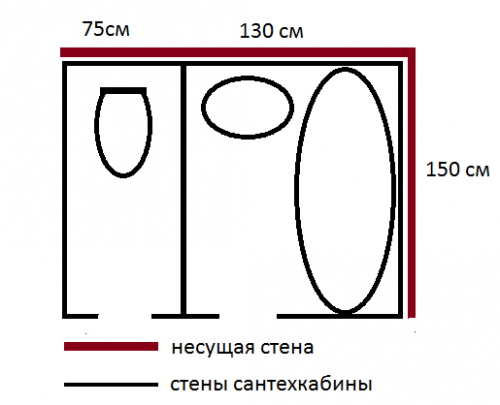
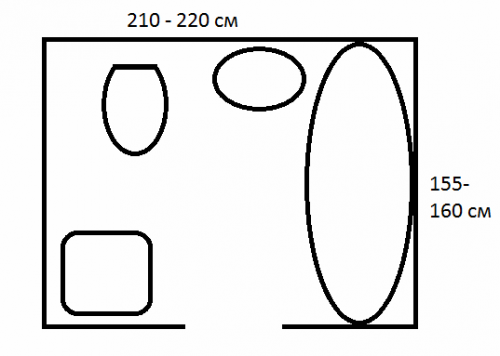
- New opportunities appear to accommodate sanitary ware. If desired, new household appliances and plumbing for the toilet will be installed (see below), which there was no place for reconstruction (shower, bidet, extra sink, washing machine).
- After disassembling the overlap of the plumbing block, the height of the ceilings will increase. This will facilitate the installation of the shower.
- The opportunity is given for the embodiment of various design solutions.
The disadvantages of the association is also worth mentioning:
- there is a need for documentation;
- it is necessary to complete the reconstruction of the power supply, water supply and sewage;
- it is required to perform a large amount of dismantling and construction work;
- there are inconveniences associated with the impossibility of using the premises by two visitors.
After all construction and installation works are performed, plumbing is needed in the toilet combined with the bathroom. Buy plumbing for the toilet with the bathroom - the floor of the case, it is important to install it correctly. To do this, it is not necessary to invite experienced specialists: plumbing in the toilet will be installed correctly subject to the following recommendations.
How to change the plumbing in the toilet: installation of toilet
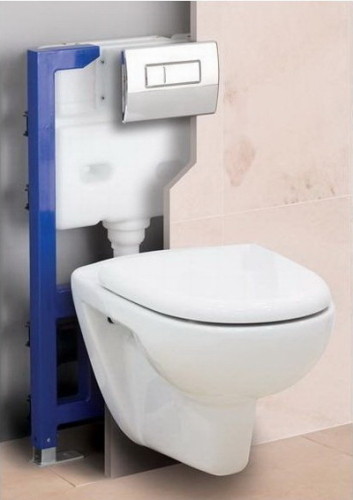
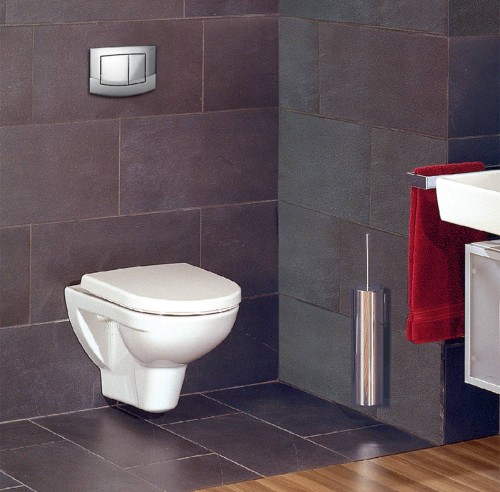
After dismantling the old, the new toilet is usually set to the previous place. This is due to the fact that the drain pipe is also not moving. But there is a different type of plumbing for the toilet: toilet bowls, besides ordinary, there are still suspended. Their advantage is that all reinforcement can be hidden behind a false wall.
Installation of suspended toilet
Suspended toilets are original plumbing for the toilet. The prices of them are higher than on the outdoor models like "compact", but this is compensated by aesthetic advantage.
For installation, the next set of tools and devices will be required:
- shock drill (perforator) with a set of drills;
- hammer;
- horn keys;
- roulette;
- construction level;
- rubber cuff;
- silicone.
The technology of mounting the suspension toilet suggests the following procedure.
- The body installation height is determined: it should take a position convenient for everyone living in the house. Typically, the distance between the seat and the floor is 40 cm.
- In accordance with the instruction attached to the design assembled by the manufacturer in the form of a rigid metal frame (installation), marks for holes for anchor screws are applied to the wall at the installation site.
- Installation set and fixed by screws. The correctness of its position is controlled by the level.
- If you need to adjust the position of installing the suspended toilet with the reinforcement relative to the wall in the mounting places, metal washers of the desired thickness are installed.
- The drain hole of the toilet is connected to the sewer with a flexible rubber cuff.
- The docking points of the cuff with a pipe and a drain hole of the toilet bowl are sealed with silicone.
- The tight tube to the tank is supplied with water.
- Frame installation is closed twin sheets of plasterboard, which subsequently is lined with ceramic tiles. The water shutter button is installed outside.
Installation of the outdoor toilet type "Compact"
There are several ways to install the toilet bowl of this type.
- On a wooden basis: For this, the board is necessary to pre-mount the board, discharged in the form of the bowl of the toilet, taking into account the reserve of 3-5 cm. The board must be made of solid wood treated with antiseptic and water repellent. The toilet is screwed to the board with large screws.
- With the help of epoxy resin: glue composition is uniformly applied to the floor toilet bowl from the bottom side, after which the toilet is installed in its place. The plumbing device must remain fixed until the epoxy is completely frozen. Additional screw mounting is recommended, for which it follows in advance drilled holes to install plastic fillers.
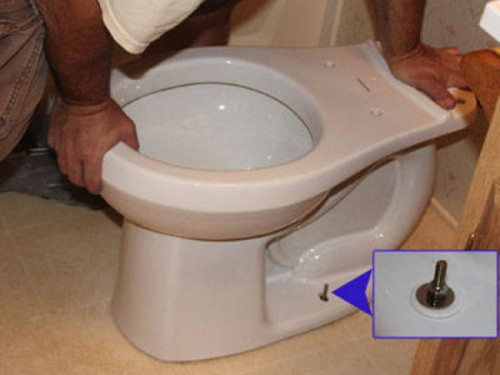
- Using anchors: Used in the case of installation of toilet bowl on tile. For the entire length of the anchor bolts, holes are drilled where the anchor is inserted. A layer of silicone is applied onto the leg of the toilet, the toilet is installed in place and fixed with screws. You can use Santechpribor immediately after installation.
Attaching toilet to the sewage and water supply
After installing the toilet, it must be connected to engineering communications to ensure a set of water in the drain tank and draining it into the sewer system. To connect to the sewer tube there are several methods:
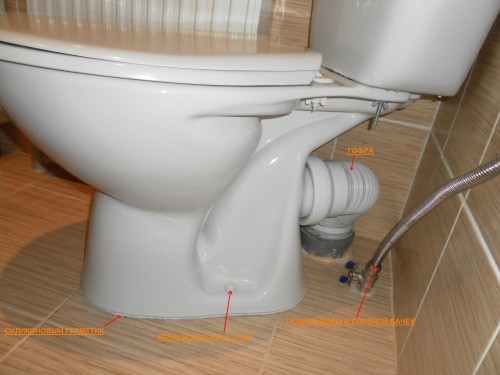
- using corrugated sleeves (used to install the toilet at an angle);
- using plastic eccentric (convenient to install a toilet bowl with a displacement relative to the drain sewer hole).
The tightness in the places of a loose fit of the connectors to the pipe is provided by the use of sealant or cement mortar with the addition of "liquid glass".
According to the method of the direction of the yield of the drain hole of the toilet, there are the following types:
- with horizontal release;
- with oblique release;
- with the release of the floor.
It is connected to the toilet water supply with flexible hoses with a metal braid. Tightness is achieved using rubber gasket or fum-ribbon. When tightening the nut, you need to hold your hand inlet valve to prevent its gross.
There are tanks with lower addition and sidelines. It should be provided for the installation of a ball valve to disconnect the water supply to the need to repair the reinforcement of the tank.
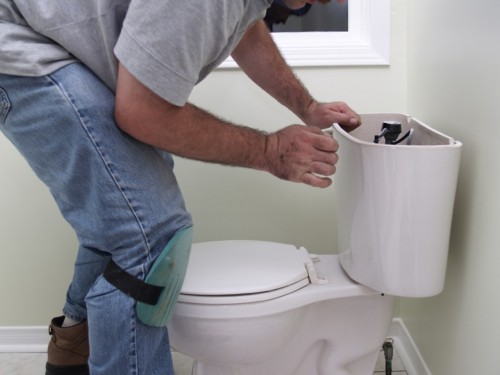
Installing water tank
For sale, floor toilets come in disassembled form. After making sure the availability of all necessary rubber pads, proceed to the assembly. The procedure for connecting a tank to the toilet consists of three stages.
- Installation of drain and bulk reinforcement in the tank. It is important that all floats and other moving parts are at some distance from each other, as well as from the walls of the tank.
- Tank mount to the toilet body. In places of attachment, rubber gaskets and screws are installed. The lamb nuts are evenly tightened from both sides.
- Install the tank cover and push-button mechanism.
- The tightness and correctness of the installation of the entire system by set and shutting the water is checked.
Important: When attaching a tank, the maximum torque should not exceed 3 nm to avoid cracks. To achieve tightness before installing rubber gasket, sealant is applied. The system is not filled with water until its full pouring.
If there is a free space, an additional plumbing is installed for the toilet - bidet. Fastening to the floor and the bidet connection is performed similarly. Water is supplied instead of a tank to the crane of a special design.
How to install a bath
Baths are manufactured from various materials. Distinguish:
- cast iron: well hold warm and serve for a long time, but their main drawback is a big weight;
- metal: poorly hold warm, and the service life is limited due to the thin layer of enamel;
- acrylic: attractive externally, light, but unstable to mechanical damage.
Instructions for installing an acrylic bath
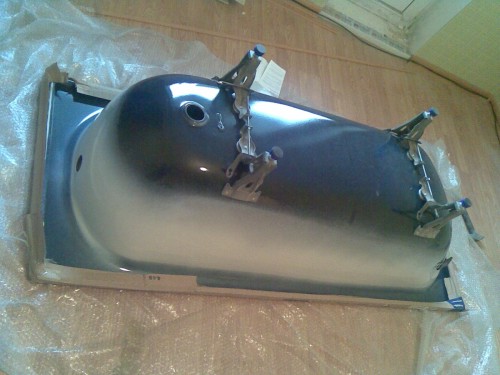
The acrylic bath in the standard embodiment is installed on the frame according to the scheme developed by the manufacturer.
Phased description of the installation process.
- Installing frame and legs. After performing markup, the drill is not deep holes in such a way as not to damage the smooth inner layer.
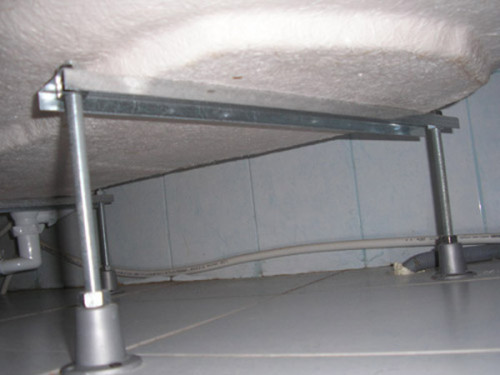
- Put the bath on the legs and regulate the level horizontally and height. In the event that the design of the legs does not provide for this, put the plates of metal.
- On the wall make marks for mounting hooks, after which the bath is temporarily assigned to the side.
- Fasten the mounting hooks (necessary to provide stiffness of the structure) and install the bath in place and fasten.
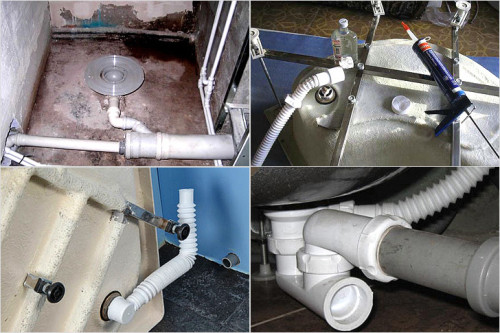
- Installation of a siphon: At first, the upper drain hole is attached, and then the bottom, after which the siphon is collected.
- Install the screen.
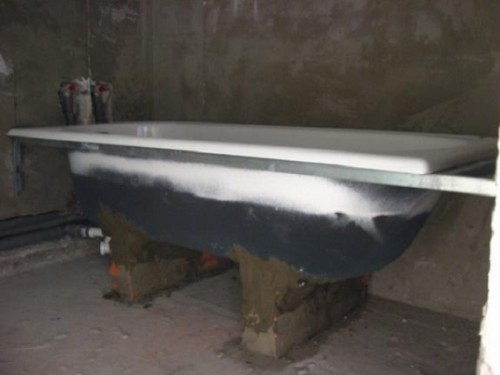
In the event that the metal frame bundled with the bathroom was not supplied, the installation is performed on a frame from a bar or a design folded from bricks. The bar must be treated with an antiseptic agent.
Cast iron bath tips
- The cast-iron bath must be installed only on specially designed legs.
- Connection to sewage is performed by rigid plastic pipes. Corrugated quickly clogged, and their cleaning is complicated.
- A revision hatch should be provided in the bath screen to access the siphon. Periodically, it is necessary to fully disassemble it for cleaning.
- Twisting plastic parts of the siphon (during installation) is performed manually, without the use of tools to avoid damage to the thread.
- When assembling a siphon, it is recommended to use a sealant.
- Connecting the mixer to the water supply is performed by pipes from heat-resistant material.
Installation of the shell
Before installing the sink, the installation of water supply and sewerage should be completed. Pipes are recommended to climb into the wall, accurately calculating the place of their output: it must be exactly in the middle of the shell. This is important in order to continue the communication to be hidden behind the pedestal.
Phased the process of installing the shell can be submitted as follows.
- The installation location and the height of the shell is determined. This should take into account the height of the pedestal.
- The sink is temporarily attached to a certain place on the wall, after which marks are made through the mounting holes.
- The siphon is installed on the sink: it is recommended to be made before the sink is posted in its place. All burrs from the surface of plastic parts should be removed.
- The mixer is installed, supplying flexible flexible hoses for water are screwed. It is easier to complete the end of the shell.
- In marked places, drill holes for anchor bolts: they must be located on one horizontal line. They are attached to the sink. Nuts are screwed over plastic washers. It should not be made excessive efforts: ceramics can crack.
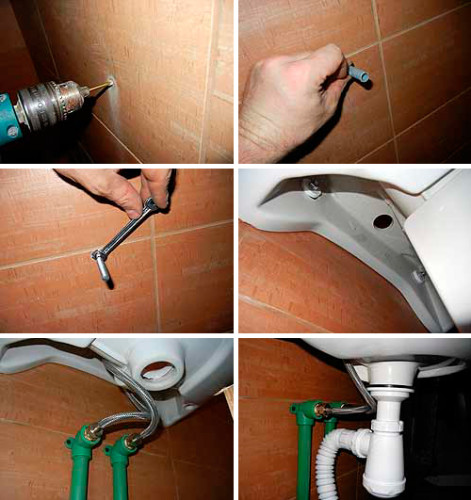
- Install a pedestal.
There are options for installing sinks on the end and a suspended way. Installation technology is similar.
Instructions for installing the shell complement the video tutorial with a specialist comments.
Installation of the shower: Step-by-step instructions
To work, you will need a tool and fixtures:
- roulette;
- corolnic;
- ruler;
- building level, plumb;
- drill, perforator;
- construction tools;
- hacksaw;
- screws, dowel, finishing material.
Except when the room is specifically prepared for the installation of the shower, the installation begins with the installation of the pallet. Pre-assemble the sewer system so that the fool is under the place of plum. Further actions are performed in a certain order.
- Details of the drain attach to the pallet, providing tightness.
- The pallet in the assembled state is installed in its place and the adjustment of the legs are achieved its horizontal position.
- The junctions of the drain pipe are treated with a sealant.
- Copper wire mounted grounding of metal parts of the shower.
- The places of attachment of the wall profile are noted, for which it is installed on the edge of the pallet.
- Holes drill without hitting a drill with a carbide attack. After passing the tiles, you can turn on the perforator mode.
- Plastic fillers are inserted into the holes and fasten the wall profile.
- The doors are installed and adjustable: they should be freely open and closed, tightly adjacent to the edge of the pallet.
- Installed fixed shirma so that its edge fits tight to the door to the door. After adjusting the shirma is attached to the wall profile.
- All joints and cracks are processed by sealant.
- The pallet screen is installed.
The installation of the shower cabin can be simplified in the case of acquiring the design of the "Boxing" type. Installation of such a plumbing device is reduced to connecting its conclusions to sewage and water supply. 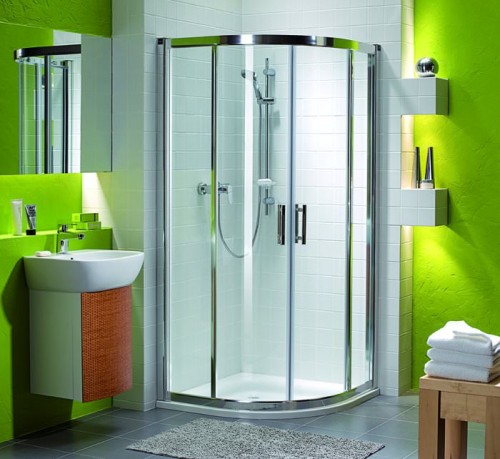
Many model of shower cabins like "Boxing" are equipped with additional features, which requires control of water pressure and connecting to the power grid. The latter is performed in compliance with all security requirements:
- to connect "Boxing", a separate cable in the shield should be provided by a two-pole machine;
- metal parts of the cabin must be grounded;
- to protect against leakage currents, the RCO must be installed - a protective shutdown device;
- lighting and sockets in the room must be in moisture-proof.
Using the recommendations set forth in the article, you can independently install plumbing devices.


