Finishing the foundation of the house do it yourself Construction
The base of the building (visible part of the foundation) not only protects it from the effects of groundwater and cold, but also performs a decorative function. Finishing the foundation of the house is performed using various materials. Basic requirements for them: Resistance to aggressive external influences and aesthetic appeal.
Content
Materials for finishing the foundation of the house
A successful design of the base will emphasize the style of the entire building. Designers and manufacturers of building materials offer the following options for finishing the foundation of the house.
- Facing stone and clinker tiles. This thin material (from 8 to 21 mm) after laying imitates a solid clinker brick. Limestone, natural granite, marble and sandstone tiles are also used. The tile sticker is performed using a special glue. The seams are filled with special composition.
- Finishing with polymer materials: with a light composite tile resembling ceramic, can be facing light frame structures that closing screw piles or a bar base. Fastening is carried out using a woodcase cladding or metal profiles and self-tapping screws. Technology does not exclude the use of insulation (they are laid behind the tile).
- Using materials made on the basis of resins. Tile thickness, externally resembling natural sandstone, is about 3 mm. The advantages of it - in high strength and ability to bend, which can be used for cladding of curvilinear surfaces and corners. Installation is carried out using special glue.
- Facing with artificial stone, externally resembling natural. The edges can be both smooth and "ribbons". This material is frost-resistant and aesthetically attractive. Facing work is carried out using tile glue.
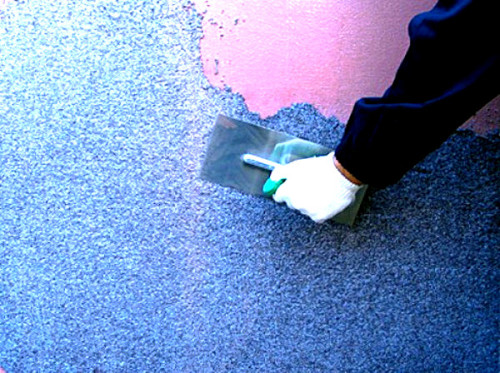
- Finishing with decorative mosaic plaster. The main component of it is mineral grains in size in the range of 0.8 - 3 mm. The base of this material will be reliably protected from moisture and mechanical damage. The working arm is applied and is distributed over the surface of the foundation with a wide spatula.
Finish the foundation of the house under the stone
The greatest popularity among these methods should be highlighted with the trim of the base of the house under the stone. This contributes to:
- aesthetic attractiveness of the material;
- a wide range and availability of tiles;
- environmental Safety;
- long service life;
- good protective properties of natural stone and ceramics.
Finishing foundations of private houses is carried out by the following types of natural facing materials:
- marble;
- granite;
- porcelain stoneware;
- sandstone;
- fake diamond;
- clinker tile or brick.
Finishing the foundation of the house with their own hands is performed in compliance with certain rules. You can proceed to work if there is a necessary tool. It will take:
- bulgarian with cutting and sharpened discs for stone;
- roulette;
- brush, roller;
- putty knife.
A phased description of cladding technology.
The preparatory stage consists of the following operations:
- pouring of concrete slaughterhouse around the perimeter of the building;
- installation of insulation and waterproofing base;
- alignment and stripping of the surface of the foundation (depends on the consumption of adhesive mass and the quality of gluing plates).
After the surface is aligned, it is necessary to check its quality using the level and rule, after which you can begin the following actions.
- Rounding processing with a special means - concrete contact of a large fraction: this will provide better adhesion of the adhesive solution to the surface. Concrete contact with roller or a wide brush.
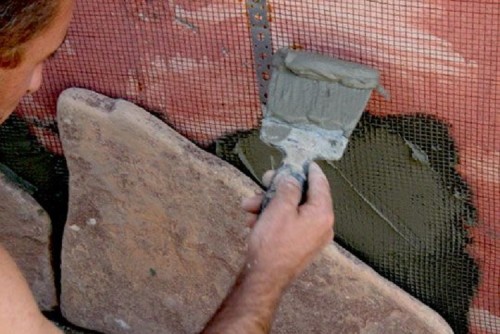
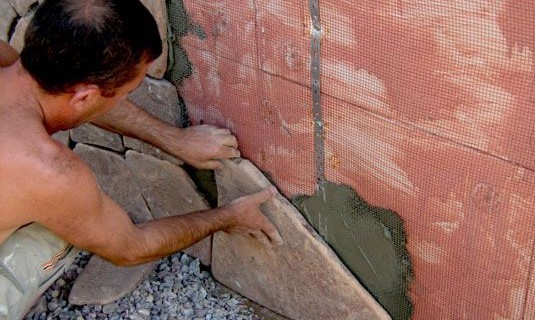
- On the selected fragment of the natural stone of the desired size or tile apply glue, and then press tightly to the base, carefully tapping (in order to prevent the formation of aircases).
- The next stone or tile is glued similarly. It is important that their facial side lay in the same plane.
- The stones are chosen so as to gradually fill the entire foundation plane. Small emptiness fill in small fragments. It is recommended to pre-collect cladding sites on the pallets, after which to transfer them to the wall. If necessary, stone or tile cut the grinder with a special circle.
- The front sides of the stones and tiles are cleaned from the solution before it is frozen, and the seams are filled, providing tightness.
Important: Heavy stones and facing plates are glued with special glue, providing a reliable connection. Such glue is more expensive than ordinary glue for external work. For reliability, plaster metal mesh is installed.
Finishing the foundation house siding
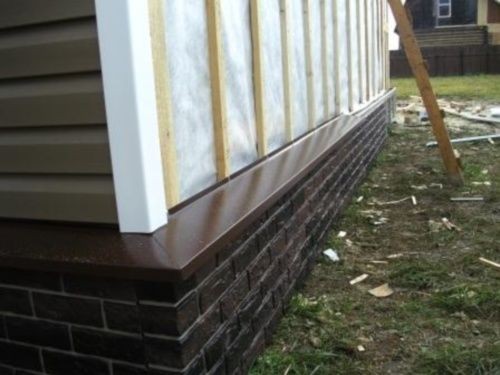
In the event that the base of the house is a columnary structure of stone, concrete or screw metal piles, it is necessary to close the gaps between the supports. Make it is the easiest way with the help of special siding.
Finishing the foundation of the house (see photo below) with such material allows you to get a surface, externally practically not different from a lined with natural or artificial stone. The advantages of this method:
- relatively lower cost;
- long service life;
- easy and installation speed.
List of tools and materials required for work
It should be at your disposal:
- long (at least 600 mm) Construction level or rule;
- roulette, marker, markup cord;
- perforator;
- dowel-nails in the amount of 1 pcs per 400 mm profile;
- self-tapping screws with wide hats or washers (for fixing panels);
- edctrolobzik, Bulgarian, Screwdriver;
- passatia;
- hammer.
In addition to siding, a metal profile of the UD type will be required (if necessary, be replaced with wooden bars treated with antiseptic). We need a runneroid in small quantities (to protect the corners of the base of the house), as well as the insulation (mineral wool or polystyrene plate).
How to calculate the required number of panels
Manufacturers offer panels of two sizes:
- 79.5 × 440 mm;
- 1270 × 470 mm.
The sum of all sides of the base should be divided into the length of the panel: Thus, we know the required amount. At the same time, the height of the base should be taken into account: if it exceeds the width of the panel - it is necessary to purchase an additional material, the number of which is calculated additionally.
The panels are best acquired with a reserves for rejection and taking into account waste arising from the design of the corners of the structure.
In addition to panels, the starting plank may also be needed (in an amount equal to the perimeter of the house), the tump and other challenges.
IMPORTANT: As a good item, not intended for this materials cannot be used. This can lead to deformation and cracking panels. The same applies to the elements for the construction of the face.
Phased description of the process of cladding
- Preparatory stage: Clean the adjacent territory and dismantle the temporary porch.
- For the foundation on the screw piles, a mounted case is required, to which the panel will be fixed.
- We note on one of the columns the level of the starting profile. It should be about 5 cm above the ground level so that the spring bending of the soil does not lead to the deformation of the siding panels.
- Using the level and marking cord, we carry the level for the starting profile on all other racks.
- Knowing the width of the panels, lay the corresponding distance from the starting profile up and mark on all base racks the level of fastening of the top profile. In the event that the base height exceeds the width of the panels, additional profiles are installed. Intermediate profiles should also be provided.
- Fresh profiles of a dowel-nail to brick racks or stone. In the case of the use of steel screw piles, welding works will be needed to install additional fastening elements of the crate design.
- Starting from the left corner of each side of the house, kpripim self-drawing with wide siding panel hats, setting them by the lower edge in the starting profile. Self-tapping screws should pass through the holes provided by the design panel on the right edge. The next panel should close the hats of the screws with its left edge.
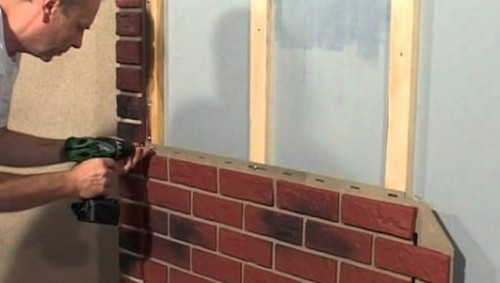
- Corners decor special profiles that are attached strictly vertically. At the same time, the starting profile must be approached close to the corner (the intake is allowed - 1 cm).
- Between the panels, we leave the gap (about 2 mm) to compensate for their thermal expansion. The length of the last panel is adjusted in size, shorting with the help of a grinder.
- The top edge of the panels is closed by popular profiles. The seams between the panels fill suitable color sealant.
Important: If the panels are fixed into several rows - combine the face pattern. At the bottom of the starting profile, the grinder make small feeders to ensure the drain of the rainwater.
In conclusion, we suggest familiarizing yourself with the video demonstrating the process of finishing the base of the house.


