Bath trim with plastic panels do it yourself Walls,Building materials
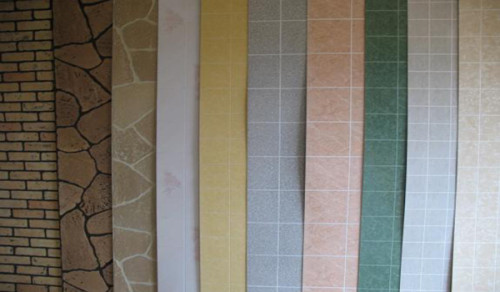
Bathroom finishing with plastic panels is the most economical and fast repair method. Manufacturers offer different types of this material. With the right choice and successful combination, using plastic bathroom panels, you can create an original interior. The facial surface of the panels can imitate natural wood, stone, brickwork or mosaic.
Content
Types of plastic panels
They got the spread of plastic panels for the bathroom (photo attached) of the following types.
- Rank panels: They look like a wooden lining. Connect the same - spike-groove. Install them, as a rule, only on the wall and fasten with the help of special brackets. The panels are vertically (for visual increase in the height of the ceiling) or horizontally (the area visually increases).
- Panels with imitation tiles. The technology of their installation does not differ from the one that is used for the roll panels, but the appearance of the lined surface is characterized by originality. This manifests itself to the greatest extent when laying the panels in a checker order. Panels with sides from 300 to 980 mm are manufactured.
- List panels: Outwardly resemble a plate of fiberboard or a fane with a thickness of 40 mm, the front side of which is laminated, and the drawing resembles ceramic tiles. Fastened to the wall with glue and nails.
Advantages and disadvantages of plastic panels
In order to make the right choice of finishing material, it is necessary to take advantage of its advantages and disadvantages. The advantages include such properties of plastic panels:
- good level of sound insulation;
- practicality: easily mounted with ordinary detergents;
- flexibility to use the material on non-ideally smooth surfaces;
- resistance to moisture and ultraviolet;
- resistance to biological effects (not the habitat of fungi and mold);
- compatibility with different lighting device diagrams (embedded luminaires, LED ribbons, etc.);
- the ability to hide the base defects (the installation of plastic panels in the bathroom does not imply special preparation of the surface of the walls and the ceiling);
- ease of installation: installation of panels does not require high artist qualifications;
- attractive appearance.
Disadvantages make up the following list:
- the surface may be damaged by even a non-a random strike of an acute subject;
- do not allow walls and ceiling "breathe", which requires the device of the ventilation system;
- low quality panels can highlight the smell.
Installing plastic panels in the bathroom with your own hands: Preparatory work
Plastic panels can be mounted on top of the old surface without its special training. But some nuances must be taken into account.
Preparation of the foundation
- The thick layer of old plaster is recommended to remove: this will save the room.
- It is necessary to replace or repair engineering communications so that you do not have to dismantle the panels. Metal must be replaced by plastic, and hide thick pipes in the stroke.
- A new wiring is paved to the place of installation of sockets, switches and lamps.
- In the raw rooms, the walls are pre-treated with an antiseptic agent.
- In that case, if the installation method is selected without a crate, the walls should be aligned and handled deep penetration: the glued panels will hold better.
Tools, devices and materials required for work
Bath finishes with plastic panels with their own hands suggests the following:
- perforator - for fastening the crate;
- scissors for metal (in the case of applying metallic profiles);
- electrolovik;
- screwdriver;
- selflessness with fillers or dowel-nails;
- stapler construction with brackets;
- level, roulette;
- marker;
- liquid nails (in case of installation of panels without crates);
- metal profiles or wooden bars;
- plastic panels.
Calculation of the number of materials
To calculate the number of plastic panels, calculate the total area of \u200b\u200bthe walls and the ceiling. It is necessary to take into account the sizes of the facing material.
- The lining is distinguished by the presence of a wide lock, is manufactured with a length of 3 m, 10 and 12.5 cm wide. At a smaller height of the ceiling, the lining will have to trim, as a result of which a lot of waste is formed. You can reduce them using a combination of different color panels connected by a special profile.
- Seamless panel: produced by the lengths of 2.6; 2.7; 3.0 m (selected depending on the height of the ceiling). Width can be different: from 10 to 50 cm.
- PVC plates or sheets go on sale 105-405 cm long, 80-203 cm wide.
In addition to plastic panels, plinths are needed and angular profiles. All materials should be purchased with a small margin (about 10%) to compensate for the marriage and unnecessary costs associated with the mounting feature.
General Facing Rules with Plastic Panels
Regardless which material is selected for the bathroom finishing, some nuances should be taken into account during the repair.
- Before fixing the panels, they should be withstanding for two or three days in the bathroom room without unpacking.
- The cavities under the panels are recommended to fill out non-hygroscopic thermal insulating material (for example, from extruded polyurethane foam).
- Reiki claws must be attached to the wall in a strictly perpendicular direction relative to the panels.
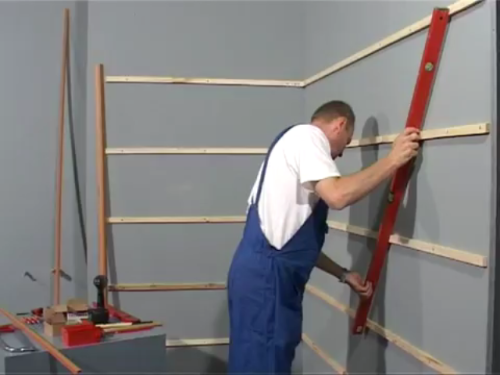
- To ensure the ventilation of walls in the raw room, what is the bathroom, it is necessary to install ventilation grilles in the lower and top of the walls. To ensure the movement of air in the crate make contreels.
- To avoid the accumulation of condensate, the panels on the walls should be placed only vertically.
- Start a lining on the left side of the wall, moving to the right.
- When drilling and cutting panels, the tool must be located on the front side: this will help avoid chips and the visible parts of the facing material. Cutting is recommended to perform with a building knife.
How to sew a bathroom with plastic panels: phased instruction
There are three ways to install plastic panels on the wall. How to separate the bathroom with plastic panels with minimal loss of useful area? We offer to use the following technology.
Facing wall panels with glue
In the event that the walls in the bathroom are perfectly even (for example, in panel houses), the panels are glued to them. Small depressions are allowed, the bugs should be eliminated. The sequence of action during installation is as follows.
- We process the primer surface of the walls.
- After drying the primer, the glue "Liquid nails" glue into the walls and on the back surface of the panels. It is not necessary to apply glue too close to the edge of the panels: as a result of pressure, it can perform and spoil the face.
- Facing starting from the left corner of the wall, opposite the entrance to the bathroom. In accordance with the instructions for using glue, one by one press the panel to the wall, after which we separate and let me dry for 5 minutes. After that, we again set the panels in place and press, orient them strictly vertically.
- Corner compounds form using special profiles.
- Between the panels, the floor and the ceiling should be the gaps of 3-4 mm, which are subsequently closed by floor and ceiling plinths.
Important: When designing inner and outer corners, you can do without special profiles. To do this, you need to make vertical cuts in the right place to do vertical cuts in the right place, and remove a narrow fragment. After that, it remains to bend the panel at the right angle. This method is good for decoration of sharp and stupid angles.
Fastening the panels to the crate of self-draws or stapler
How to make a bath with plastic panels aesthetically attractive, if the walls are initially indulgent? The work in stages can be described as follows.
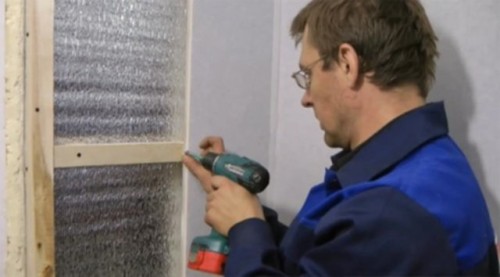
- We apply marker or painting larger markup for fastening the frame. The distance between horizontal parts should be about 0.5 m. At the top (under the ceiling) and at a distance of 10-15 of the floor, the lattice is mandatory.
- An additional framework is installed around the doorway. Reiki, a special plastic or metal profile must be in the same plane, for which the bars or pieces of plywood are put in the right places under the crate. The position of the rail (profile) is controlled by the construction level and plumb. Additional rails are also attached in the corners.
- In the corner where the first panel is recorded, there must be a starting profile. It is screwed with self-tapping screws.
- The first panel is inserted by a narrow shelf to the starting profile, and a wide shelf "shoot" to the crate with a construction stapler or fasten with self-draws.
- The following panels are inserted into the grooves of the previous ones and are attached to the above method. In the corners, the corresponding profiles (external or internal) are installed.
- The last panel is inserted into the groove of the profile with some effort.
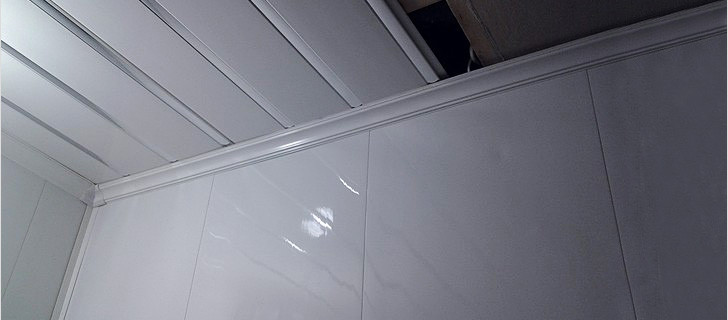
- Ceiling and floor plinth closed slots.
This is important: the ceiling cladding in the bathroom is similar. Before fixing the panels, you need to install wiring for embedded luminaires.
Fastening panels clips
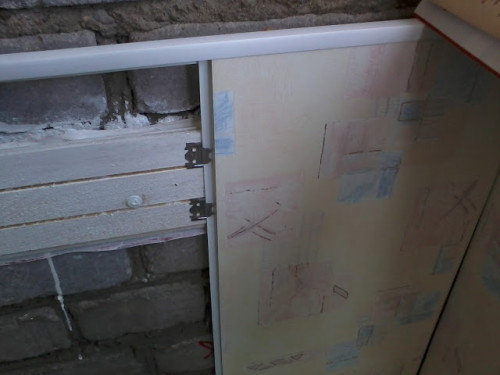
To fix plastic panels to a wooden crate, you can use special clips. This will make it possible to substantially alleviate and speed up the installation. Work is performed in stages.
- Installation of wood bars is installed, as described above.
- Starting corner is fixed by self-drawing.
- Panels are installed, the wide shelf of which is pressed by clips.
This method allows you to save the panels with integer, without visible traces after fasteners.
Facing a bath with plastic panels: video with comments and useful tips will complement article article.
How to care for surfaces from plastic panels
To contain in the purity, the bathroom, walls and ceiling in which are lined with plastic panels, the following rules must be followed.
- Wipe plastic only with a soft cloth.
- Conventional pollution and dust are easily removed with warm water.
- The sweat surface of the light panels can be restored using ammonia alcohol.
- You can not use abrasive detergents (pastes and powders).
- From oil spots you can get rid of the rubbing with a soft cloth moistened with a special means. Acetone, gasoline, other chemically aggressive solvents and alkaline soaps can damage the glossy surface of the material.
When complying with the installation and care rules, plastic panels in the bathroom will last long years.


