Drainage with their own hands Plumbing

In order for its own home to become reliable and cozy, in the process of its construction requires attentive attitude not only to the processes of choice and assembly of the main major elements of the design. An equally important protective function is carried out by drainage, the competent organization of which will allow you to protect the walls and the roof of the house from premature destruction, and also eliminates the occurrence of personal inconvenience when approaching the building due to the water flowing throughout the perimeter and the large puddles and dirt on earth near it . How to make the right drainage with your own hands, you will learn from this article.
Content
Criteria for choosing drainage systems
Design type for water removal, materials from which it makes it, select, based on the following criteria:
- annual precipitation in the area where you plan to build a house;
- the total area of \u200b\u200bthe roof and its configuration;
- architectural solution of the whole building;
- material and shade of roofing flooring and facade walls.
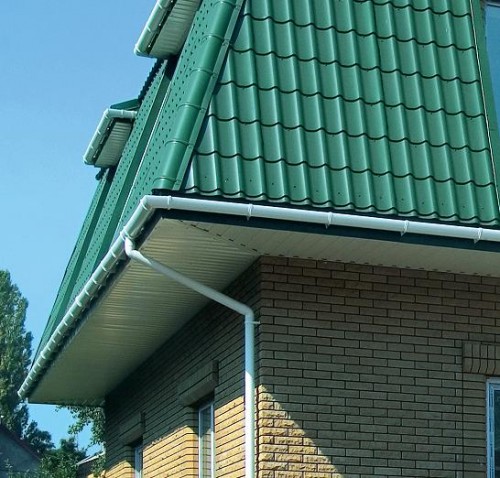
Important! To understand how these conditions are correctly related to the choice of the system suitable for your home, look at several variants of the waterproofs in the photo. Note how harmonious they are combined in a style and provide a full-fledged water removal.
Choosing the location of the waterproof
Before making the drain, select the suitable location of the system. It can be:
- internal;
- outdoor.
Important! The type of roof drainage is determined before building a roof, since the preparation of the location should be made in advance.
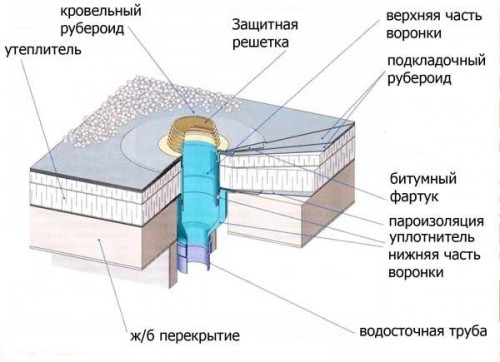
Internal system: Features
The internal system is installed in those houses that have a flat roof or are built in a harsh climate. The main condition in this case is to properly equip a focus on the receptionist inner funnel. 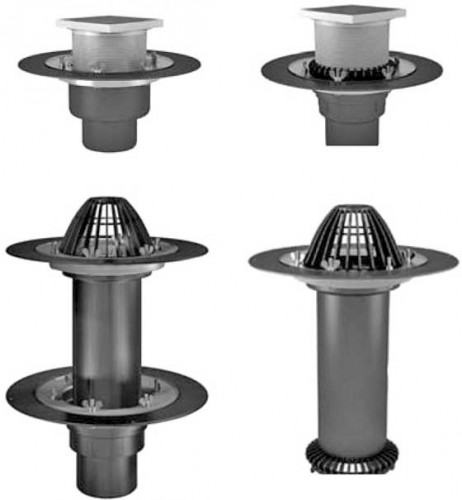
The design of the inner drain includes:
- receiving funnel;
- pipeline;
- collector;
- system service connectors.
Important! The construction of such a system is determined by the requirements of SNiP 2.04.01-85, according to which all the preciputes are discharged into storm sewers.
Outdoor system: features
The external placement system involves the equipment of drainage from the roof on the facade of the building, and so that the incoming water does not violate the integrity of the local area. Fastening the hooks for such drains is performed to the frontal board or directly to the beams of the rafted, so the preparatory period of the system falls at the time of construction of the roof frame. 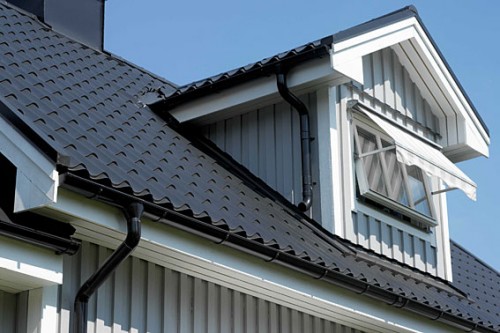
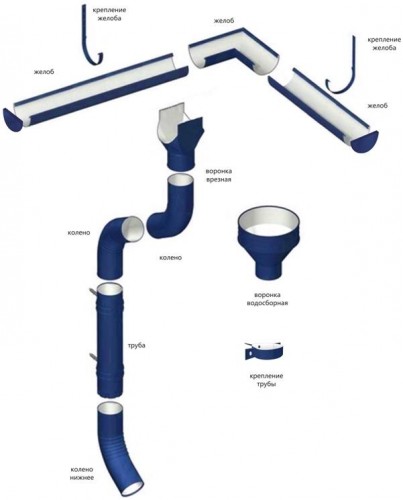
The design elements of the outer drain is:
- draining;
- funnel;
- pipeline;
- chute;
- fasteners - hooks, brackets, pins, clamps.
Rules for organizing drainage
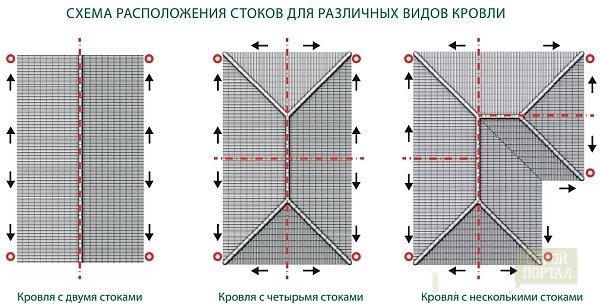
To determine the required amount of drainage gutters, measure the roof length in the scene and determine this way:
- svet length up to 10 meters - set 1 waste pipe;
- the length of the oxle of the roof is more than 10 meters - mount 2 sewage pipes for drainage.

Correctly determine the location of the effluent, depending on the roof configuration, will help you below the proposed scheme.
Calculation of drainage
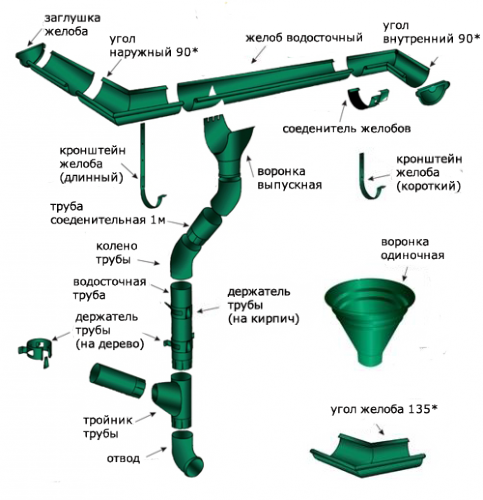
To determine the required amount of all consumables, follow these steps:
- Number of gutters. Since the market presents elements of various lengths, determine the amount you need and parameters in such a way as to minimize waste. For example, metal pipes are standardly released in 2 m long, and plastic products can be 3-4 m. That is, for the length of the eaves of 12 meters, the task is solved easily - buy 3 gutters for a 4 m drainage gutter, and with length in 10.5 M smaller consumption can be achieved if items in 4 m (2 pieces) are +3 m (1 piece).
- Number of connecting couplings. This indicator is determined after the number of chutes is known - the couplings are bought by 1 unit less. That is, if we mount 3 gutters, then 2 couplings will be required.
- The number of water fastening elements. In order to calculate the number of brackets, use the following formula: N (brackets) \u003d (L - 0.3) / 0,6 +1, in which N is the required number of elements, L - the length of the sump of the cornice, 0.6 - fastening pitch .
- The number of angular elements and plugs. This number is determined by respectively the configuration data of your roof. The more difficult profile, the more items will be required.
- The number of funnels. This indicator completely coincides with the amount of drain pipes.
- The number of clamps. This number also defines the number of used drains pipes - to each element purchase 2 clamps.
Children's Choice: Material, Form
To date, such an option, as galvanized drainage, in private construction is used extremely rare, although this option is inexpensive, will last long and facilitates the installation process. Most often, they are used to organize extensive municipal highways of centralized networks. 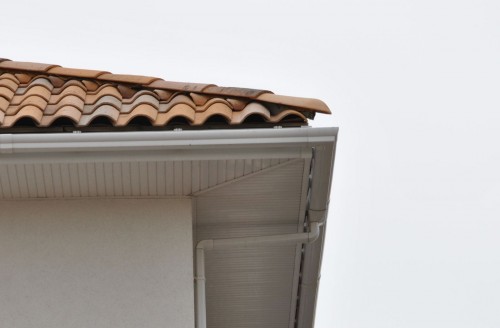
For the arrangement of the cottage, the following options will be suitable:
- Painted metal drainage. Such products look very attractive, but cost more, besides, you will need maximum accuracy when installing, to prevent the chickens of decorative painting.
- Metal elements with polymer protection that you will easily select accurately in the tone of roofing. In addition, they will be very resistant to severe frosts.
- Plastic drainage. This option is ideal when arranging a soft tiles, while plastic elements are distinguished by good strength characteristics in combination with light weight.
Important! In addition to these options, no less interesting copper and titanium drains, but they will be more expensive. With regard to style - the first are perfectly combined with copper roofs, and the second - with the design of the space of metal tile or professional flooring.
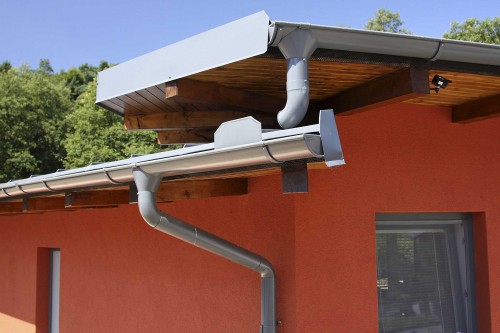
Section type
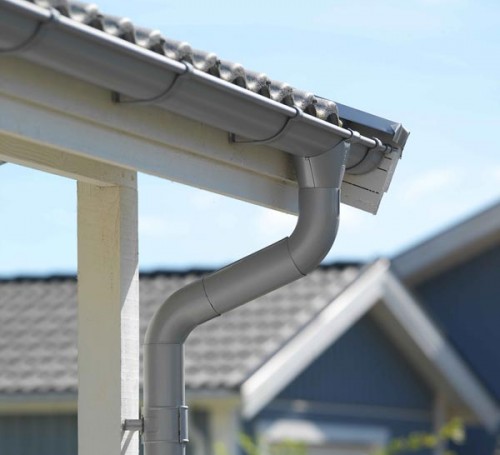
In addition to the material of the drain, inspire and choose a suitable profile, which will be perfectly harmonized with the roof architectural solution. According to this principle, waterproofs are distinguished:
- trapezoidal;
- semicircular;
- rectangular.
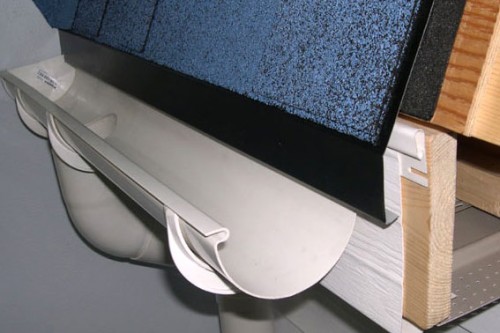
Important! The most in demand - semicircular parts that are equipped with internal ribs in the edges. This principle of the device provides reliable protection against water overflow for the drain.

Production of gutters of drainage with their own hands
In the case when you decide to further save, and do not acquire ready-made gutters and pipes, but to create them with your own hands, follow these steps:
- Prepare steel sheets with a thickness of 0.7 mm.
- Generate the longitudinal edge on sheets to ensure the possibility of a folded connection.
- Prepare a special tool - rolling.
- Roll out from the blanks the elements of the cylindrical and half-cylindrical shape - for pipes and gutters, respectively.
- Cut 3 parts from steel sheet - cone, glass, rim.
- Cut the pipe with a sposue to make a drain element.
Important! Note that the diameters of the rim and part of the cone from which the connection is planned, as well as the section of the bottom of the glass and the pipes must match.
Tools for work
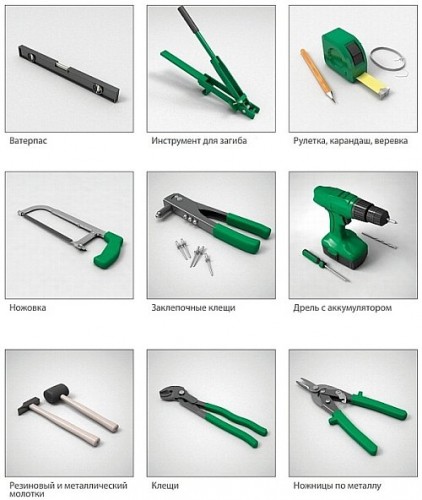
In order to fulfill all the work on the installation of drainage, prepare the following set of tools:
- rope;
- pencil;
- hydraulic level;
- roulette;
- ticks rivet;
- hammers - metal and rubber;
- hacksaw and scissors for metal;
- ticks;
- screwdriver or drill;
- instrument for beating hooks.
Installation of drainage with your own hands
The process of direct installation of drainage is not distinguished by complexity, but requires compliance with the sequence of work. In the course of execution, follow the following scheme:
- Choose the location of the mount - to the rafters, to the extreme board of the crate, top of the rafted beams.
- Select the desired hook type - long, short or adjustable, based on the planned fastening site.
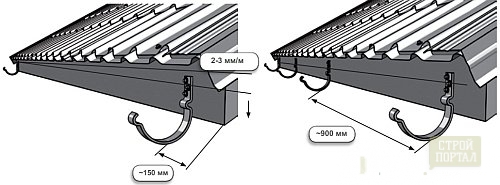
- Calculate the angle of inclination of hook elements or use standard recommendations in 2-3 mm per 6th anniversary meter.
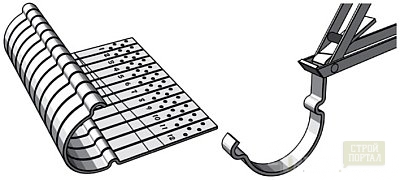
- Name the hooks and tick the fold line.
- Beg the hooks using a special tool, according to markup.
- Set the first hook, withstanding the distance from the imaginary continuation of the roof to the outer side of the gutter in 20-25 mm, or stick to another scheme - 10-15 cm. Distance from the roof edges for the first and last hook.
Important! Start from the edge of the sink, from which the roll will go relative to the horizontal line.
- Install the following hooks, withstanding a step at 0.6-0.9m (Make a choice based on the length of the drainage line of the drain).
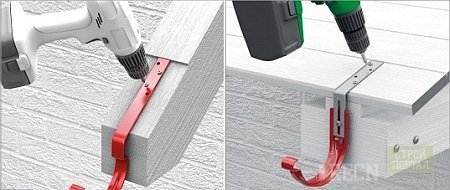
- When installing the hooks directly to the rafters or the initial brushes of the crate, pre-make the grooves for them so that the surface of the beams and hooks is on a single line.
- Mark the groove with a pencil in places where you plan to install funnels.
- Swelling holes with hacksaw.
Important! Do not use grinders for cutting metal.
- Purify the right shape to funnel, removing burrs.
- Treat sections in metal anti-corrosion metal.
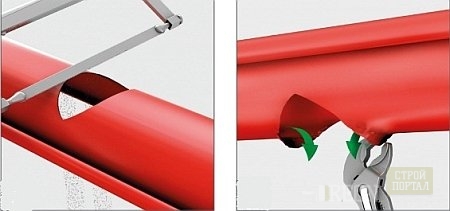
- Secure the funnel to the gutter bending outside.
- Cress the locks-terminals from the inside.
- Install the plugs in the ends of the gutter using the rubber hammer for this.
- Set one-piece design in the hooks, slightly pressing in the pricing places.
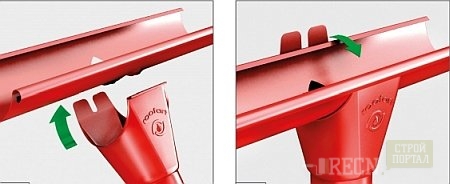
- Connect all the elements of the chutes on the line with the help of lock parts, leaving previously under them between the ends of the gap in 2-3 mm to eliminate the destruction of the system at temperature differences.
Important! To ensure a good level of sealing of joints, apply three lines to the rubber gasket - on the sides and in the center. The back of the lock is fixed to the inside of the gutter, and then press to the external one. Latch the lock and hold down the clamping terminals, then remove all the remnants of the sealant.
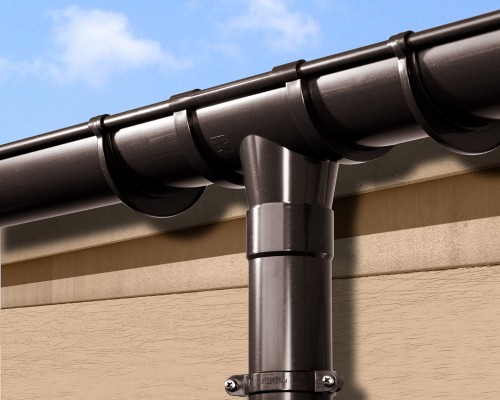
- Drains Install in the marked places, securing them with clamps.
- Distance between clamps determine no more than 2 meters.
- Pipes set with an indent from the wall of 4 cm.
- Fixing the clamps make dowels.
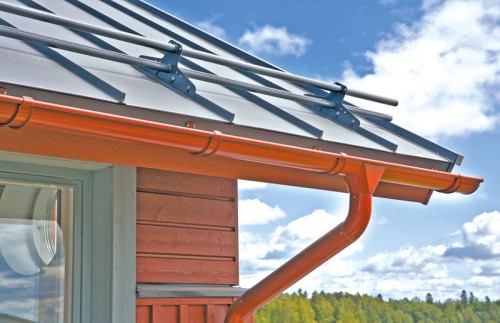
- Install the last knee - drain, fasten to the pipe using rivets, but in such a way that the indentation from the ground to the pipe itself does not exceed 30 cm.
Video
Browse the video how to make drainage with your own hands so that you do not have unresolved questions in the process of performing work.
Conclusion
As you were convinced, the installation of the drains do it yourself - quite fulfilling the task, to cope with which if there are even small practical skills of construction work, will not make problems. The main condition is clearly follow the scheme designated above, make reliable fastening of the drainage, and for a long time you will not have to worry about the poor-quality discharge of moisture from the roof, even with abundant natural precipitation.


