Installation of GKK on the ceiling Ceilings
Already many times it was said that the plasterboard is an indispensable material in repair and construction. With it, you can create a wide variety of designs that will perform the necessary functions. For example, the GLC is often placed on the surface of the walls. It turns out that even the most upholstered wall becomes perfectly smooth. Together with this attractive, the whole room, which previously it could look simply terribly.
Content
- Features of plasterboard sheets
- Preliminary actions before installing HCL on the ceiling
- Tools and devices
- Installation of profiles around the perimeter of the room
- Ceiling markup, as well as fastening of suspensions
- Installation of longitudinal profiles
- Installation of plasterboard sheets
- Putchal material
- Surface finish
The same situation with other parts of the room. Plasterboard is mounted on the ceilings, and sometimes various designs are created, performing exclusively decorative function in the dwelling. For example, it can be a decorative fireplace that is frowning outside with an artificial stone. It will be very good to look like this design, however, compared with the creation of this fireplace will have to spend only a part of the money. But the result will definitely disappoint.
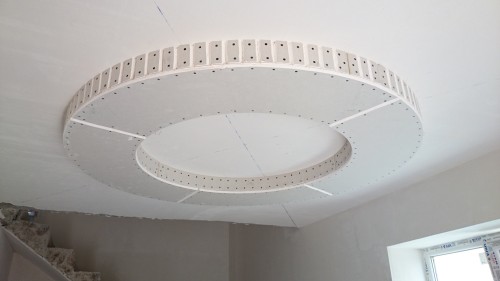
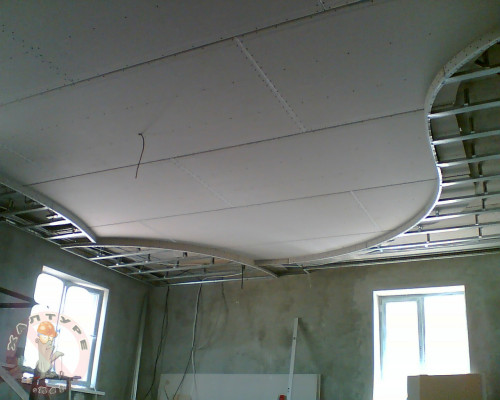
In this article we will try to analyze the main points associated with the installation of plasterboard sheets on the ceiling. This is an extremely common practice that allows us to transform even the most damaged surface into the ceiling perception and aesthetic perception. In addition, in the article we will look at the main difficulties arising in the process of installing GLC.
Features of plasterboard sheets
Before considering the main process of mounting drywall on the ceiling, it is necessary to analyze the most important features of the material. Of course, builders and repairmen note that this resource is almost indispensable, and it does not have significant drawbacks. Of course, there is a material and weaknesses that should be known in the first place:
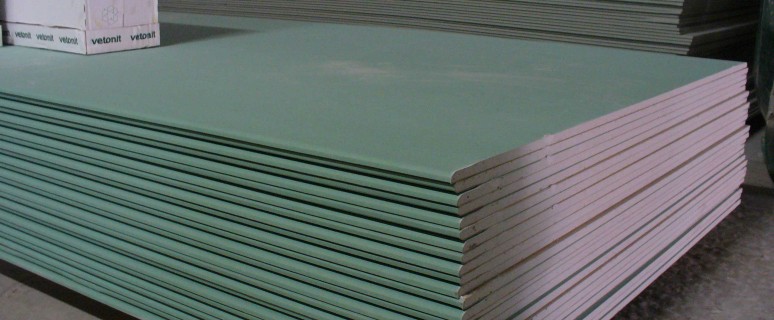
- Low moisture resistance. If the ceilings proceed in your house - in no case can the plasterboard can be mounted, since the material is simply deterrent, and it will have to dismantle it. Moreover, the material is not recommended to install in the bathroom, as well as in the kitchen. Despite this, you can find moisture-resistant plasterboard. Unfortunately, it is significantly more expensive than ordinary GLCs. In any case, often sheets of plasterboard are mounted in bedrooms, or in the halls, therefore there will be no special problems with moisture resistance. Separately, I would like to note that even at low humidity on the surface of the drywall mold can appear. Gradually, it will spread and negatively influence the condition of the material. This must be remembered and regularly checking plasterboard for this problem.
- Low strength. As you know, plasterboard is easy to damage. There were cases when someone in the house stumbled and damaged a drywall structure, not even making major efforts. Indeed, such a problem takes place, however, in the case of the ceiling, everything is somewhat simpler. If the ceiling is high, then it will not be possible to damage it even in children who can play in the room. Despite this, make sure that it is not necessary to accidentally damage the material.
- Mounting complexity. Unfortunately, beginners to carry out the installation of a full-fledged plasterboard design will be quite difficult, or not possible. Of course, it is possible to have on our own, but for this you need to know the technology of installation, and it will not prevent some consultations with specialists. In addition, much in the process depends on the existing space, so all this information needs to be analyzed in advance.
It is also necessary to remember that there are strict storage requirements for drywall sheets. For example, before the material is used for mounting, it must be kept in a dry place.
Advantages of plasterboard:
- Ability to create a unique design. As we have said, based on plasterboard sheets, you can create a variety of designs that can have different dimensions and appearance. There are no worthy analogues in GLC, especially considering the fact that this material is inexpensive. Obviously, to create unique design compositions based on drywall, it is necessary to have experience.
- Security. Plasterboard is a non-combustible material. Moreover, it has no components that would negatively affect human health. All because the sheets of this resource consist of paper and ordinary gypsum. Compared to some other finishing materials, drywall again has no worthy competitors.
- Convenience. Under plasterboard sheets, you can easily hide the means of communication. It may be not only wires, but also various pipes. Moreover, the owners often use space between the base wall and plasterboard for the installation of insulation. In this way, 2 hare is killed - the room becomes attractive and insulated.
Of course, these are only the main advantages of the material. There is still a lot of other details, which you need to know, however, their presence depends on the existing space. Again, as we said, first of all, it is necessary to take into account the disadvantages of the material, since after installation it will be too late to make some conclusions.
Preliminary actions before installing HCL on the ceiling
Before proceeding to the process of mounting the material, we need to install how many sheets of plasterboard will be needed in the process. For this you need to carry out enough simple calculations. It is necessary to know the area of \u200b\u200bthe room and compare them with the dimensions of the material offered in the construction stores. At the same time, additional fastening elements and profiles must also be purchased. Often the number of products can be installed and consultants in the store can establish, so there should be no problems.
It is first necessary to level the walls so that there are no gaps and other problem points when installing the plasterboard.
In addition, it is necessary to monitor the temperature regime in the room. As you know, in this plan, the plasterboard is quite arrogant, so if possible, it is necessary to turn on the heating if the minus air temperature window. If in the street is increased humidity, you should close the windows and take care so that the humidity is lower inside the room. In addition, if the repair work is carried out in winter, indoors must be placed in the room. Keep comfortable for staying in the room temperature. However, the most important thing is to ensure stability.
Tools and devices
Before proceeding with the main part of the work, it is necessary to check if all the tools are needed. It must be said that the lack of one or another can bring many serious problems.
- putty knife;
- building level;
- perforator;
- knife;
- roulette;
- sandpaper;
- screwdriver.
Also do not forget about basic materials that will be useful in the construction process. Among them:
- self-tapping screws and dowels;
- profiles (carrier, longitudinal and start);
- putty;
- crab (element required for connecting profiles).
Again, as we have already spoken several times, depending on the specifics of the process, it may be necessary for some other device or material, so everything needs to be carefully analyzed.
Installation of profiles around the perimeter of the room
First of all, it is necessary to install profiles around the perimeter of space. It is on this basis that it is possible to spend the rest of the repair activities.
- First you need to arm a pencil and construction level. With the help of these devices, you must apply markup around the perimeter of the room. It should be paid to the fact that each millimeter has special importance here, so it is necessary to relate to markup.
- From the baseline, the distance on which the profile will be placed. Experts recommend using the UD-27 profile.
- Immediately after we have decided on the placement location, you need to cut a profile for the appropriate dimensions. It is more comfortable to use grinding for cutting.
- In the marked places you need to securely secure the profile. The holes are done using a perforator, and directly fastening - with the help of a dowel. If we are talking about a concrete wall, then it is advisable to use exactly the scoring dowels. The step between the mounts should be approximately 300 mm.
Ceiling markup, as well as fastening of suspensions
At this stage, we need to think about how to place profiles across the entire ceiling area. It is necessary to ensure the most successful position of all components of the ceiling, and that the future design differs in strength and reliability.
The essence of the markup is that we need to draw the position of the suspensions. Again, it all depends on the existing space, so available issues should be discussed directly with specialists.
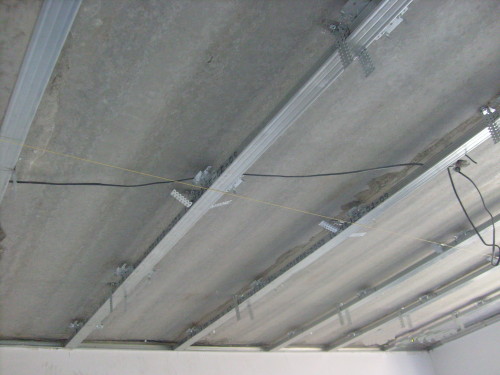
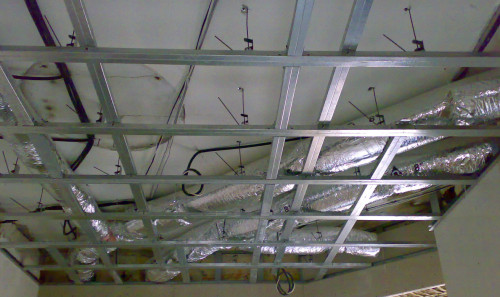
Immediately after that there is a fastening of the suspensions. CD profiles must be inserted into UD profiles, which are often used as starting. It is worth saying that in this case a small backlash will be present. Directly mounted the guide elements of the structure are mounted. With the help of a laser level, you need to ensure that there are no serious deviations from the horizontality.
Installation of longitudinal profiles
Immediately after installing the longitudinal profiles, our design becomes tough. Now you should determine the distance between the longitudinal profiles. If we are dripping a longitudinal profile, then this distance is often limited to 400 mm, and in the case of transverse - 600 mm. To attach two or more profiles, we will need an element called "Crab", which we mentioned earlier.
It is at this stage that insulating materials are often used (mineral wool, foam and other), which are mounted in the obtained spaces between profiles. This will significantly increase comfort in the room. It is also important to pay attention to the fact that the insulating material should be placed tightly, otherwise it will not show a special effect. Often, the hosts prefer the creation of noise insulation, since the ceiling insulation is not always effective and effectively.
Installation of plasterboard sheets
Now it's time to maintain plasterboard sheets. This stage is considered the most responsible, as it is very simple to make an error here, and the appearance of the ceiling will depend on this process.
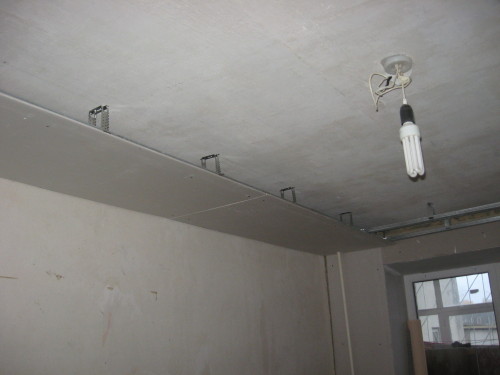
Specialists recommend placing plasterboard sheets across longitudinal profiles. Moreover, an important requirement is the presence of gaps between the sheets of the material and the walls. The distance to just a few millimeters will allow the entire design to "breathe".
- Installation begins on the wall, and the second sheet is already attached relative to the first profile (longitudinal). The space that is formed between the longitudinal profile and the wall is hidden. Most often, for this process, it will be necessary to cut off the part of the whole HCL.
- Approximately the installation of plasterboard sheets throughout the ceiling continues. As for the fasteners, they need to use self-tapping screws used for metal. Accordingly, the minimum step fastening is often limited to 150 mm, and the maximum is 200 mm. It is important to keep in mind that the caps of the fasteners must be at least a little deepened in a drywall sheet (even even a pair of millimeters), otherwise additional surface treatment may become more complicated.
- Separately, I would like to note the question associated with the joints between the sheets of plasterboard. Often the distance between the sheets should be about 2.5 mm, and further the existing gaps will be putty. Obviously, after installation, the material will be subjected to small deformations, and it is small gaps that will avoid serious problems with the appearance of the existing design.
Putchal material
Already after the last sheet of material is fixed on the ceiling, you can proceed to the spacing of the surface. As we have already spoken, it is advisable to wait for some time that the material is slightly adapted to the existing conditions. First of all, joints are processed between sheets of plasterboard. Already after the composition is dry, it is necessary to arm the sandpaper and grind the surface. Obviously, all the irregularities that remain on the surface should be removed as quickly as possible.
- The putty of the main surface is carried out in order to further be separated and done really attractive outwardly. Again, with a spatula, a thin layer of putty is applied, and after drying, sandpaper is used again.
- Experts recommend all this to make the most careful as possible, as it is very simple to turn the ceiling in a terrible externity. Accordingly, the layer of putty must be thin, and the processing of sandpaper - careful.
After we spent putty and additional processing, you can proceed directly to the surface finish.
Surface finish
First of all, it is necessary to say that the most difficult measures associated with plasterboard ceiling have already been completed, so it remains only to be able to make a creative to the repair process and make the surface really attractive outwardly.
The decoration of plasterboard sheets can be carried out in various ways. You can cover the surface of the paint, or just to bother. Recently, both wallpapers that are perfect on the surface of the ceiling are considerably popular, thereby creating a unique atmosphere in the dwelling.
In stores, offices, as well as other institutions where many people are located, often the surface is located. In this case, the ceiling becomes bright white, which emphasizes the almost perfect horizontal of the ceiling. It is worth saying that a more attractive result will certainly fail to achieve with the help of alignment of the base ceiling, or using some other tricks.
As for the color of the ceiling, everything will also be held without problems, but the plus is the fact that using different colors of paint, you can create an original externally surface. For example, it can be lines placed at different angles along the room. A certain expanser for creativity is definitely pleasing.


