Gate with forging elements: Tips for choosing Useful advice

Beautiful gates can become the brightest and expressive element of any home, so the choice of design and material for manufacture should be treated seriously. There are special appeal among the gates of various designs. But the main drawback is the high cost. You can save money if you try to make the gate with the forging elements with your own hands. On how to do it in practice, and it will be discussed.
Content
Methods for making wrought gates
In the event that it is not possible to master the blacksmithing case, you can use ready-made wrought-made elements for the design of the gate. To do this, we recommend using the following tips.
- The gates installed earlier should be removed from the loops and clear from the old paint and rust. To do this, use a construction hairdryer, a grinder with a nozzle in the form of a metal brush.
- Patterns can be invented or high in the Internet, after which it is transferred to the gate panels.
- In the construction supermarket, there are forged elements from this calculation so that they come to the sketch of the patterns.
- On the gate panels lay the elements connecting their bent steel rods and fix on the spot with welding.
- The gate with the elements of cold forging is ground and stained in black: on a background, silver plated or coated with gilding (with the help of decorative paints) of curls, peaks and other wrought elements will be highlighted on a background.
- The iron gates with forging elements are hung on the loop.
Tip: Before finally, decide on the pattern, it is necessary to evaluate it. For this, the pattern can be pre-simulated by posting the items on any level surface.
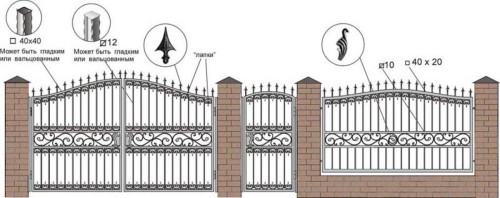
You have some sketches of a gate with forging elements.
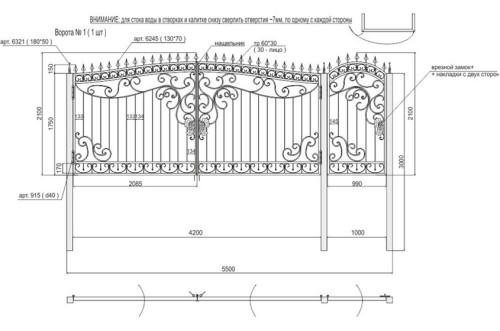
They are recommended to indicate the main dimensions of the design: this is necessary to calculate the number of necessary materials. According to sketches, a working drawing is drawn up with the size of all elements.
Gate of professional flooring with forging elements
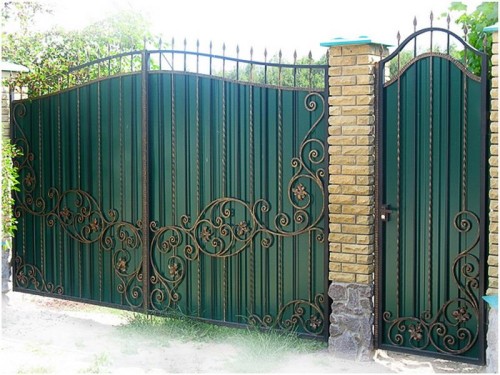
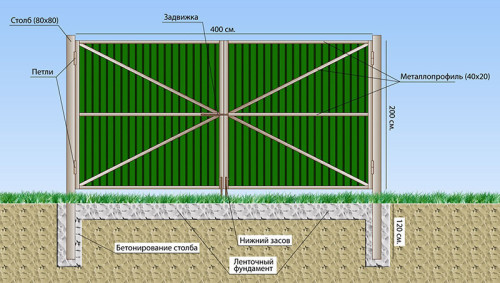
We offer to familiarize yourself with the most simple and affordable way to make the gate with your own hands. The gate of the professional flooring with forging elements (see the photo below) can be created without the use of complex equipment and technology.
Preparatory stage
A professional flooring can be used as the gate panels - durable and lightweight shelter from cold-rolled steel coated with protective enamel. The benefits of the professional flooring include a long service life (up to 50 years), corrosion resistance and relatively low cost. The door of the profile pipe elements of forging is well combined with a professional flooring, which can be partially or completely fill out the opening. Phased the process of manufacturing a gate with forging elements using a professional flooring can be represented as follows.
Selection of required material:
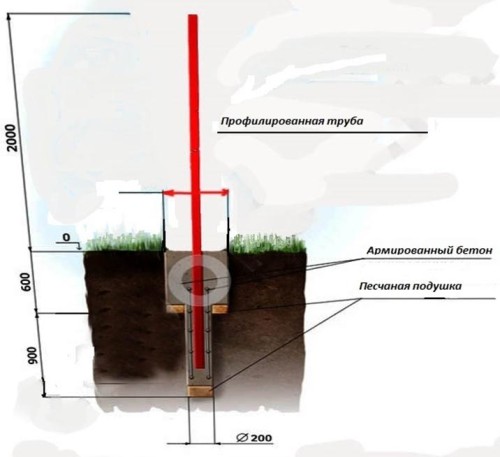
- For columns, two pipes are needed with a diameter of 200 mm and more (depends on the size of the gate). The length of the pipes is chosen taking into account the underground part, which should be about a meter.
- Professional flooring: the number of sheets depends on the total area of \u200b\u200bthe panels. It is necessary to purchase sheets of such a length to eliminate horizontal joints when mounting.
- Swing gates with forging elements require the creation of a solid frame. For this purpose, metal profile pipes with a wall thickness of at least 3 mm are used. In addition to the outline of the gate, the material for rigidity is required.
- The hinges for swing gates must withstand mass design. If necessary, install additional loops.
- Retractable gates with forging elements are equipped with a roller mechanism, drive automation, console equipment.
- Locking mechanism.
- For cleaning and metal processing, an abrasive circle or brush, a rust converter, primer and paint can be required.
- Installation is made using various hardware.
- Cement, sand, crushed stone of the middle fraction - for concreting columns.
Tip: For the manufacture of the gate frame, it is recommended to use a profile tube (square or rectangular section). Such a material looks more attractive than a conventional round tube.
To work will require a tool:
- bulgarian with cutting and sharpened abrasive circles;
- welding machine with electrodes with a diameter of 3-4 mm;
- manual drill;
- mixer for mixing cement mortar;
- metallic or plastic container;
- screwdriver with a set of nozzles;
- metal scissors (for processing a professional sheet);
- riveter;
- electrode with a metal drill (diameter selected under rivets);
- set of wrenches;
- building level, plumb;
- roulette;
- marker.
Install the columns for the gate
The sequence of actions at this stage is as follows.
- At the place of installation of the gate, the site preparation is performed and the places of installation of columns are scheduled. It is important to accurately designate their centers by pegs in accordance with the size of the structure.
- The manual brown is prepared by the wells. Their diameter should be about 2 times larger than the diameter of the columns. The depth of the hole is at least a meter.
- On the bottom of the holes, the sand is embanked (layer about 100 mm) and tamper. Several layers of rubberoid are stacked (for waterproofing.
- The lower part of the columns is processed by the rust converter and then - bitumen mastic.
- Points are installed in the wells and recorded by temporary backups in a strictly vertical position.
- The crushed stone of the middle fraction (about a third of the height of the underground part) is falling asleep and the prepared cement-sandy solution of semi-liquid consistency is poured). The operation is repeated until the wells are concreted completely.
- Using the reinforcement bar (multiple picker), air bubbles are removed from the solution in the well.
- The position of the columns is checked and adjusted. This must be done immediately after the end of concreting. The solution must stick at least 5-6 days before the installation can be continued.
Creating a gate panels
The whole process can be divided into several stages.
- In accordance with the working drawing of profile pipes, details are manufactured. To facilitate installation, they are recommended to numbered.
- On the flat platform, the carcass details are laid out in the order in which they must be connected.
- Using the welding machine, profile pipes are connected. The loops and lockable devices are welded.
- The grinding (corner car) is cleaned with sharp edges and burrs.
- The welding is connected to the shadows forged elements, after which they are attached to the frame of the sash.
- Frames of shifts of the gate with forged patterns are ground and stained. Decorative gilding highlights the main parts of the patterns.
- Details of the proflist are cut out, cut out with scissors for metal and superimposed on the back side of the panels. In places of attachment to the pipes, holes are drilled, rivets are installed.
- The gate is hung on the columns.
The master class on the manufacture of the gate demonstrates the following video.
Learning for a blacksmith
Put exclusive curls for the gate at home. This will require:
- compact Horn;
- vice;
- firmware;
- blacksmith pliers;
- anvil;
- hammer.
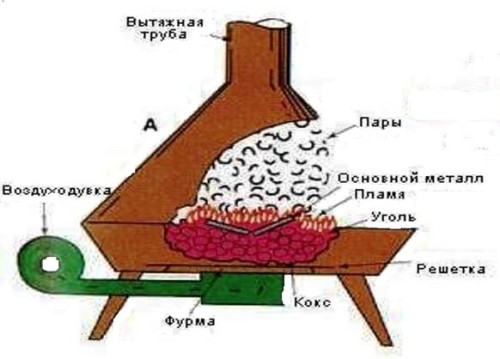
Scheme of blacksmith horn
In addition, special extensions will be required to form patterns. Such extensions can be made independently of metal fittings.
Patcher forging technology is as follows.
- The billets of the appropriate size are hot.
- Holding the ticks, the blank is put on anvil, where with the help of a hammer give it the necessary form.
- The billet is cooled, after which it can be sharpened for the final formation of the part.
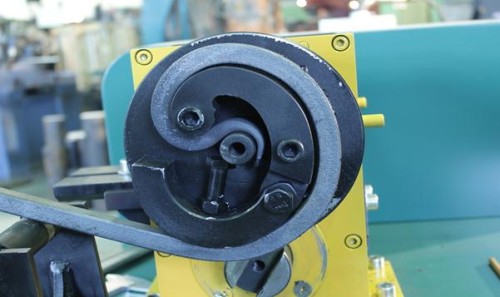
To connect forged parts, curved metal elements will be required. It is possible to make such using special bending mechanisms. It remains to connect the finished elements with welding, sharpening welding seams and consolidate patterns on the frame of the gate canvas.
Device for the manufacture of bent elements
In conclusion, we suggest familiarize yourself with how the gates are made with forging elements with hands. The video is a visual exercise allowance.


