How to make a bur Garden drill do it yourself Instruments,Useful advice

The car manual earth is always in demand during repair, construction, as well as when performing various works in the garden, in the country, in the garden. It is indispensable in cases where you need to dig a deep and narrow pit, for example, when planting trees, mounting support for the foundation, drilling wells. If funds for the acquisition of the tool are limited, then it is quite possible to make manual drill with your own hands. In this case, it will cost an order of magnitude cheaper than ready.
Content
For what purpose is the use of a garden bora
- you can use the garden bur for columns under the fences. To do this, in the ground, I will be a pit, pillars are inserted into it and poured concrete, and when it will freeze, stretch between the columns the chain grid;
- you can drill not very deep well. Having determined the previously where the underground source is located, the well begged at the place of its stay, periodically pulling out the soil. These actions continue until the sherry aquiferous sand appears;
- it is possible to equip a cesspool or compost yam, squeezing it, using a large diameter blade;
- you can take a sample of soil. For this purpose, it is necessary to drill a well depth of 3.5-4 meters;
- you can dig up well for planting plants. In order not to dig a spade pit that get wider than you need and take time more, it is possible using a drill to make even the same holes with a depth of equal length of the roots;
- you can drill tunnels for communications. To do this, you need to pull the trench not far from the foundation of the house and drill the tunnel of the desired diameter in its wall. Next to the breakthrough, the cable is stretching, which is subsequently drawn there plastic pipe.
Required for self-making tools and materials
Manual consists of several parts:
- auger is the part of a tool that buryu a well;
- metal pole - rack;
- metal handle.
Related tools and materials necessary:
- apparatus for welding;
- lathe;
- emery wheel;
- drill and metal drill;
- high-strength steel sheet;
- cut of the gas pipe;
- metal rod with a diameter of 16 mm.
The drawing of the manual drill for its manufacture is not required at all.
From this list it becomes clear that for self-making a borah, it does not require an intricate tool or expensive material.
Step-by-step instruction for the manufacture of garden bora
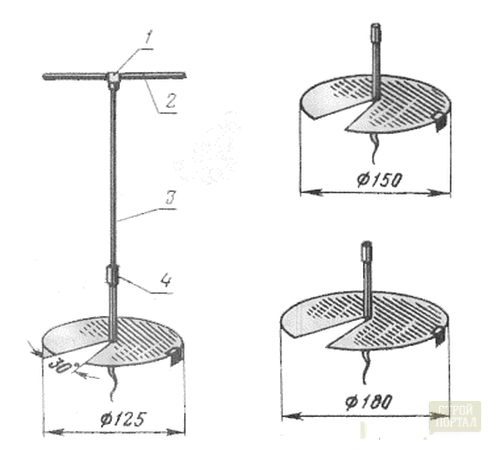
- From the sheet began to make round billets of cutting parts of a drill of various diameters, in order for it to be used to drill different widths. The diameter of each billet should be 5 mm to exceed the width of the well, which will be drilled using this tool;
- In the center of all blanks drilled hole. Its diameter should be 1 mm. exceed the diameter of the metal rod, which will serve as a hand-held bora;
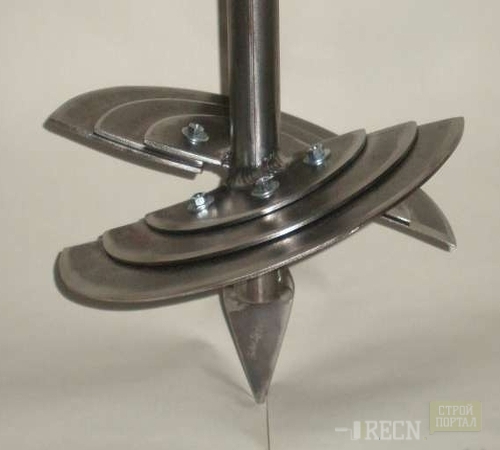
- On the lathe, the sleeves from steel are pulled out, two holes are drilled in them, in which the threads are cut. In the future, it will serve in order to fasten the cutting details of the boraner on the rack by using bolts;
- With the help of a cut circle on the billets of cutting parts, a small area is cut. Next, it is stretched out for the ends so that the item is tightened with a screw. The lower edge of the screw surface is poured, observing an angle of 45-60 degrees. On this, the work on the manufacture of the blade for the garden drill is completed;
- On the rack of the boraine make flat cuts 3 mm. in depth. You can make them using the emery circle, retreating from the end of the rack about 8 cm;
- From the lower end of the rack form the edge, dragging it at an angle of 30 degrees. Using the cutting circle, on it on the spirals make special grooves;
- In order for the bee better in a dry, blind ground with a welding machine can be welded to its end of the metal drill;
- At the opposite end of the rack, the handle is fixed so that if desired it can be removed. Fix it with a sleeve. If necessary, you can make spare tribes of the rack and sleeves for their connection. In the event that it is necessary to drill a well high depth, it will be possible to remove the handle and make the rack longer due to these additional parts;
- At the last stage, you need to paint paint, which will protect the metal from corrosion.
Next, after you made a garden drill with your own hands, it is necessary to exercise a simple care for it - after using it from the Kitsiev Earth, check if the edges of the blades are not damaged if the burrs did not appear. All detected damage must be eliminated and covering these places of anti-corrosion paint.
Before starting the drilling of the well, the upper part of the soil is removed with a shovel and tear. This is done in order to facilitate the entry of the bora. After that, it is installed in the working position and start rotating clockwise. At the same time, it is necessary to sometimes remove the boring and clean it from the ground. These actions continue until the well reaches the necessary depth. If you have the need to lengthen the tool using an additional knee.
Why do you need to make a few blades of different diameters for a bora?
Hand borrowed garden can be a multifunctional tool if different-caliber blades are attached to it for drilling wells for various purposes.
The list of works that can be carried out, having several different blades.
Blade with a diameter of 9 and 12 cm.:
- wells for planting plants, disembarking seedlings in peat pots and flower bulbs;
- measurement of groundwater level, taking soil samples, drilling wells to obtain water;
- agriculture of greenhouses;
- drain of tunnels for communications.
Blade with a diameter of 17 and 25 cm.:
- landing plants having a rod root system;
- clay and sand generation;
- pouring support for fences, gates, veranda, greenhouses, street tables and shops, etc.;
- the construction of wells, cesspool and compost pits, as well as all of the above works.


