Installation of pig-iron bath: Installation recommendations Plumbing
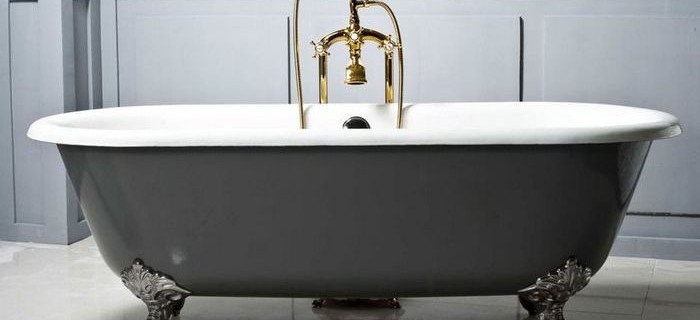
In pursuit of cleanliness, modern society was divided into two camps: the first one belongs to those who prefer to wash in the shower cabin, and the second is lovers of baths. We dare to assume that the latter is more - which of us does not like to soak in hot foamy water, conveniently sitting in the bath? Our article will tell readers,how to install a bath.
Content
- Cast iron bath transportation specificity
- Wall trimming methods in front of the cast iron bath
- Necessary tools for installing pig-iron bath
- Installation of pig-iron bath do it yourself: instruction
- Installation of pig-iron baths on bricks
- Installing the mixer on board the cast-iron bath
- Installation of hydromassage in a cast-iron bath
- Installation of pig-iron bath. Video
Modern manufacturers offer us baths made of acrylic, steel and cast iron. The leading positions occupy pig-iron baths, which, in principle, is not surprising: under the influence of hot water, this material is evenly heated and long holds heat, turning hygienic procedures into solid pleasure. In addition, the products mentioned above have a huge period: in most cases, when replacing the old cast-iron, the Soviet sample is installed in the installation of a new bowl of the same reliable, tested cast iron.
If in your bathroom you do not want to see anything but cast-iron baths, be sure to check out the rules and features of its installation on their own.
Cast iron bath transportation specificity
Everyone knows what kind of heavy material of the cast iron: the standard cast iron bath of Soviet times weighed about 120 kg. The mass of modern analogues of foreign production today is an average of 100 kg.
It is quite obvious that carrying the cast iron from the place of purchase to the directly bathroom for only two - alone with such a rider is better not to contact. If in the entrance of the residential building of the cargo elevator, there is no heavy bowl when lifting the stairs are located so that the plums are in the opposite direction of movement.
In the bathroom, the product is introduced in a vertical position - so the bath will not take too much space in the room, and the loaders are faster than it, where and how to put it. The threshold and door jambs of the bathroom are pre-closed with a dense soft cloth so that it is not enough to damage the covering of the cast-iron bath.
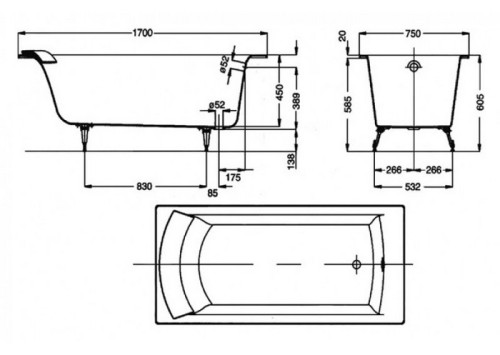
Note! The correct installation of the cast-iron bath involves the exact measurements of the bath itself and the measurements of the room in which it will be installed.
Wall trimming methods in front of the cast iron bath
Conditions in the bathroom must meet the requirements for placing a heavy item there. Particular attention should be paid to the flooring. On its surface there must be a concrete screed covered with solid ceramic tiles. If the floor coating is not sufficiently solid to install the bathroom, and it cannot be changed, so as not to suffer the overall style of the room, then the legs of the baths put on the steel plates with a width of 5 cm and thickness from 0.5 cm.
When installing a cast-iron bath, wall decoration in the bathroom is also of great importance. There are two versions of tiled masonry:
- Conventional tile laying on the entire wall area, which is mounted before installing the bath. This method will be quite by the way if you change the old bath, because the whole room will be laid on the tile.
- Wall finish with tiles only over the bathroom is also good. In this case, you can "drown" the edge of the cast-iron bath in the wall and thus narrow the distance between its sides and the wall to reduce the amount of flowing water to the floor. To finishing, naturally, go after installing the cast-iron bath, as close as possible to the edges and the border of the tile masonry. The finish is produced by attaching the film from above on the bath with the assembly tape to protect it from the tile glue drops. The main drawback of such tiled masonry is obvious: if necessary, change the bath, you will have to destroy the general view of the bathroom or, as an option, customize the new product under the place where the old bath was stood.
Necessary tools for installing pig-iron bath
If you decide to install a cast iron product on your own, you need to stock:
- legs for pig-iron bath and fasteners to them;
- regulating bolts;
- level;
- hammer;
- wrench / induced key;
- rubber gaskets;
- siphon;
- plastic pipes;
- border plastic ribbon, ceramic plinth or silicone gel.
Installation of pig-iron bath do it yourself: instruction
So, first of all, make sure that the water in the apartment is blocked, then open the taps to drain it from the pipes.
In the bathroom, install the cast-iron side of the track so that the bottom of the product is drawn to the wall, near which you decide to install it, at a distance of about 70 cm from the wall surface. Now you can go to the first pair of legs. Screws for adjusting the height are most convenient to attach on the legs before installing, making sure that the nut is relative to the legs on the floor side.
Setting the legs on the cast-iron bath can be made differently - it all depends on the bath that you purchased:
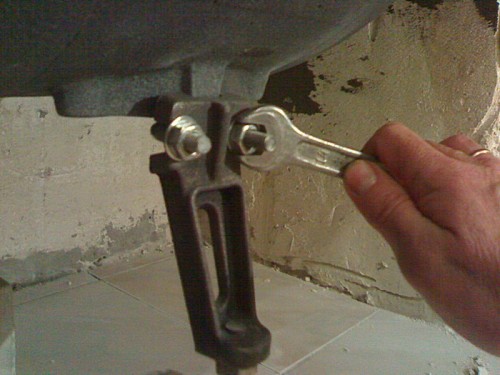
- The first way implies the fastening of the legs with wedges. Put the legs on the fittings intended for this on the bottom of the plumbing product and secure them, driven by the wedges that the leg producer attached to them in the kit. Work carefully - the main thing, correctly calculate your strength, without applying excessive efforts. The legs will be fixed correctly if all the details will fit tightly to each other, and the power impact will not be able to break their static.
- The second way offers to mount the legs on the tie screws, which also come in the kit. When tightening the bolts, remember the undesirable manifestation of excessive force - if you are stopped, you can damage the bath, then its use will be impossible. True, if such a trouble still happens, you can solve the problem, putting the product not on the legs, but on bricks. The legs are fixed with the help of bolts must be absolutely fixed and tightly lay down to the attachments.
After installing the first pair of legs, turn the cast-iron container and place it as it will stand when used. Now raise the side without legs and hide it on the board 60 - 70 cm long, obsumed by one end to the floor.
Attention! We do not recommend doing this work alone - the partner should be near, to inspire you from an accident.
The second pair of legs is installed similarly to the first. If the floor covering in the bathroom slides, the legs of the baths put on the gaskets, which can be used caps for pipes from plastic. To make the installation of a cast-iron bathtub durable and reliable, add a few drops of polymer glue under the laying and inside them.
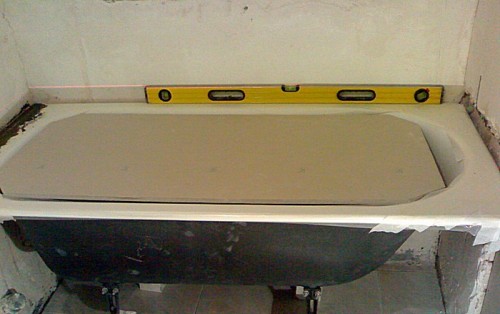
When installing the cast-iron bath, additional inclination in the direction of the drain hole do not need. Such plumbing products are prudently produced with a necessary slope. All you need to do finally be ensured in the correct position of the sides of the cast-iron container relative to the horizontal plane. In this you can focus on level indicators. So that the measurements are as accurate as possible, it is better to use a long tool.
Correcting a bath with legs fixed by wedges, be careful - the wedge mount can shift in the process of necessary measurements. Due to the fact that the cast-iron bath is very rigid, checking the level of horizontality can be made only on one side and from one end, which adjoin the walls. Installation of pig-iron bath requires compulsory compliance with the gap between the baths and the surface of the wall - at least 1 mm. After the adjustment is made, the cast-iron container is finally moved to the walls, tapping along the supports that are adjacent to these walls.
And finally, we will deal with the plumbing communications that you need to connect to the cast-iron bath. You will need plastic components - these are the most comfortable and easy-to-use parts. If they were not complete with a cast-iron capacity, you can purchase them separately.
The lower drain hole should be equipped with a siphon, and to the upper hole to attach a plum-overflow leading to the siphon, then attach the siphon pipe to the sewage plum. All communications are connected to the bath with the mandatory use of rubber gaskets.
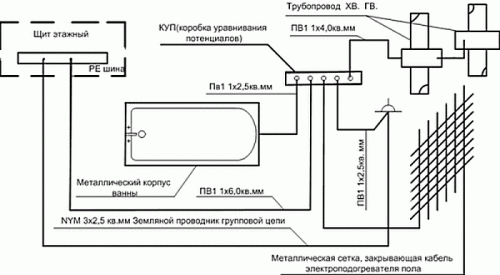
Note! The installed cast-iron bath needs grounding. This is the work of the hands of specialized workers - electricians.
Before using the bath, all connections need to be tested for tightness. Fill the bath with water and observe whether the leaks will not appear. To quickly detect them, use the newspaper that needs to be unzipped under the places of pipe connection. Legging drops immediately come on fine paper.
Finally, it is necessary to ensure the sealing of gaps between the cast-iron container and the walls to which it is adjacent. To do this, you can use a ceramic plinth, plastic ribbon and silicone gel.
Installation of pig-iron baths on bricks
Above, we have already mentioned this method of installation. Consider its advantages and features.
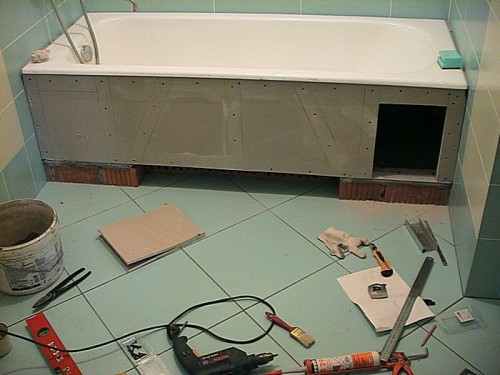
No matter how much the legs under the bath are installed, they will not provide her such stability as brickwork. This is the main "plus" of this installation method. True, he has a significant disadvantage: the creation of brickwork under the bath is a rather time-consuming process that will take a lot of time.
The construction of a brickwork is a painstaking work that needs to be performed in such a way that there is no gap between the paint-iron capacitance and the surface of the wall, otherwise water will be penetrated there, followed by the formation of the ubiquitous mold.
We list the main stages of the construction of a solid base for the bath:
- First, make sure the bath and bathroom are clearly measuring the cast iron container to other plumbing equipment and furniture subjects.
- Prepare bricks. They should be enough for a laying across the baths in the form of a layout height in 2 - 3 bricks. You will need about 20 bricks. For the arrangement of the bed (recesses) you will need half the click for each edge.
- bath Length defines the number of rows with a distance therebetween of 50 cm. The height of the front of the stage should not exceed 17 cm, and the height of the stage at the other end must be 2 cm above. For use masonry sand and cement slurry in a proportion of 4 parts sand to 1 part cement with the addition of water. That the solution is well grasped, it will need at least one day.
Install mixer on board the cast iron bath
Consider the particular mounting of the mixer to the bath surface of the iron. This process is divided into several stages:
- Make crisp, clear layout bath rim marker. As a place for the future of the mixer to select the most affordable for the repair site. Also, make sure that after the installation of the mixer will not have problems with its connection to the water system.
- Note! Board cast iron products may to some extent lose their stability after drilling. To solve this problem, attach a special mixer chassis that often goes with it included.
- With the help of an electric cutter with a crown that fits the diameter of the mixer, make a hole in the iron, focusing on the markup.
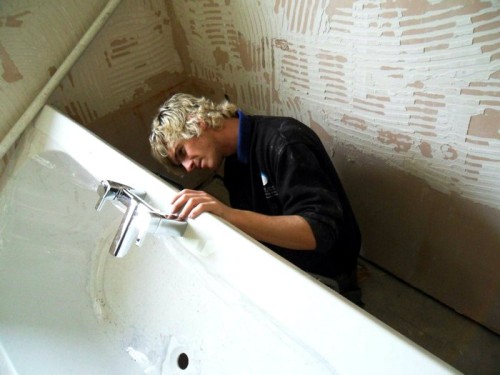
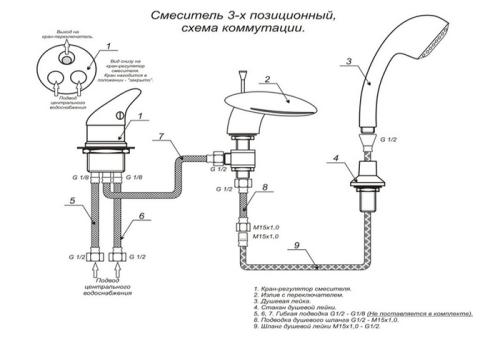
- Mount the faucet to a special gasket, securely fasten the structure by tightening the nuts under the bath. Single-lever type mixer is attached, below the pre-screwing the pin and fixing it by means of special steel polushayby.
- Now connect the flexible supplying hot and cold water hoses. Use gaskets for flare washers, if there is such a need.
When installing the faucet on the bath side, made of cast iron, a high probability of chipping and cracking unattractive on enamel, which subsequently will cause the formation of rust spots and streaks. Here are some ways to solve this problem:
- When markup specifically expand a diameter of the future opening of about 1 - 2 mm. Then carefully enamel grind off sander on the inner side of the partition and make a hole in an electric iron. This option is acceptable, if supplied to the mixer manufacturer prudently added a special cap that hides unsightly intermediate portion.
- Can be bonded to a portion of an electric working a metal plate, which will become a shield to maintain the integrity of the enamel.
- Do you know that the diamond drill has a more gentle effect on enamel and does not leave significant chips and cracks on its surface? To maintain an attractive type of cast-iron bath, arm with a diamond crown mill and plywood conductor. In the process of drilling from time to time, water the crown with water so that it does not heat up.
Installation of hydromassage in a cast-iron bath
Due to the popularity of pig-iron bath, the language does not turn to call this product with the remnant of the past, especially since modern technologies allow you to combine the dignity of pig-iron container for taking a bath and hydromassage. For the embodiment of such a tandem into reality there are two options:
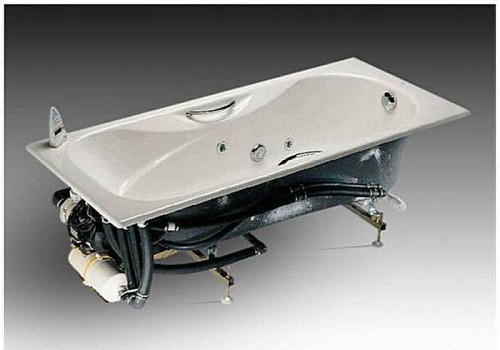
- Application of a special lining. The device has a form of an internal polymer case, which exactly repeats the outline of the surface of the cast-iron container. Such linings are mainly cast from acrylic. The case is equipped with nozzles and hydromassage guides. The lining is connected to the outer pump and fix inside the bath. Thus, the cast-iron bath is reincarnated in the jacuzzi. The main disadvantage of this, at first glance, the ideal transformation consists in its high cost and the necessary large size of the cast-iron bath, since when installing the hydromassage case "eats" up to 3 cm around the perimeter.
- Installation of full hydromassage equipment. In the cast iron drilled holes for mounting nozzles. We note immediately that specialists who have the necessary skills and tools must be performed. The cast iron is considered a fragile metal, so it does not have any special means in it, without having special means. In addition, when drilling the integrity of the enamel on the surface of the bath will most likely be broken. It is best to cover the bath with a new enamel, and this is extra costs. This option will be suitable if the installation of the hydromassage lining is not possible with the existing cast iron baths.
Installation of pig-iron bath. Video


