Decorative plaster with your own hands from ordinary putty Walls
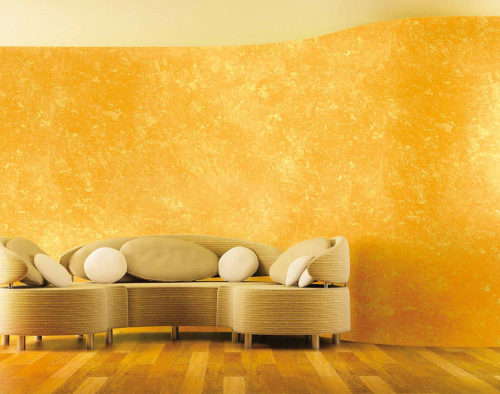
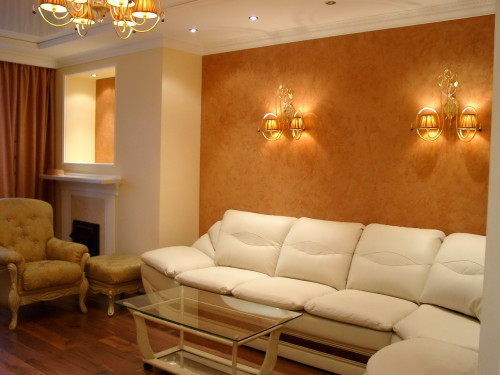
Modern people, making repairs in an apartment or in the house, pay great importance to the interior, thinking through his design to the smallest detail. Fortunately, in our time in the construction market, you can find an unimaginable amount of various finishing materials that will help embody the most bold solutions. In this article, we will tell about how to prepare decorative plastering from putty with their own hands and what methods can be applied to the walls on the walls.
Content
- Features of textured spacure
- Preparation of textured plastering from ordinary putty
- Preparation of walls before applying textured plastering from putty
- Subtleties for decorating walls textured putty
- What is the structure of the walls
- Coloring decorative plaster
- Surface varnishing
- Decorative plaster from ordinary putty. Video
Features of textured spacure
The putty applied to create on the walls of the decorative layer is not inferior in its characteristics of textured plaster. Among the advantages of the material under consideration can be allocated:
- strength, durability and reliability of the coating;
- simplicity and ease of care;
- the possibility of incarnation of various design ideas;
- a huge assortment of shades and facing material textures.
The disadvantages of putty include the complexity of the process of applying it to the walls. If you are involved in the work of specialists, then the payment of their services will cost you in a significant amount. But possessing elementary skills in the construction work, as well as armed with some advice, cover the walls of the room with decorative plastering from a conventional putty can be carried out by saving decent money.
It should be known that the texture plaster made of putty is applied to the walls in different ways, depending on this distinguish 3 types of surfaces:
- smooth wall decorated with colored spots and divorces;
- smooth surface with an image of the image;
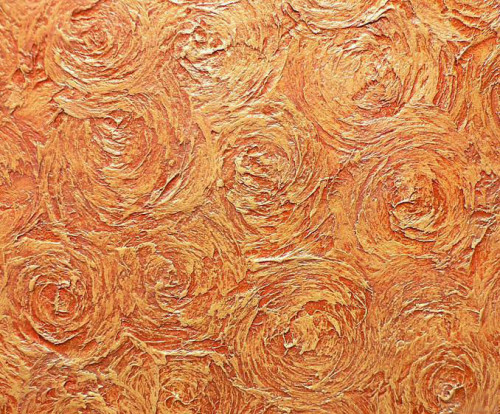
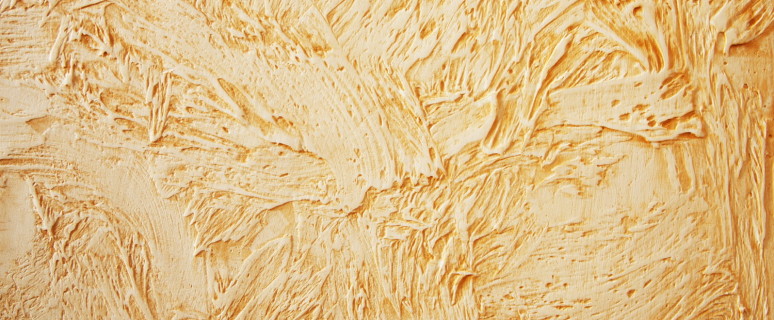
- a textured wall with any arbitrary relief.
So that after decoration of the room, it is guaranteed to get exactly the result you hope to think over the overall style of the room, as well as separate design elements. It should also be noted that the textured wall decoration has a pronounced relief, dust often accumulates in the deepends. That is why it is not recommended to use such a decoration in the kitchen, otherwise the wall will cover the fat microparticles and will lose the external appeal.
Among other things, putty, used as textured plaster, is able to absorb a certain amount of moisture. If you decide to apply this finishing material in the cheese and wet room, do not forget to additionally cover the wall with a layer of varnish.
Preparation of textured plastering from ordinary putty
In order to prepare the necessary composition and subsequently apply it on the walls, you need to stock by some tools, they include:
- a bucket or large roomy container for mixing ingredients;
- a drill equipped with a mixer;
- sandpaper of various grainability;
- the grater for aligning the layer of the applied material;
- several spatulas of different sizes;
- ironing, with which you will strudule the surface;
- a variety of tassels and rollers for painting drying plaster;
- sponge for creating various effects by applying decorative glaze on the wall.
Textured plaster can be prepared from almost any putty, which allows you to create the desired consistency to implement a particular design idea. For the design of walls, textured plaster must have in stock the following:
- putting down any manufacturer;
- a mixture for embedding seams between plasterboard sheets;
- white acrylic primer;
- acrylic lacquer;
- paint selected color;
- glaze for additional surface decoration.
The texture plastering from putty is preparing very simple. In the deep People, for example, in a bucket, a putty should be mixed, remedy for seams and cold water. The amount of materials should be equal to the proportion, as for water, it must be added gradually by adjusting the consistency of the mixture. The plaster should not be too liquid and drain along the horizontal surface, and its density should be enough to form on the wall intended relief.
Preparation of walls before applying textured plastering from putty
The most important requirement for the treated surface is to be smooth. At the same time, it is not necessary to create an absolutely smooth wall, since small errors will still be compensated during the finishing process. But the noticeable level drops should be adjusted. To do this, it is easiest to use a gypsum composition or a mixture of cement with sand. Note that the gypsum putty is more reliable and easy to work.
The surface of the walls before the facing should be clean. From it should be considered all the dust and dirt, remove the old coating and swollen stucco. After that, the wall should be treated with a soil composition, so that the applied coating restlines the surface and held there for a long time and firmly.
Subtleties for decorating walls textured putty
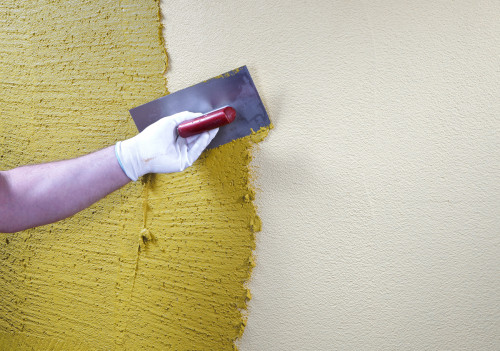
After the surface is properly prepared for decorating, it can be covered with putty. Such work is carried out by a spatula, with its help, as well as using some other tools, a wall can be decorated with some kind of relief. The plaster is applied to the wall in several ways:
- movements directed horizontally;
- circular movements;
- scarring;
- vertical strokes.
Some uncomplicated ways of forming a relief on the walls can be described as follows:
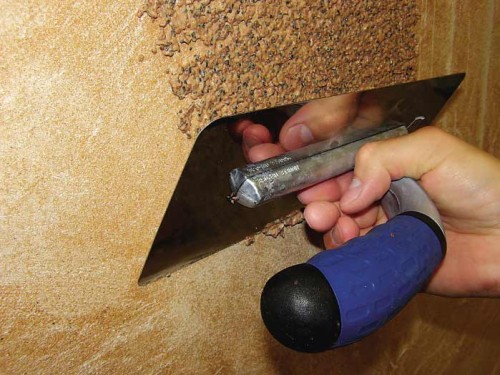
- To create a rough surface is quite simple, for this you need to first cover the area of \u200b\u200bthe wall with a thin layer of putty, the thickness of which does not exceed 3-4 mm. Then you should take a special tool for moving the material - smooth with rounded edges. This ironer is rigorously pushed into a crude putty and release, after which a roughness is formed at the site of the instrument.
- Create decorative invoice can also be using a spatula. The finishing material is applied to the wall with multidirectional movements. It can be both chaotic strokes and drawing on the surface of any figures.
- With a spatula with a toothed edge, the easiest way to create an unusual embossed pattern on the wall.
- You can also make the original texture thanks to a sponge or special roller.
- Another type of wall decoration is the creation on the surface of the decorative plaster pattern imitating pink buds. To perform it, you need to take tight paper and smith it into the ball. Then this ball should be wrapped with cellophane, so that it is not enough from the absorbed moisture. Pressing paper into a soft putty, you will get a drawing resembling roses.
It is worth noting that the textured putty dries over 20-25 minutes, so it is important to create a beautiful pattern in this time interval. To work only on freshlylandized material, you need to cover the composition not the whole wall, but only a small fragment. After processing the entire premises, it is necessary to give the material to dry completely, and after a little losing it with sandpaper - so the drawing will be smoother, without excessively convex elements.
What is the structure of the walls
Before applying decorative plasterings from putty, you need to decide on the pattern you wish to create. In the design of interiors, several types of textures are applied:
- rock;
- rain;
- coroede;
- surface with imitation of stone;
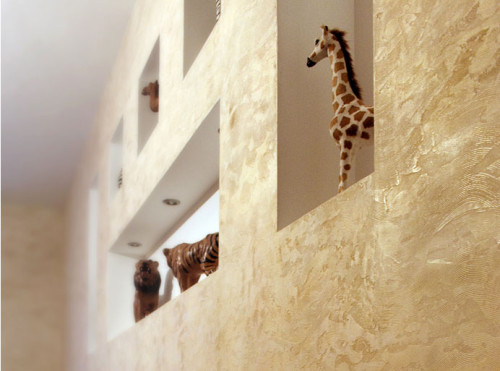
- silk effect;
- venetian plaster;
- stucco with marble crumb.
When making walls with putty, it is easiest to create a "rock" or "rain" texture.
Stages of creating a surface with a "rock" relief
- To create a decorative coating, purchase a suitable putty to the finishing appointment in the construction store. Its composition can be both cement and gypsum.
- Purified from the old coating, dust and garbage wall cover the layer of primer and let it dry. Then apply a thin layer of putty on the surface and also leave it until complete drying.
- After that, you can proceed to decorative design of the wall. Uniform layer Cover about 0.5 m² of area. The thickness of the putty should be about 3 mm, rub the material on the surface is easiest to be smooth.
- When you scatter the composition properly, wrap the stuffing of the material from it. Then lean the tool to fresh putty and move it away by 15 cm. Air bubbles that are formed under the surface of the ironing, will give the wall the desired texture. Try to perform movements chaotically, to give the surface natural look.
- Having reached the end of the treated fragment of the wall, smoothly tear off the tool from the solution so that there is no clear track on the edge. Making movements, slightly increase the angle between the wall and ironing. The angle size should be approximately 15-20 °.
- After completing the operation on one surface section, remove the remnants of putty and proceed to the decoration of the new area.
Several useful tips:
- Chaotic movements in the process will help to give the texture natural look, but you can show fantasy and perform any drawing on the wall. To do this, you will need to move the tool in a specific direction, observing a specific procedure.
- The finished surface will need to be left for about a day for its complete drying, after that, on top of the plaster you can apply paint.
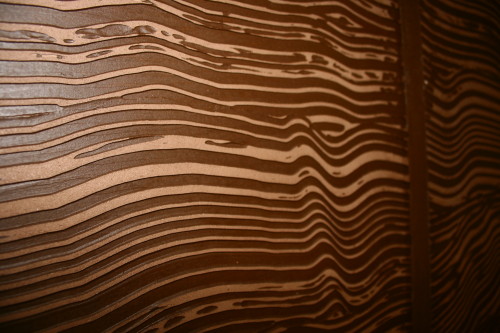
Creation of the relief "Rain"
This drawing on the wall is made a little more complicated than the above, however, the result is quite beautiful. Performing a similar texture on the surface, the "rain jets" can be sent strictly vertically, horizontally or tilt. Consider the process of applying textured plaster stages:
- To begin with, you should put markings on the wall, focusing on which you will make strokes. The markup is drawn over the entire surface, ranging from the ceiling and ending with the floor level. The size of one step must correspond to the width of 3 glades. When the lines are drawn, they should not be interrupted on inland and external corners. This work will take a lot of your time, but you do not need to save forces if you want to see a good result as a result.
- The next step on top of each markup line should be pasted with a lane of paint tape. It is advisable to start working from the upper right corner of the wall, and the lower edge of the painting tape should be placed on the draw.
- The putty is applied to the wall of the layer, the thickness of which does not exceed 3 mm. The processed portion in width should be equal to the width of the tool, and in the length of approximately 1 m.
- To get on the wall imitation of the rain droplets, press the smooth to the crude putty and depart the tool from the wall. In this way, you need to process the entire area.
- After the work done on the wall surface, spines are formed, to give them the desired appearance, the material will need to smooth a little. Remove the remnants from the tool the remnants of putty, lean the smoothness to another fresh plaster and draw a tool in the desired direction. Note that it is not necessary to fully apply a smoothness to the solution, you should lift one of her edge slightly. The future relief of the wall depends on the pressure of the pressure and the thickness of the layer of the applied material.
- Having finished one section of the surface, proceed to the new one. The second strip must go to the first little cleaner.
- So that the texture turned out to be uniform, do not challenge until you finish executing the entire wall. Otherwise, the difference of layers will be very noticeable on the surface.
- After the putty is completely dry, adjust the extra irregularities and discover the angles, shutting the wall with shallow sandpaper or abrasive grid.
Coloring decorative plaster
When the relief of the wall is ready, you need to give the surface with the completed view, painting it into the selected shade and, if necessary, start with lacquer. The process of coloring decorative plaster can be described as follows:
- So that the paint smoothly lay on the surface and held there for a long time, the wall should be covered with a layer of primer.
- It should be noted that the textured plaster is best to paint with two colors, so that it is advantageous to emphasize the relief of the surface. If you apply to the wall paint only one shade on the wall, then the decorative effect will be lost.
- Interesting plaster can be painted in two ways: a dry brush or erosion method. Using the first option, you highlight the convex places, and in the second case you will emphasize all the excavations and depressions.
- The surface with the "rock" relief can be processed by any of the selected methods, and the rain relief should be highlighted using the color of the erosion.
- Regardless of which method you use, the first layer on the wall should be applied background, you can perform it in several layers. Take a dusty roller, plunge it into the paint and treat the surface. Do not forget that when painting textured plaster, the consumption of material will be large than when processing smooth walls.
- During operation, a dry brush is desirable to take light contrast tones for painting, and when processing the wall, dark shades will be suitable method.
The surface design with a dry brush is performed as follows:
- Take the painting bath and pour into it the paint of the selected color.
- Finish a wide brush in the paint, wash the excess material about the edge of the container, and then additionally about a piece of cardboard.
- Light movements, without excess pressure, paint the surface by making multidirectional movements. It is very important in the process of keeping the tool parallel to the wall, so that it is barely to touch its surface.
- Movement brushes It is advisable to make chaotic.
Wall processing by the method of erosion of paint consists of such steps:
- Cover the wall with a background layer and let him dry completely.
- Then apply a darker on the surface, a contrasting tint.
- Give it a little to dry, and then, with the help of a wet rag, set the paint on the wall. The main thing is that the dark color is not dry completely. After removing the surface of the dark color from the surface, you will pick up the background layer, and the dark paint will remain in the recesses of the relief.
- So that the dark layer was easier to flush, use water-soluble paint.
Surface varnishing
In order to keep the paint longer and the surface looked more beautiful, it is necessary to open the wall with the final layer of varnish. It is best to use a water-based composition, pre-diluting it with water 50:50, so that the fluid is better penetrated into the surface structure.
It is necessary to apply the wall on the wall in 2-3 layers, each time giving the previous layer to dry well. It is easier to use a wide soft brush to work, and to avoid the formation of flops, excess varnish should be wiped about the edge of the container.


