Socket in drywall: installation features Lighting,Useful advice,Walls,Building materials
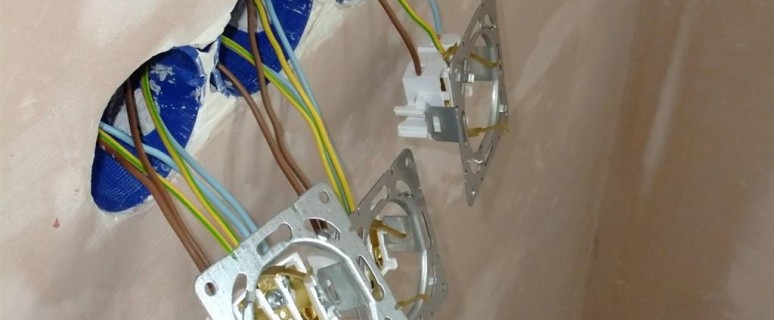
Among the demanded finishing materials of modernity is distinguished by plasterboard. The benefits of this material are many. One of them is the possibility of hidden laying of wiring. This process provides for a series of actions. Our article we will talk about how to attach sockets to the plasterboard.
Content
Preparatory stage
It is clear that before installing sockets in plasterboard, it is required to pre-prepare. Moreover, it is done long before the walls of the walls with a finishing material. The preparatory stage itself consists of two main stages:
- laying electrical wiring;
- determining the location of sockets.
Laying electrical wiring
This procedure is carried out at the installation stage of plasterboard:
- created a frame of galvanized profiles;
- the power circuit is determined;
- the alleged location of the cable is written to the notepad;
- the vertical part of the frame is made holes;
- the wiring to which the rosettes for plasterboard will be connected, it is placed in a corrugated tube;
- the tube is stretched through holes made in profiles.
To effectively function, it is better to use a three-in-room wire that has a double insulation and a cross section of up to 2.5 mm. The corrugated tube with the cable is additionally attached to the frame of plastic clamps or copper wire.
Determination of location of sockets
When choosing a place to mount a socket in plasterboard, not only building standards take into account. To the most guided by the target destination of the socket itself. Furnitura should be located in such a way that it is convenient to use household appliances.
The recommended height of the sockets is:
- 0.3 m - from the floor;
- 1 m - for washing machine;
- 1.2-1.3 m - in the kitchen over the table top.
Naturally, these norms concern not all home appliances. For example, a socket for a TV, air conditioning or aquarium should be placed in close proximity to the instruments. The electrical cable should not hang or lie on the floor.
At the preparatory stage there is also an accurate calculation of the number of fittings and its purchase. When purchasing conversion, you need to make sure that they are suitable for drywall.
Creating holes for the outlet
Before you put a rosette in drywall, you need to make a hole for the opposite. For this:
- the pencil marks the place where the socket will be attached;
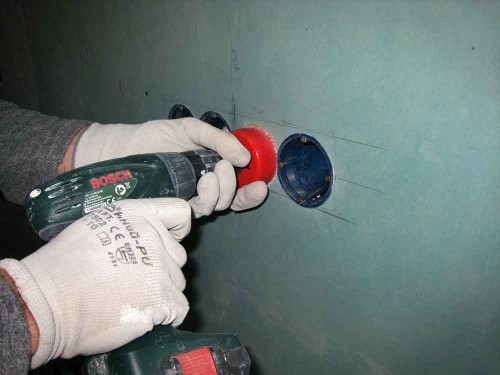
- a drill is taken equipped with a milling cutter;
- acute part of the cutter is installed in the center of the marked mark;
- neat pressing on the drill is made a hole;
- in the same way, all holes in the drywall under the outlet are made.
When laying holes, it is necessary to consider that the electrical wiring ends will be cleaned. Therefore, the cable must be laid with a margin.
You need to drill the hole neatly. It is impossible to push the drill strongly. Otherwise, you can damage drywall. As a result, it will be difficult to qualitatively fix the clamping paws of the conversion.
For this reason, many experts strongly recommend using the usual drill. With the help of a manual tool, several holes are made at the location of the socket. After that, the circle for the rosette in the drywall is cut off by a stationery knife.
It should be noted that when drilling holes can be stumbled into a metal profile to which plasterboard is mounted. To avoid this, you can use a good magnet. Having put it on the wall, there is a longitudinal movement on the surface and is determined whether there is a profile behind the wall.
And how to install a rosette in drywall, if there have been contact with a frame design? In this case, no need to despair. In the transfer of holes for the outlet to another place there is no need. A piece of interfering profile is cut with a metal scissors or bends (knocked out) by a conventional chisel.
Mounting work
After drilling holes, it is embarked on the final phase of such a process, as in the drywall to make a socket. It consists of two consecutive stages:
- installation of peasants;
- fixing sockets in the submersests.
Installation of conversion
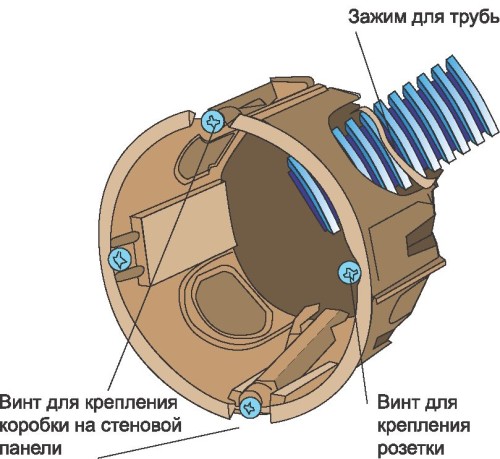
Outplows for sockets that are attached to a plasterboard wall differ from the analogues intended for the concrete surface. They are equipped with special fastening legs and four screws. One pair of screws is designed for fixing the outer metal frame that keeps the opposite.
Installation of submersors involves the following actions:
- disable electricity supply to the room;
- in the side or back of the peavercraft, the hole is cut under the electrical wiring;
- the reserve cable is pulled into the hole;
- screws are exhibited horizontally;
- podrotimets is inserted into the hole;
- screws are cleaned.
When fixing, the opposition in the hole need to make sure that it does not shift the electrical cable. When screwing the screws, the peaver should be increasing into the landing place. Then the screws are weakened and the reliability of fitting fittings is checked.
Pallet legs must be squeezed to plasterboard. To impart maximum strength, the landing place can be covered with putty.
Installing sockets
Now let's talk directly on how to fix the outlet in plasterboard. Naturally, the work is carried out in the absence of voltage in the electrical network. Make sure this is necessary using an indicator screwdriver.
Installation of outlets is carried out as follows:
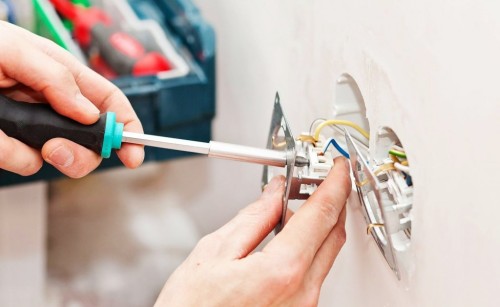
- decorative lid is removed;
- unscrew screws on the terminals of the socket;
- the cable veins are inserted into the contacts and are tightly tightened;
- when using a three-core wire, the ground with a ground is connected to the middle terminal;
- the socket is inserted into the opposite.
Reliable fixation of accessories is carried out in one of two ways:
- by twisting the fastening screws on the submersion;
- by moving the spacer paws in the rosette itself.
After mounting the socket, the correctness of the wires is once again checked. They must be well tightened. Otherwise, the cable will overheat, which will lead to the closure of the network. The socket is closed by a protective decorative lid. The bolt is neatly twisted with a screwdriver.
Video on mounting sockets in plasterboard:


