We make shelves for flowers do it yourself Useful advice,Interior items
Flowers in the house - it is beautiful and aesthetic. Live plants bring to the premises of the beneficial energy, and sometimes they even help to cope with various kinds of negative. But it is not so pleasant to place flowers on the windowsill, how to arrange a special "alive" corner with interesting neat shelves. Such color shelves can be made personally, and in this article we will share with you some ideas.
Content
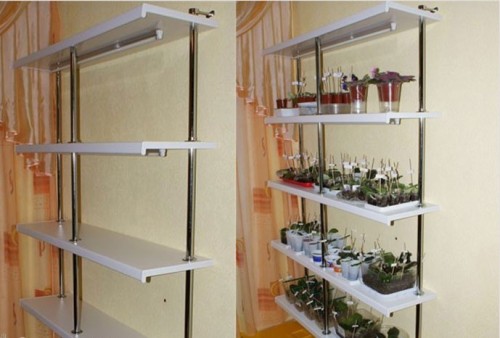
Wooden-metal shelf for plants
The shelf for colors can be made of metal rails and wooden bars. Metal racks connected by jumpers will perform the role of a frame, while the wooden boards will become coats under the pots. Consider the work process in stages:
- If the shelves are presumably mounted on the wall, then for them you need to pick up a rod from metal with a cross section. If the design will be placed on the floor, then in the installation locations it is necessary to secure the corners. The size of the shelves can be defined independently, based on the wishes and availability of free space in the room.
- Metal racks weld with each other with jumpers. For example, if you take racks with dimensions of 90x20 cm, you can make a rack of 4 shelves, the distance between which will be 30 cm. On such shelves, you can place small pots with compact plants, you can put more tall cultures to the highest shelf.
- Racks for colors are combined with rods to make the design more stable and strong. Such a strapping is made on all 4 floors of the rack. After that, the design is painted the selected shade.
- Wooden strips with a size of 25x15 mm are divided into fragments of 60 cm, which corresponds to the length of the shelves. These parts are parallel to each other and fasten with 20 centimeter bars.
- To the surface of the wall, the design is attached by self-drawing, making a step between the fasteners of 50 cm. In the process of operation, the smoothness of the framework of the frame is required to check the construction level.
- Wooden details color in the appropriate color, dried and placed on the frame. After that, the shelves are ready to put pots on them with flowers.
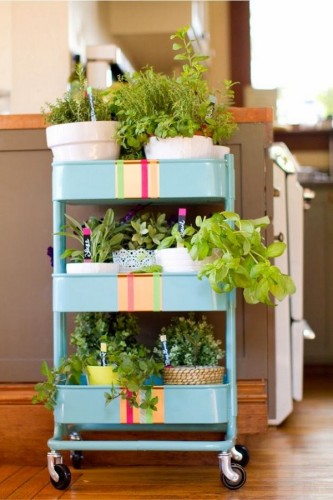
Mobile shelf for flowers
Mobile shelf can be made of wood or other suitable material. The plus of the design will be that it can be moved to the most convenient place. To make such a rack, you will need the following:
- plywood sheets, wooden spikes and bars, instead of bars you can use metal-plastic;
- wheels for future design, as well as legs to them;
- fastening elements - self-tapping screws;
- racks and crossbars;
- work tools; Glue, tassels with paints, jigsaw and drill.
As an example, we will look at the creation of a three-level rack of an arbitrary size, the dimensions you can choose at your discretion. So, the shelves for colors are made in this way:
- Before creating a design on paper, draw its drawing with the size of the sizes.
- Plywood sheets are folded on the floor and apply the corresponding lines on them for which the parts will be cut.
- From a wooden bar make a frame, bonding individual parts by spikes and self-drawing. If there is no bars, they can be replaced by a metal profile.
- From the sheets of plywood according to the drawn markup, the desired details are cut in, in which the grooves are done. The frame racks will be inserted into these grooves.
- Choosing the paint of the desired shade, plywood parts are painted and leave to dry. Meanwhile, the wheels are fixed on the frame. After their installation, the frame is also painted with a suitable color.
- When all the elements of the rack are dried, the shelves are fixed on the frame, where the pots with plants subsequently set.
Such a rack can be made any height, although it is necessary to understand that too high, more than 5 floors, the design will be too heavy and massive.
Plastic Rack
Cheap option made of primary materials - rack for plants made of simple plastic windowsill. As the basis, we will take a window sill with a length of 3.9 m, as well as additional materials:
- galvanized or nickel plated pipes - 3 pcs.;
- flange mounts - 9 pcs.;
- brackets - 2 pcs.
Let's start working:
- We cut the plastic window sill on fragments of 1.3 m long. There should be 3 pieces of such parts. These items will become shelves for flowers.
- To install the shelves on the frame, we do 3 holes in the plastic. We have them so that they form the vertices of an equifiable triangle. Near the ends, next to the back side, there must be 2 holes, and the third should be placed in the middle closer to the front edge.
- Now we prepare 3 cutting pipes, observing the same length. Fix parts of the structure using tightening flange mounts.
- To the floor, the rack joins the same fasteners. From above, the design is attached to the wall by the brackets.
Simple design wall shelves for colors
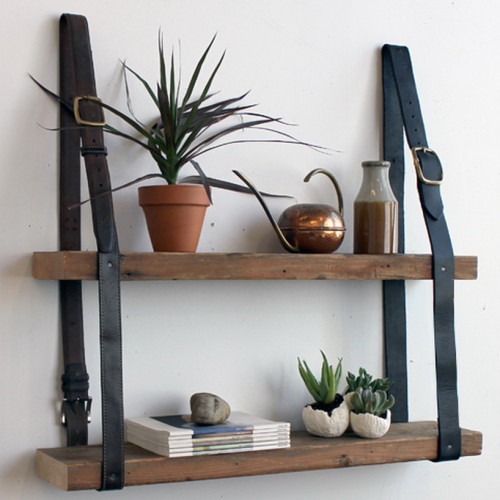
There are also completely simple options for the manufacture of floral shelves, for which the minimum of effort and materials will need. Despite the ease of execution and a small amount of primary means, the detail of the interior is very original and interesting. We will make it from a wide board, leather belts and fasteners. Instead of belts, you can use something else: the reps tape, twine, etc. The process of working as described in stages:
- We take the board with the width we need and divide into several suitable fragments of the same size. Ends with sandpaper.
- Now stain in the future shelf by any way like that. For example, you can cover it with a verse, and then with a colorless varnish, and you can simply apply color paint.
- Leave the shelves to dry and cook the mount. We divide the belt on 2 blanks with a length of 50-60 cm. We fold the blanks in half, retreat from the edge of 4 cm and drill holes.
- Having measured the parameters of the shelves, on the wall we apply the appropriate markup. In places attaching dowels, we do in the wall of the hole. We make from the loop belt and fix them through pre-drilled holes on the wall surface.
- We set the wooden shelves on these loops, which by the time they managed to dry.
Now we put the pots with alive plants. For greater aesthetic, such shelves in the room can be hung a few, and as a color of their design, you can choose a shade combined with the interior of the room.
Corner shelves on the wall
Consider another option of the rack - angular shelves. This solution is optimally suitable for small close apartments. To make the shelves, we will need:
- Chipboard;
- galvanized or nickel plated pipes;
- flanges and screws.
We make the shelves in the following way:
- From the sheet chipboard, cut the elements of the size and shape you need. The main thing is that by their dimensions they corresponded to each other.
- On these billets, we draw tags in which we will make holes for fasteners. Such holes should be 3 on each shelf.
- We collect the rack with fasteners: flanges and screws.
- We install the shelves on the wall using brackets in advance to the surface.
- I paint the finished design to the hue and dried.
Glass shelves for flowers do it yourself
Glass shelves in the interior look spectacular, especially if you perform from glass of different color and equipped with backlight. Such a detail will fit almost any interior regardless of style. Let's try to make a similar design yourself, using 6 pre-harvested glass shelves and two wooden slats for this. We describe the step by step process:
- To work, it is better to take tempered glass with a thickness of at least 5 mm.
- In wooden planks, we do the grooves corresponding to the thickness of the sheets of glass, as well as cross section of the planks. The fragility of the material should be taken into account and the grooves are as frequent as possible and stable.
- In these grooves insert glass shelves. For greater strength, the tree in the mounting places can be lubricated by a suitable adhesive composition.
- Then the rack is installed in a suitable place.
Glass shelves with flowers can be put on the floor or on the windowsill, and you can also make the design of a smaller size and arrange souvenirs and figurines on it.


