Installation of LED Tape: Instruction Lighting
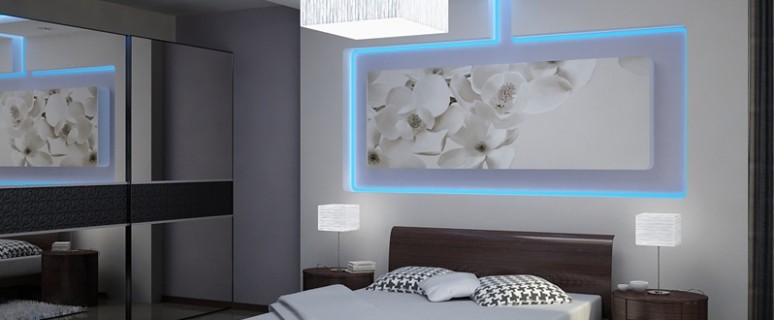
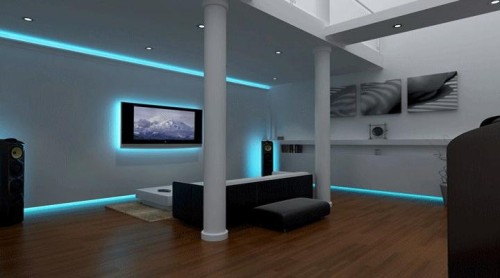
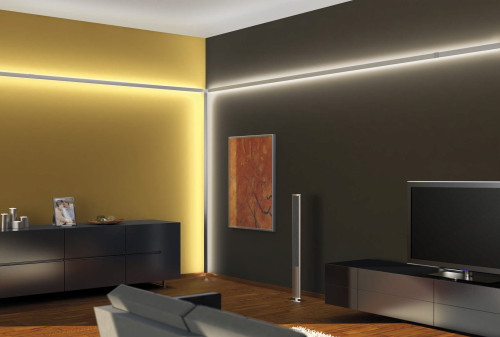
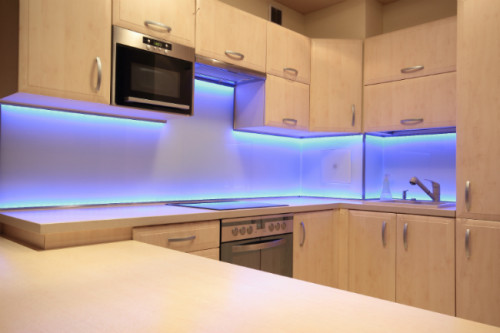
If you have conceived the repair of the apartment, one of the first will be the question of choosing lighting equipment. Beautiful alternative to traditional lamps and lamps - LED tape. When installing a ribbon with LED lamps on the ceiling, not only the view of the room will change significantly, there are great opportunities in choosing a designer solution. In the article, we will introduce you to install the LED tape with your own hands, as well as the benefits of using this lighting equipment and the features of choosing one or another tape.
Content
Tape device with LEDs
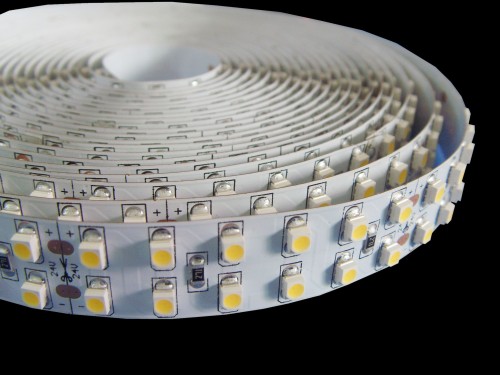
Duralight (LED tape) is a plastic printed circuit board in which the small light bulbs of various shades are mounted, as well as resistors. The latter perform the role of resistance. The printed (circuit board) has a sticky self-adhesive basis, so it is possible to apply LED tapes in many places: at home, in the apartment, in restaurants, hotels, clubs, bars and other commercial buildings. Due to its peculiarities, tape with LEDs can be freely used when illuminating hard-to-reach places.
Important! LED lamps are usually located on the surface of the conductive thread at the same distance.
LED Tape Color Options
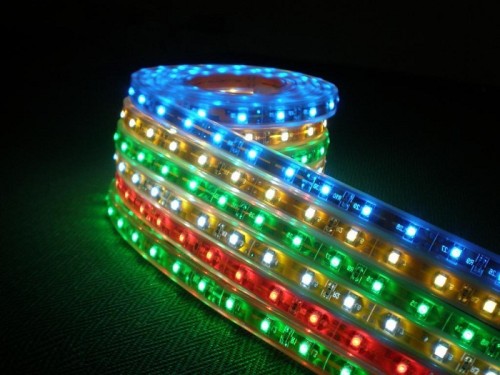
LEDs have different colors of the glow:
- Warm white.
- Cold white.
- Green.
- Blue.
- Yellow.
- Red.
- Multicolor.
Standard LED Tape Sizes
- Width 8-10 mm.
- Thickness - 2-3 mm.
- The length of the tape in the coil - 1 or 5 m.
Selection of LED Tape - Criteria, Properties
When choosing a LED tape, it is advisable to immediately decide with its requirements, and for this you need to know what kind of criteria the types of lighting threads are distinguished. This will speed up the process to buy the correct version of the lighting device in the planned price range.
We list the main distinguishing features:
- Brightness.
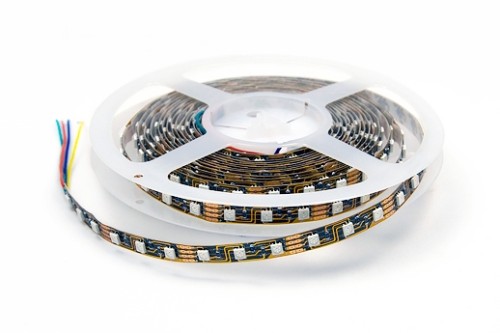
- Type (monochrome or tricolor).
Important! Monochrome duralites can be green, white, blue, red, yellow. Multicolor - RGB ribbons are able to change the color of the backlight, thanks to the special controller.
The shade of LED lamps depends on the type of crystal embedded inside.
- Number of lamps on one meter. Than they are more, the brighter the tape, which means it will be higher than it.
- The base (self-adhesive or not).
- The quality of moisture protection is determined by the IP class.
- Using DIP or SMD. More often use SMD (superficial installation) as a cheaper option.
Important! Before purchasing the LED strip, decide on the brightness of the lighting, the level of humidity of the installation location, as well as the required tape length. When choosing, consider the optimal number of LEDs for the required level of illumination, so as not to overpay for unnecessary brightness.
Advantages of LED ribbon
Before installing and installing the LED tape, read the advantages of the lighting equipment. This will make sure the correctness of its choice.
The main advantages of Duralight:
- Minor energy consumption - thanks to small power.
- Favorable service life, regardless of the type of room - from 5 to 13 years.
- The possibility of laying on any trajectory - due to the plasticity of the thread.
- The ability to choose the desired length of duralite, since the cutting of the cut is 6-10 cm (after 3-5 LEDs).
- Lighting such a ribbon has the highest efficiency. LEDs do not emit heat, electricity is spent only on the radiation of light.
- No flicker.
- Portability to voltage drops in the power grid, in particular, the tape continues to function at a reduced voltage to 130 V.
- Lack of ultraviolet radiation.
- The ability to independently pick up the color gamut.
- Fire safety.
- Ecology.
- The quality of the glow throughout the life remains unchanged.
- Simple laying - thanks to the use of assembly tape or self-adhesive base.
- Manufacturer's warranty. All LED products have a long warranty that favorably distinguishes it from the usual incandescent lamps or fluorescent devices.
General Rules for Mounting LED Tape
When installing LED tape, follow some rules and requirements to ensure impeccable and long work lighting. Most often, such places in the premises are becoming the most advantageous for laying the lighting thread from the point of view of practicality and design.
- niche walls or ceiling - Special boxes are used for this;
- on the surface of walls and ceilings inside plastic corners;
- behind the ceiling plinth.
Connection and installation technology in all cases is almost the same. General rules are as follows:
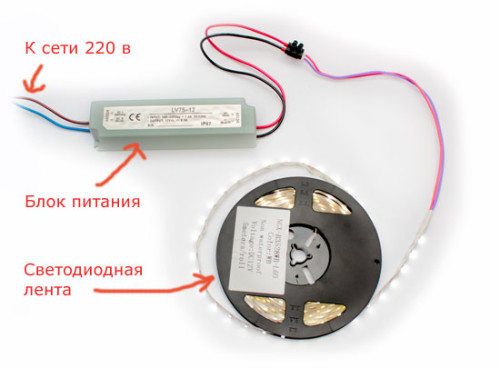
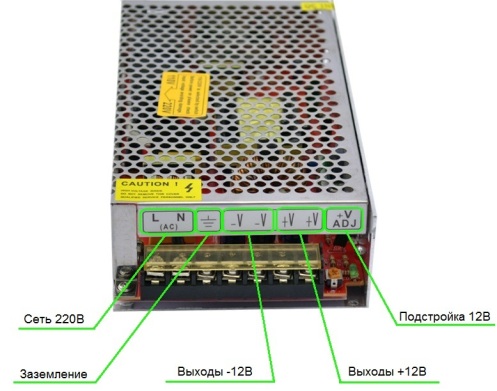
- Duralite is connected only through a special power supply, downlinking, but not directly to 220 V. For the operation of the LED source, there is enough voltage in 12 or 24 V.
- Each type of ribbon Connect and fix on the desired surface by means of suitable connectors and connectors.
- Mechanical impact on Duralight, including harsh bears, during installation is unacceptable.
- Connecting individual segments, make sure that you do not disturb the integrity of the conductive tracks that feed LEDs.
- Pay special attention to the IP class of dust and moisture protection. The IP 65 class will allow you to establish lighting even in water.
- The surface on which the thread with LEDs will be placed, must be smooth and clean. This will avoid damage to the printed circuit board.
- If the adhesive tape is selected, it is possible to fix it on the surface only 1 time. Therefore, thoroughly consider the configuration of the lighting line, make pre-labeling the trajectory to avoid inaccuracies.
- On the length of the tape more than 4a, we recommend using not available connectors for the connection, and the soldering, as it is much more reliable.
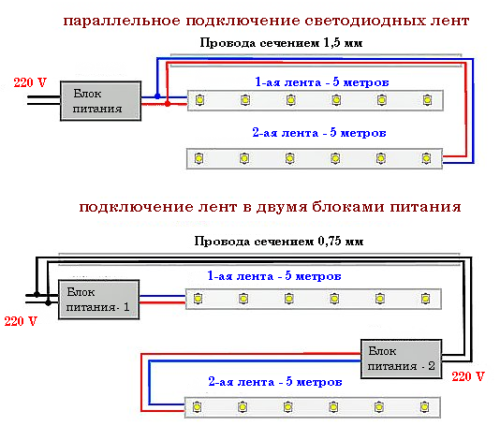
- Connect a sequentially no more than 5 m duralite. Otherwise, the lamps at the end of the thread will produce the light of a smaller brightness, and in the future it will lead to a stable overload of the entire system.
- The power of the selected power supply must exceed the total power of the connected LED strip at least 20-30% at full load.
- To connect the power of the lighting equipment, invite qualified specialists. If you connect the lighting yourself, carefully take the place to dock the power supply of the power supply with the output.
Important! When working with a current, be sure to adhere to safety equipment.
- Before cutting the ribbon to pieces, carefully operate the coil of the LED tape and connect it to the power supply for the test dough. In case of marriage, return the LED tape under warranty.
Important! During service check, the lighting equipment should work in active mode from 8 to 24 hours.
LED Lighting Design Design Tips
To get a truly winning interior result, when laying Duralight, consider such recommendations:
- The distance between the levels should be 20 cm. When decreasing or increasing the distance, it is possible to obtain uneven lights, which is unacceptable.
- The optimal bulk value is 2-3 cm.
- While mounting the equipment, use the mounting plastic angle. It is attached simply and easily with the help of bilateral scotch.
- We do not recommend highlighting the glossy ceiling, as the diodes on such a ceiling will be reflected in the mirror.
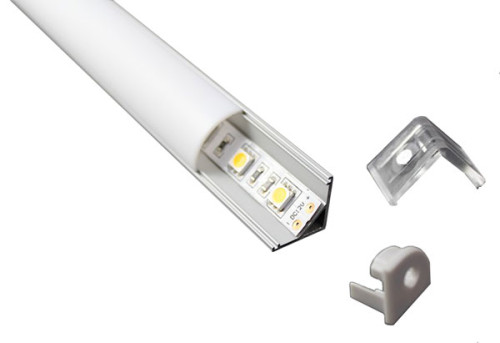
- In the constrained conditions of placing limited ventilation, the installation of the LED tape is recommended in combination with an aluminum profile. It is necessary for heat removal, as the overheating will significantly reduce the resource of the LED.
Important! When installing, consider convenience for repair in the future. For example, if you install the lighting thread behind the suspended or tensioning ceiling, without partial disassembly of the ceiling, you will not be able to repair the device.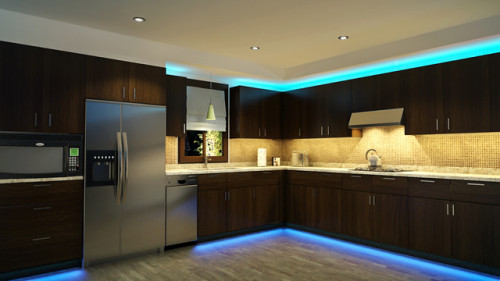
LED ribbon fastening methods
The LED tape is mounted on the ceiling in the following ways:
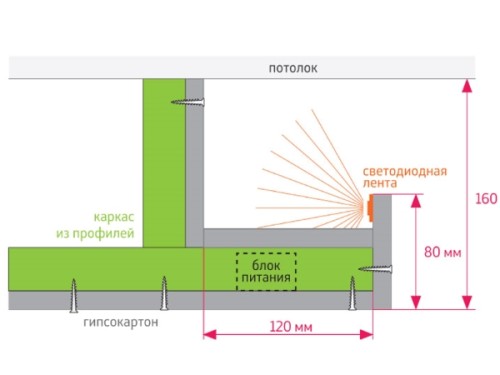
- Installation of LED tape into ceiling plinth. This method has a huge advantage - you do not need to perform the ceiling alteration, since the ceiling plinth itself is mounted at some distance (8-10 cm) from the ceiling. After mounting the plinth, proceed to the duralite attachment: remove the bottom layer of the tape and stick to the ceiling plinth, as the usual sticky tape.
- Installation of ribbon in eaves made of drywall. This method is much more complicated, but the ceiling will look much more effectively.
Installation of LED tape on the ceiling
Installation of LED tape with your own hands, carry out consistently:
- Determine the length and type of tape, pick up the profile.
- Check the color control controller and glow brightness. It smoothly switches the colors, and the dimmer adjust the brightness using the control panel.
- To connect Duralight, buy connectors. Connectors may have a flat or round shape - it depends on the type of LED tape and the manufacturer.
- Pick up the power supply that will perform the function of the lowering transformer - in the kit it does not go.
- Collect the entire system, sequentially laying and gluing the thread with LEDs.
- Connect the LED tape to the power supply.
Let us dwell on some items.
Select the power supply
Power supplies are different power - from 6 to 400 watts. Energy consumption depends on the quality of the tape, the density of the LED location. As mentioned earlier, the block capacity should be at least equal to the power consumption of the tape plus the stock of about 25%.
Important! Consider the calculation of power on the example:
We have a tape with a length of 5 m and with a capacity of 9.4 W.
To calculate the power of the power supply: 5 m * 9.4 W \u003d 47. Do not forget about the reserve: 47 * 1.25 \u003d 58.75 W.
As you can see, we need a power supply minimum of 58.75 W. You can round up to 60 W. This is not difficult to find in the store radio components.
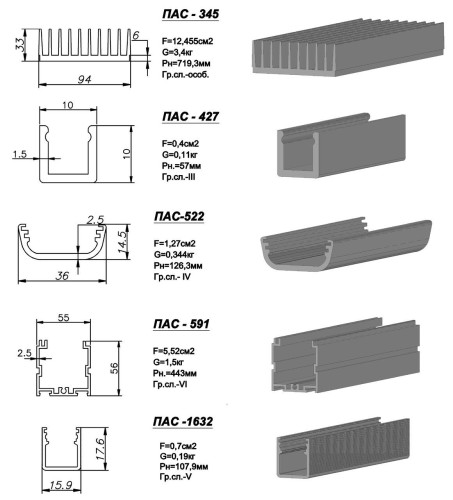
How to choose a profile?
Profiles for mounting lighting equipment differ by material, as well as a device. Consider the main of them. By material manufacturing material is distinguished:
- Aluminum profile. Such a system is universal and reliable and will be appropriate in the interior of any style. The profiles of this type are used for the maximum quick and easy creation of the design of the lighting system.
- Plastic profile. The profile box for lighting equipment is often made of durable plastic. It is transparent either matte. The advantage of this profile: elastic, resistant to mechanical effects, to temperature differences and moisture.
Important! The plastic housing is suitable for mounting lighting structures in public buildings, in highlighting showcases, shopping equipment, as well as furniture. Plastic profiles are used even to illuminate ice hills, rollers and sculptures.
By device profiles are:
- Angular. In some cases, the standard profile is inappropriate, and then apply an angular, which is suitable for highlighting showcases of trading halls, cabinets and is used instead of ceiling plinth. By choosing this option, show your fantasy by the location of the lighting thread. In this case, it is possible to install even in non-standard places, due to minor fasteners, high speed and simplicity of laying. For example, to illuminate window frames, floors, the linen of the inlet door, etc.
- Built-in. The built-in metal profile looks in volume and has a lot of advantages, in particular, is resistant to aggressive environmental impact. When installing this type of profile, use special glue or fastening so that the design is high-quality.
- Mortise. The profile of this design is most often used in the furniture industry to make backlighting tables, kitchen heads, cabinets. Aluminum design has silver color or gold. The profile length is 1-2 m. Often the mortise profile equipped with matte light filters so that the light from the tape is dissipated. New furniture such filters attract the attractive look, and the old furniture - a new life.
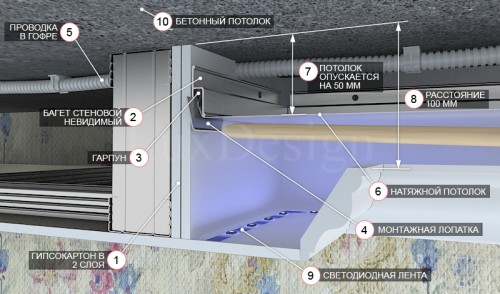
Mounting scheme LED tape under the stretch ceiling:
- Shoot the stripes of the ribbon until the desired length is obtained. Cut the thread, focusing on special labels, otherwise you can damage the contacts (usually permissible cuts are indicated by labeling in the form of small scissors).
- Collect the scheme on the floor to check the connection density and make sure the work of the lighting equipment:
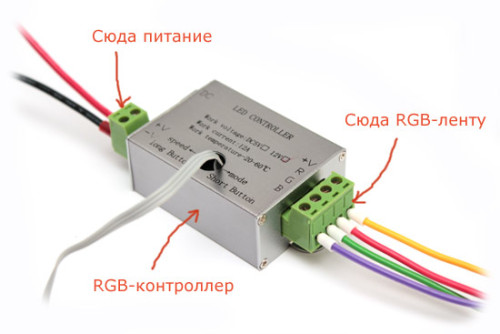
- rGB Colored Ribbon Connect to the controller, observing the labels in the color of the wires on the connectors: R - for red, G - for green, B - for blue. For a black wire, the connector is indicated 12 V or 24 V;
- controller Connect to a downstream transformer - power unit.
Important! When the transformer is connected, do not mistaken with the surveillance, otherwise the tape can quickly overcome.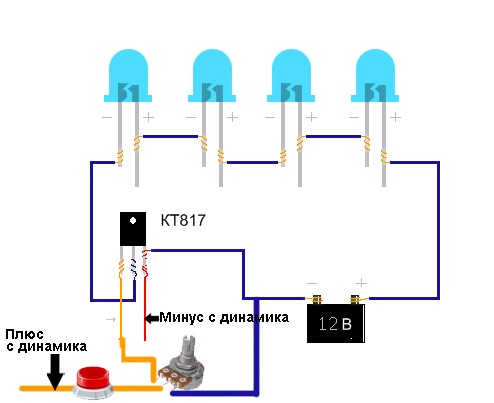
- Connect the collected circuit in the network and check the assembly correctness.
- If everything works efficiently, disconnect the tape from the controller and stick to the ceiling.
Important! After mounting the lighting tape, connect it again into the network and check the quality of work. Only after the positive results of the test you can collect the web of the most stretch ceiling.
Tips when installing and connecting duralite
- Before sticking the LED ribbon, prepare the surface for installation. It should be smooth and degreasing. To do this, treat it with alcohol and a clean cloth.
- Powerful duralite (more than 10 W \\ m) mounted on a metal profile either on an aluminum substrate.
- Design for convenience, glit on a layer 3m or glue / sealant.
- When installing duralite on conductive surfaces, for example, metal structures, be sure to insulate the ribbon by placing it into the frame.
- During the assembly, eliminate damage to conducting tracks.
- When connecting large tape segments, use a parallel connection. With a consistent - there will be overloading of conducting tracks, which will lead to bravery.
Important! Before installing the LED tape, not only remember all these rules, but also look at the video lessons. Especially if you fulfill such a job for the first time and are not sure about your abilities.
Installation of LED Tape - Video
Conclusion
We hope that following our advice and recommendations, the installation of the LED tape in the kitchen or in any other room was successful, and in your apartment there is a soft, beautiful light, and the interior was transformed and became more comfortable.


