Children's bed do it yourself Useful advice,Interior items
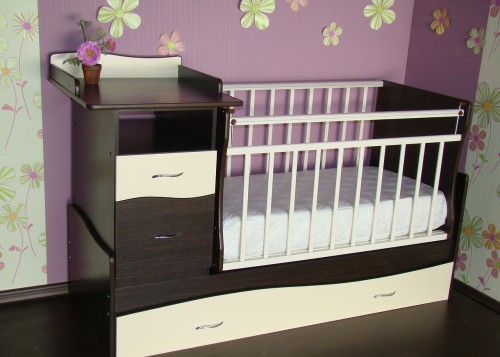
The main problem of modern young families is a lack of money. And with the birth of a child, expenses increase significantly, because the baby needs a lot, while only one working person remains in the family. In addition to costs for essential goods, significant funds go to the purchase of children's furniture. Therefore, we want to offer you detailed instructions, how to independently make one of the main elements of the children's room - the crib for the baby. Be sure your baby bed do it yourself – it is easy even without experience in working with wood and tools. But the cost of such a product will be 4-5 times lower than the price of analogues in children's stores.
Content
Consider that with all technical breaks you will have about ten days to work. But you will make a full-fledged piece of furniture personally. On the Internet you can find all sorts of drawings of baby cots, as well as video about the production of furniture and use them to create a drawing if possible.
Selection of materials for the beds. Key points
In the manufacture of the bed with his hands, the following types of materials:
- Wood. Those details that will be seen from the outside are made of MDF. Depending on your budget, select the texture and wood. It is best to take light wood breeds so that the bed can be transferred without any problems. 16-millimeter blanks will be quite enough. For internal parts, wooden or plywood blanks with a thickness of 15-20 mm are suitable. We strongly recommend using MDF - this material is not laminated, so that you can do it for gluing parts by the usual PVA glue, which is harmless to the baby. The laminated surfaces can be glued only by nitroleum, which is quite dangerous. We advise not to buy MDF in stores, but to order in the nearest furniture workshop. Firstly, it will come out much cheaper, and secondly, the furniture makers will cut the blanks in size and high qualityly turn them out.
- Lumber. For the manufacture of the bed you will need a 5x5 cm bar. Length is better to take with a margin, at least meters 8. If there is no possibility to take a whole bar, you can buy separate fragments. For the flooring, you will also need 2x10 cm boards (up to 10 pieces). The usual plywood is also suitable. Pick the dimensions according to the intended bed dimensions. Boards will be the best option, because it is cheaper and better consistent with the size of the product. The breed can be chosen almost any, but lumber must be planed, edged. You yourself will only have to do sawing boards for the desired size and sampling of quarters and grooves.
Important! We recommend not to apply chipboard for layering bed. This material is not elastic, so the child can sleep badly due to inconvenience. The chipboard is only needed if you need a children's bed with drawers - for them it will be the best material.
Construction assembly course
Preliminary work can be divided into three stages:
- Background frame elements Put vertically, pour with kitchen chairs or other objects. Check the diagonal evenness and rectangles of the frame, impose the kings. If necessary, align the frame, remove the electrical link or another suitable tool.
- Now you need to make marking of places for copiers connecting the chambers of the Tsarg with backs. It is most convenient to do this with a simple pencil. Measure the pre-height also. For one end you will need 2 bells. This indent is equal to half the distance between the buses. Thus, the width of the board is divided into 4.
- Next, remove the Tsargi, then drill in the ends of the boards of the wells. Manual drill to work in this case is not very convenient, so use the electric one. Slide the walls slightly and insert the sings to the place and press the backs as closely. Now you will see the naked eye where you need to make a retaliatory wells. If the resulting imprint is poorly visible, repeat the procedure again.
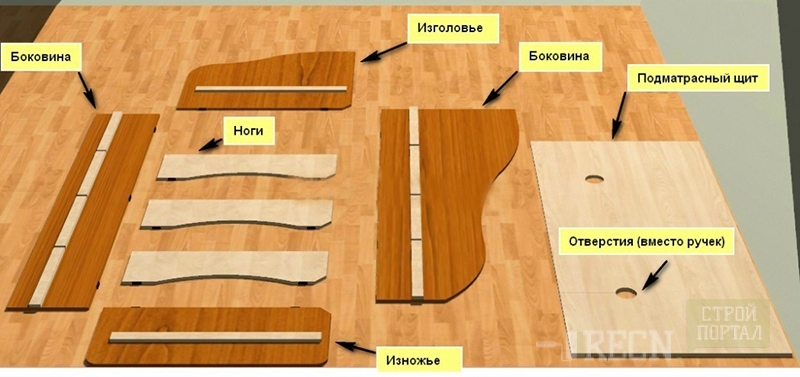
Alone, you can make different types of baby beds, but the assembly process is practically identical in most cases. Always start making a back. Take the bars with a cross section of 5x5 cm and MDF-slab. Make a note for the spikes of longitudinal communication and screed. To select the grooves, the optimal version is the milling machine, but the usual chisel is suitable. Align the length of the legs. Consider that at this stage, the legs of the foothold should be higher than the legs of the head of 6-7 cm, while the upper parts are better to immediately give the shape of the pyramid.
To set the frame, assemble the base on the impudent, as described above, and select the wells in the backs. We vgonate peaked in the ends of the boards. It is best to do using PVA glue. After that, smear the wells in the backs and quarters of the bars. Next, the design must be dried slightly and with the help of Cyanka to bring back to the kings. Now you can put the frame. Before starting the tightness, put the packing cardboard on the corners from the middle of the sides. All this wrap the rope. It is necessary to make three turns, so the length should be suitable. Watch your node to be just in the middle of the width. At this stage, you will most likely need help. Tights distribute the width of the boards. From four sides, place trimming pipes or bars of the tree of equal diameter under these turns. The diameter should be from 2 to 8 cm, depending on how tight the rope is stretched, but watches the diameter to be the same. While the glue is not reduced, and the frame is still free to walk across, check the diagonal and hang it. After that, two to four days glue should be ashamed.
When the design dried, you need to drill in the corners of the bruk frame of the hole under brazen and put them on the glue by the same principle. Next, on the site we use the spar. Lubricate with adhesive cut cuts in bars and mustache. After that, we put everything in place and fix the corners.
Sunbedding is attached to the frame with glue or nails. The cloak is a mandatory stage, because the flooring not only keeps the mattress, but also performs a number of functions in the overall mechanics of the whole design. If you chose plywood flooring, drive nails into corners. It is also necessary to carefully glue all the joints so that everything is well kept. After that, give the beds to dry a few more days. Bed is ready for use. It can also be painted or opened with varnish so that it fit into the interior of the room.
Features of the assembly of more complex designs
Many modern parents want to provide a child something more than an ordinary bed. We offer you several options for more functional children's beds that you can make yourself.
Loft bed
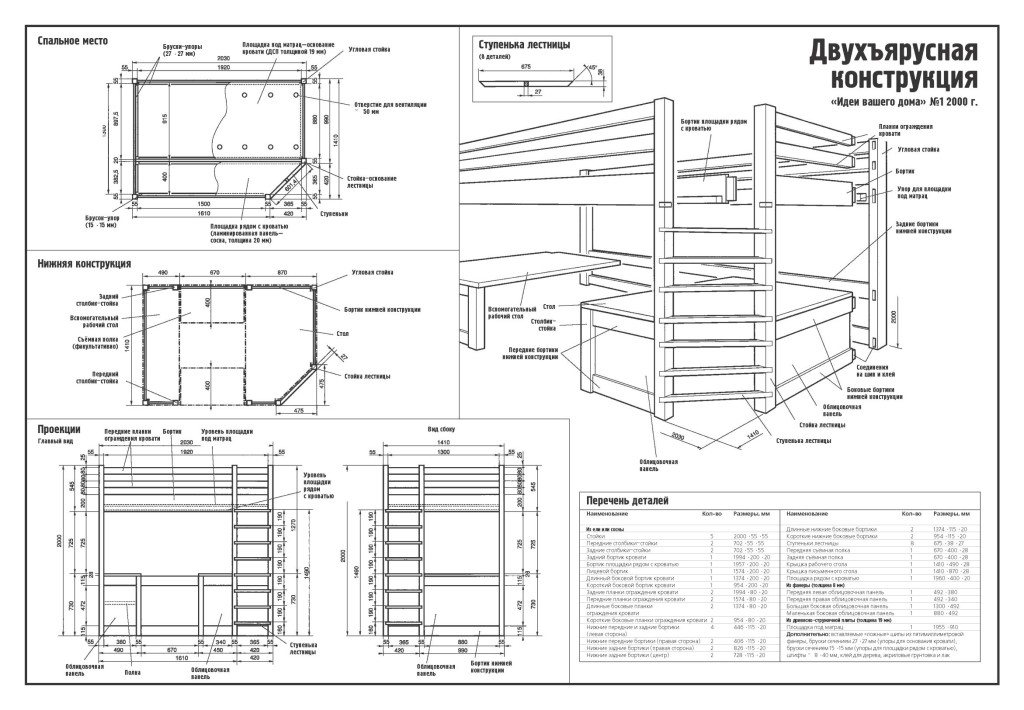
A great solution for saving space in the apartment is a children's attic bed. Such a bed can also be made without the involvement of the wizard. You will need all the same Bar-fifty and plywood 2 cm thick. Please note that the plywood cover must be solid. Plywood thickness is not enough for it to sleep, so you need to fasten several sheets with nails, glue and slats. Kosinki go inside: shields attach self-proof and sample along the same scheme as above.
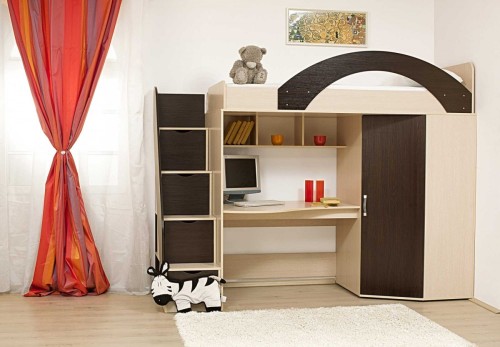
When you install such a pallet in a niche, mount it to a rectangular frame from a steel corner of 8-10 cm. The ladder is better to install metal. She, among other things, will also be an additional support. Fastening racks Make a steel pipe with a diameter of no less than 3 cm. From above, flanges should be welded - this will allow you to firmly screw the bolts. It is best to fix four bolts every rack at once. Even if one falls out, the rest will keep well for a long time. The risk of the collapse comes down to a minimum. Below are photos of children's beds of various designs.
Bunk bed
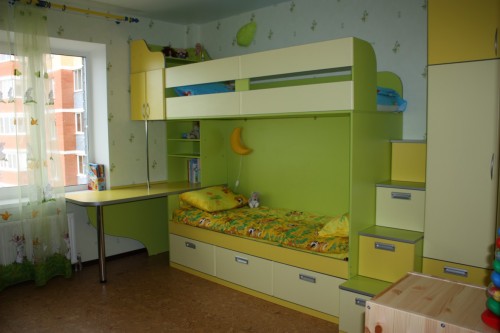
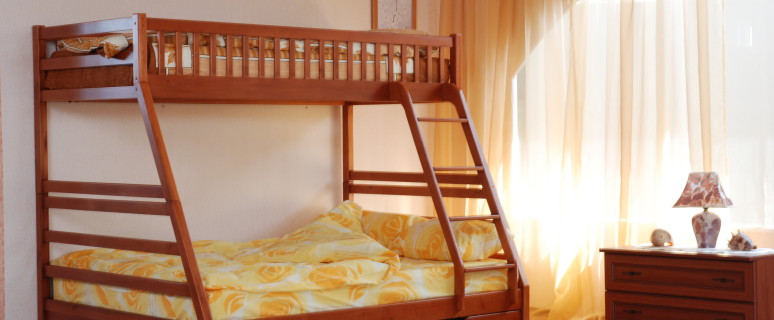
If you are not one child, you will be interested in children's bunk beds more. A set of details and tools is almost the same as above. But note that this is, in fact, two beds, which means that the material needs more. Bunk bed - construction is quite complicated, so all work should be produced in stages.
- To start a pencil or handle, make a complete markup on the details. Mark where you will have billets and places where you will drill holes.
- Make a bed start from the walls. Initially, you need to drill the desired holes, lubricate the joints with glue and connect the rack and transverse screed screws.
- Take the bars of 2.5x2.5 cm - they will be supported. Attach them with screws to the side boards. Please note that bars should be placed from the edge - they will hold a plywood.
- Connect the boards with transverse walls with bolts. It is easiest to do if the bed lay the side.
- The second tier of the bed is made on the same principle.
- To make a staircase, you will need two 5x2.5 cm bar and 1.25 m in size. There are also two internal 1.05 m in length. We advise to round the corners of the parts to reduce the risk of injury to children. Drill in the inner bars of a hole of 2.5 cm - here you will cast down the steps. For steps, conventional steel pipes with PVC coating are suitable. Internal bars attach screws to external, and external - to the sides of the bed.
- The new bed is best to open acrylic varnish. It is safe for health and quickly enhances. When it is completely dry, put the plywood bases and put mattresses on them. Plywood inserts can be screwed with screws if necessary, but this is not required in most cases.
- That's all, the bunk bed is ready for use. Now it will remain just well to enter it into your interior. The main advantage over the rest is the minimum of the place and ease of use. At any time, tiers can be divided and used as two separate beds.
Children's bed transformer
Children's bed transformer consists of three elements: box, bed and lifting mechanism. At the same time, the box can become a full-fledged cabinet for your items. In any case, the thickness of its walls should be more than 2.5 cm. The transformer bed is better to make a bigger size so that there is a stock into it.
The rear wall is not necessary, but the stubborn wall and the plinth are the necessary items. To make a bed, use chipboard. It will make the design cheaper and easy. You can use a tree, but the bed will be noticeably harmful. The pumping and assembly process partially echoes the previous options, but there are several features. To assemble such a bed, you need to do the following:
- Cut the details for the box. To do this, calculate its size according to the sketch that you can take on the Internet. Do not forget to take into account the thickness of the mattress and the height of the back. Details you will receive, collect with the help of self-tapping screws. It will not be superfluous to cry, but in this case it is not necessary.
- The box can be installed directly on the floor or on the base. Do not forget to fasten it to the wall using metal corners.
- By selecting the lifting mechanism, based on the load and type of folding, secure it. Please note that various mechanisms are needed for a double and single bed, so immediately specify the features of the seller.
- When you collect a bed, install an orthopedic base on it. You can attach to the base belt for fixing the mattress and bed linen. The facade part can be decorated under the facade. To do this, it will be best to make a mirror surface or simulate the doors with handles.
Retractable bed
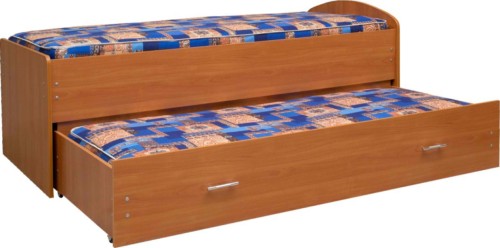
In small rooms, a children's retractable bed is a great option for saving space. To make it yourself, you will need a 19-mm chipboard from which you will drink the main elements, as well as a furniture shield of 22 mm for a lid and bottom side of the podium. Creating a bed occurs in six stages:
- Start with markup. Use a ruler, a simple pencil and drawing that you need to regularly check. Podium lid drink from a wooden shield, and the base is from MDF. It is most convenient to do it with an electric bison.
- Cut the sides to which the flooring will be attached (also from the shield). To do this, turn the podium and mark where they will be located. On the markup, fasten the board. At the edges, place the ribs ribs. They need to cut their 4x6 vessels. The back side of the flooring can also be strengthened by rigid ribs so that there are no obstacles to nomine the bed.
- When the elements are connected by screws and are combined, give structures as you should dry. Visible surfaces must be opened by varnish before you put the design on the sides.
- Select the grooves under the carrier block, which will be support for corner niches.
- Screw to the rush base of the LED strip. A semicircular facade, which is ahead of the design, take two cutting plates. In turn, screw them to a semicircular base. Between the frame of the bed and the semicircular facade insert the stops that can be made from the MDF residues.
- Rear to the bottom base screw the furniture rollers. Front - support details from the bar.
After these manipulations, the bed should freely extend and move back. If there is a need, let it dry one night, after which you can fully use it.
Now you know how to make a children's bed with your own hands and do not spend big money on her purchase. The most important thing is to use environmentally friendly materials. Little children have no health and poor-quality paint and other materials may cause serious damage. As you can see, there is nothing difficult in creating the bed. All you need is a few days of free time and working mood.


