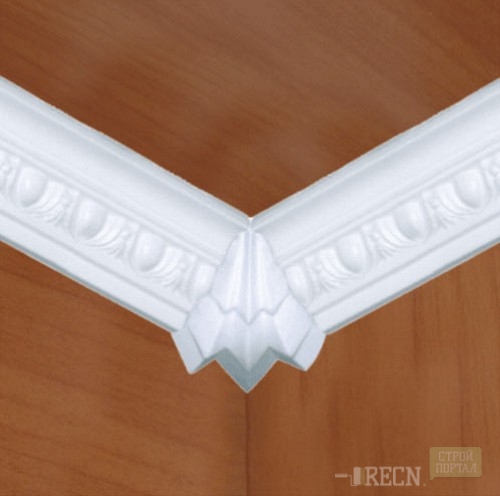
How to make the corner of the ceiling plinth Ceilings
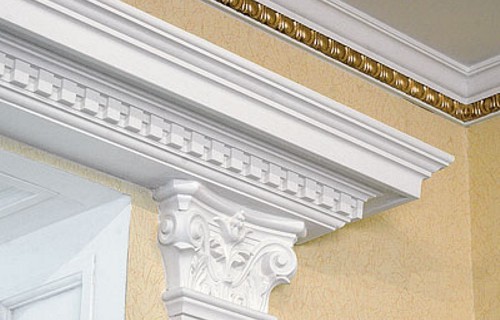
Repair completed, you can admire the newly decorated walls and the ceiling as you like, but the look involuntarily rushes up onto the ceiling. And even if the interior is suitable with taste, then all the impression of the curvature of the coftenstening joints sharply drops. Learning to make the corner of the ceiling plinth - the task is not easy, but if you follow simple recommendations and be patient, you can easily make an even angle.
Content
After decoration of the walls and the ceiling between them, unsightly transitions remain. To decorate this transition easily, using special devices - ceiling plinth. You can often hear a completely different name of the plinth - a quilt. They are used to fill the moves of the two boundaries - walls and ceiling. When installing cartoons, it is necessary to be neat and consistent, then the joints will turn out perfectly smooth.
There is no particular difficulty in this work, make a beautiful angle of ceiling plinth in one room in just a few hours, the main thing is to carefully measure each item and take advantage of small assistants.
Ceiling plinth material
Ceiling plinth can be different, but in most cases, when it comes to a modern "euro" repair, then each of us represents light building materials that will not load the interior.
Modern ceiling cartoons are made of materials:
- foamed polystyrene;
- plastic;
- PVC.
Chipboard and tree as a ceiling plinth recently used extremely rarely. This is primarily due to the high cost of materials. But the lungs of light materials are plastic or polystyrene are used often. This material is easy to use, and you do not need to invite specialists for installation. With the task you can cope with yourself, the main thing is that the joints in the corners of the room were not curves.
How to make the corner of the ceiling plinth
The options for performing a beautiful angle of ceiling plinth is somewhat:
- With the help of a special device - stusla.
- Manually (pencil labels) - without using an additional tool.
- With the help of a stencil.
- Arbitrary cutting.
How to cut the angle of the ceiling plinth with a stus
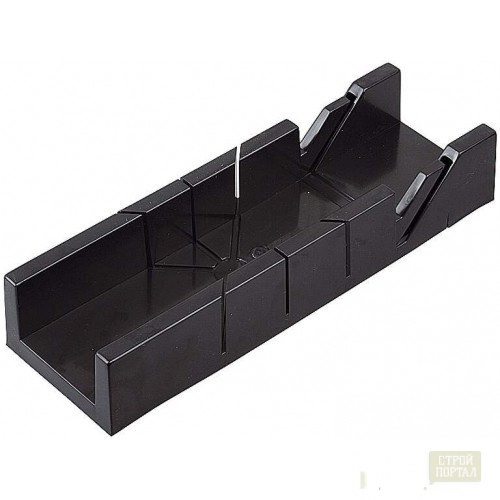
This simple tool was invented by carpenters a few more than a few years ago, to quickly trim the wooden parts under two corners - ninety and forty-five degrees. You can buy a device in any construction supermarket, and if you wish, you can do it yourself. Find in the store, among the diversity of all sorts of construction devices stuslo - easy. Looks like a tool as a small box (most often wooden, but can be made of metal and plastic) with holes for the hacksaw.
You can find a device for professionals with a swivel mechanism. In this case, the tool can be fixed and rotated in different positions.
If you do not have time for hiking on construction stores, you can make a device yourself. To do this, you need to take trimming of plywood (three stripes) or boards. The size of the bands should be the same. Then it is necessary to connect the parts so that the letter "P" turns out and perform marking for the corners. According to this markup, it is necessary to make slots using the jig in almost the very foundation.
To quickly cope with the task and make the corner of the ceiling plinth, in addition to the stub, you need to prepare such tools:
- hacksaw;
- acute building knife;
- pencil;
- rule.
When working with the ceiling plinth, it is very important to choose the right cutting tool. If the plinth is made of lightweight materials - plastic or foam, they should not be chuck to cut them in order not to damage the product. If a plastic plinth is used, covered with a veneer under a tree, then you can use the metal hacksaw - it will provide a smooth cut. A conventional building knife with a sharp blade will help smoothly cut off the foam plinth. If you are faced with the task to install a wooden plinth, it is better to use the hacksaw with small teeth.
When the question arises - how to crop the angle of the ceiling plinth smoothly, you need to carefully chase everything several times, and only then proceed to cutting. For each corner, you should make your workpiece, and it is necessary to leave a small supply of a material equal to five centimeters. In order to avoid the formation of the gap at the junction, you need to decide in advance, at what angle the wall in the room converges, and outline the cut line.
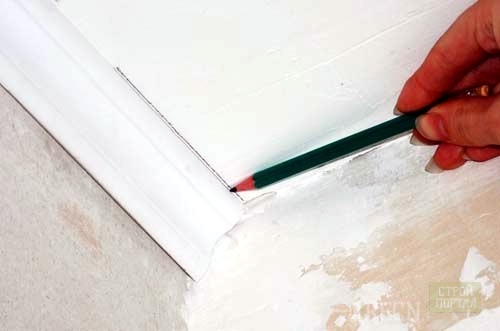
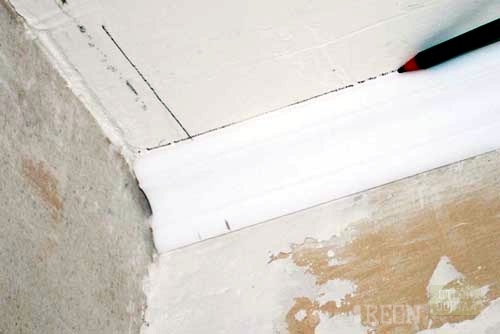
To mark the plinth directly on the ceiling it is desirable to use a simple pencil. Then each element must be transferred to the stub and position exactly the same as the plinth will be on the ceiling in the corner.
One part of the workpiece should be tightly pressing to the stouch and cut off with an acute tool according to a strictly intended line. Similarly, it should be done with the second part of the plinth, but the workpiece must be laid already in the opposite nest of the stub (mirror reflection). If necessary, the edges of the cut should be additionally treated with fine-grained emery paper.
In order to avoid large material overpower, it is desirable to make a template in advance from trimming. This is possible only if the corners in your room are simple.
Cut the corners of the ceiling plinth video:
How to cut the corners of the ceiling plinth
Corners are internal and external. Consider individually how to cut the angle of the ceiling plinth.
Performing angle:
- perform the necessary measurements;
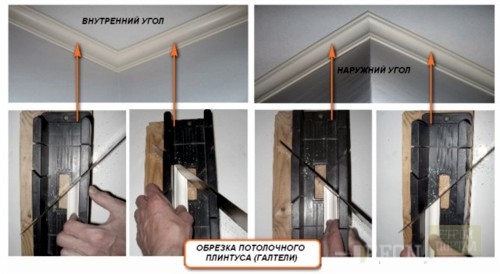
- install the plinth in the stub so that it is accuracy to be accommodated with the placement on the ceiling;
- press the bar to the opposite panel of the stub. For the convenience of working, keep the plinth better with the left hand;
- take a hacksaw or a sharp construction knife and place it at an angle of 45 degrees in the removal on the device;
- perform a neat incision of the plinth;
- a similar adjacent piece of plinth must be cut in the same way, only to arrange it in the mirror stouch.
The image shows how to cut the corner of the ceiling plinth:
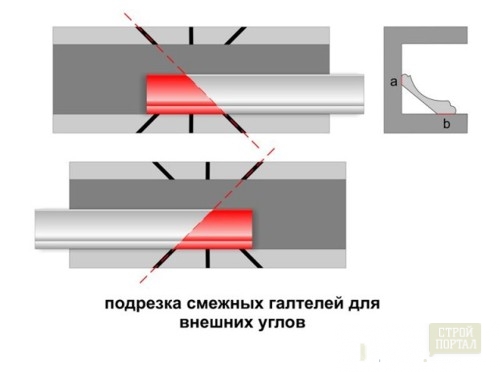
In this image, it is schematically shown how to cut a bar for an inner angle:
The outer angle of the ceiling plinth falls in the residential room is not as often as internal, and the cutting technology of such angle is not so complicated. Try making the angle of the plinth as well as the inner, only on the contrary. First, make markup on two elements, and then insert them into the stub and fix them. The long part of the plinth must be placed on the left side of the device. After trimming, each detail is first applied to dusting directly on the ceiling to check the smoke of the joint. If the edges are uneven, then they can be directly fired directly on the spot, and only then install the plinth.
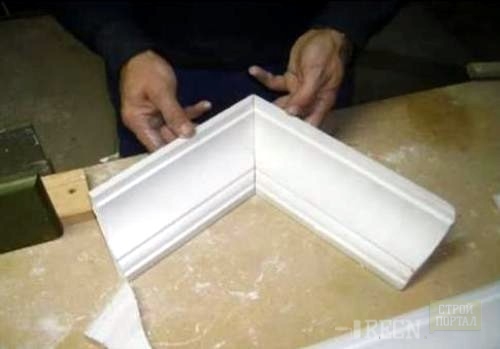
If you did everything right, then you must have an ideal angle, provided that your wall is absolutely smooth. In apartments with non-standard layout, corners may not be ninety degrees, rounded or have several faces of intersection. In this case, the method with stupid is not suitable.
How to roll the corners of the ceiling plinth
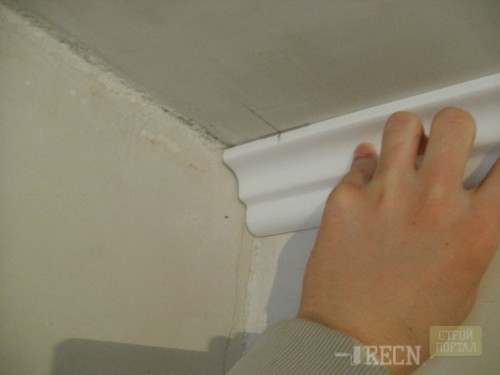
With non-standard angles, it will be somewhat more complicated to perform the cutting of the corners of the ceiling plinth. It is necessary to use the construction knife - directly on the spot to attach a plinth to the wall and make an arbitrary cut "on the eye". Tracing the design on weight is not easy, this work is painstaking and long. But if you try well, then with maximum accuracy, you can get a beautiful corner. To the question of how to connect the angle, most experienced professionals meet that it is necessary to customize the plinth on the ceiling "dry", constantly trimmed by a sharp knife edge of the plinth. For such a fit, it is necessary to use a material with a margin. After receiving the perfect result, you can finally glue the plinth.
Smooth docking angle.
Installation of ceiling corners of the baseboard Look at the video:
How to fit the angle of the ceiling plinth without stub:
- Attach one piece of plinth to the ceiling and tightly press it.
- With a pencil, draw a horizontal line.
- Take the second item and do the same actions.
- Find the intersection point. If you spend from this point to the edge of the plinth, then you should have an angle equal to 45 degrees.
If you have a "good eye", then questions how to dock the corners of the ceiling plinth should not occur. Moreover, you do not need special devices - it is enough to be guided by a homemade drawing. Take a thin paneur and draw a rectangle. With the help of the transporter, mark a point of 45 degrees on the same side of the triangle. Spend lines to connect edges. With this layout, you can easily dock the corners of the ceiling plinth.
How to glue the corners of the ceiling plinth
The standard length of the modern ceiling plinth (plastic or foamed polystyrene) is two meters. When calculating the number of materials, it is better to take cartel with a margin. In addition, it should be necessary to decide in advance with the plinth width. So, for small areas of premises, narrow cartoons will fit, and for spacious rooms can be purchased wide.
Glue plinth in different ways:
- Directly on putty to the wall even before the wallpaper is glued.
- Right to new wallpapers.
Most experts advise to glue cartoons right on the wallpaper.
What plinth glue:
- on the glue "moment";
- on a shtaile mixture.
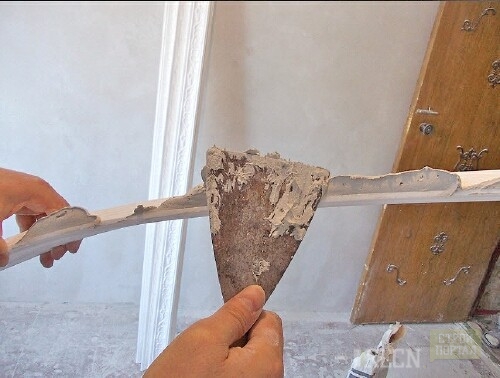
The first option is suitable for perfectly smooth walls, but even if a slight space will appear between the wall and the plinth, it can be filled with the same glue (white or colorless is sold). If this option is acceptable for you, you can proceed to work. Otherwise, it is necessary to pre-align the walls or install the cartel in the other way - on the spacure mixture.
Most experienced builders do and do, but it is unlikely that you can do the perfectly smooth cut wallpaper, besides, you need to spend more effort to fit them to the ceiling plinth.
In the event that you cannot cope with the ceiling plinth angle, you can purchase a plinth with a special finish that will approach the drawing of your plinths.
It often happens that everything is done correctly, but one corner still did not turn out perfect - it looks ugly. To avoid irregularities and lumen, you can fix the situation. Take a white sealant can and fill in dents or cracks, and you need to work solely manually, in this case there will be no trowel and other technician tools.


