How to put off slopes Useful advice,Construction

When replacing window or door blocks, the damage to the slopes is the usual matter. Yes, and over time, the slopes in view of the objective reasons lose their previous appearance and require repair. When building many Soviet homes, builders did not particularly care about the right geometric forms of slopes, which violated the general view of the room.
Content
Spacure of slopes - it's not too complicated, but it is better to trust it with an experienced specialist. If you are going to do it yourself, then you will come up with the following tips on how to put the slopes on the windows and how to put the slopes of the doors.
Tools and materials
Required tool. To restore the slope, we need: a set of spatulas, a bucket for kneading putty, a drill with a mixing nozzle, scissors for metal, bath and roller, brushes for painting and primer, level.
Required material. It will be necessary to purchase: greasy tape, primer, putty (finishing and starting), perforated corner, grouting grid, water-emulsion paint.
How to put the slopes: putting the technology of putty
Surface preparation
Today there are many different finished mixtures for putty. But for quality work, they are not suitable. To do this, you need to take dry mixes and breed them yourself. Only this can be obtained by a consistency needed for putty. After all, the consistency of finished putty can you just do not come up. For some, you need a more liquid option, and for someone more thick. This can be attributed both starting and finishing putty. To prepare the mixture, it is necessary to start to pour out a dry mixture into a suitable container and gradually add water for breeding to it. Water should be room temperature. When breeding the mixture, it is necessary to constantly stir. To do this, use the mixer for construction work. The amount of the mixture should correspond to the amount of work. It is only necessary to take into account that the diluted mixture dries quickly.
When the mixture is ready, it is necessary to carefully clean the working surface from old wallpapers, paints and all kinds of contaminants. When preparing the basis for the qualitative applying of the starting putty, first of all it is necessary to clean the surface from parts that are bad on the wall. It can be knocked out of concrete, disposed of plaster, a crepe part of the wall and a fungal basis. This garbage of the working surface must be removed even before applying the putty layer. We must not forget that the working surface before applying the starting putty should be thoroughly predicted. From how the wall will be trunk, the grabbing abilities of putty are dependent.
Previously, it is necessary to protect the window or door block from pollution. If this is not done, it will be difficult for it to cleaned from primer and putty. This is especially true of wooden windows or doors. To do this, we have a window (door) block by painting scotch.
Kneading and applying putty
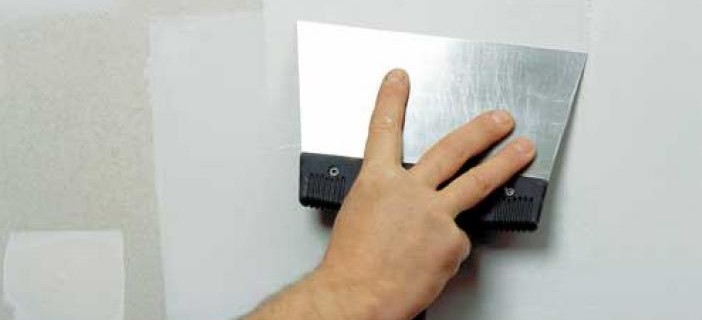
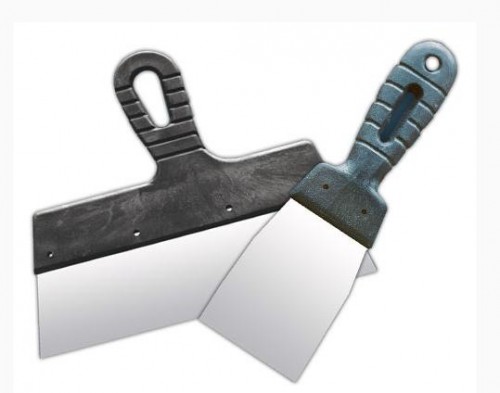
We proceed to apply putty. To clarify the technology of putting off the putty, you can see the step-by-step video "how to put the slopes". Thus, for walls and other smooth surfaces, a larger spatula should be taken, and for hard-to-reach areas and the angles are smaller. As for the material, stainless steel spatulas are the best spatulas.
- Before applying the starting layer of putty, it must be properly seated. It is necessary to observe certain proportions: 30 kilograms of putty or one kilogram of a 2-2.5 liter of water is usually divorced by 12 liters of water. But often there is simply no time for compliance with the proportions when mixing. Therefore, in order to make a mixture quickly, you need to pour water and fall asleep to putty, while the small slide is not formed over the water. The kneading should be performed using a wide whisk and interfere until there will be no lumps in the mixture and it will not become a homogeneous creamy mass.
- Next, you must apply a starting putty on the surface. Today, starting putty is used for various purposes. In particular, it is used for the capital and cosmetic repair of premises, as well as for interior decoration. Those who are engaged in construction work know that for the manufacture of starting putty, several components are used, of which lime and gypsum are the most important. The remaining components are various harmless binders. The grip and lime fraction grinding in a starting putty mixture is usually 80 million, which is considered to be a major in comparison with the finish putty.
- When you embed a starting putty, the layer thickness must be made no more than 5-7 millimeters. This is usually enough to close various visible defects on the plaster and producing a fairly smooth surface.
- Starting putty on the wall must be applied using a narrow or wide spatula. The narrow spatula at the same time should be used to overlapping the starting putty onto a wide one. Tightly pressed against the wall with a wide spatula, you already need to put a putty on the surface. Application technique largely depends on the basis, volumes and personal preferences.
- If the basis is smooth and large, then the starting putty should be applied with large portions and smeared strokes. The material should be applied from the bottom up, while how closely pressed the spatula to the wall. If there are divorces, they need to be left in this form as it is. And after that, it is enough just to correct the solution, and at the very bottom in the place of the divorce to make a smear. If there is a need to impose a start putty to the surface of a small area, then in this case you need to tinker a little so that the hand can feel the layer.
- If the case is complex, the starting layer must be reinforced using a special plastic grid. On the outer angles of the slope you need to install a perforated corner. It will protect the slope from mechanical damage, and simplify the wrapper process. Corner must be cut into the dimensions of the slope and set up the level. On the base they apply putty and install a corner on it.
- In the event that the working surface has potholes, then you must first fill in the mixture until they are aligned to the level of the main surface. Playing the angles should be through an angular spatula.
- The next layer of putty should be applied only after the complete drying of the previous layer. To dry out each layer, you usually need at least a day.
Finishing stage
After the starting putty dry dries, the slope must be sweat with the mesh to remove all the tubercles. After that, we apply the finish putty. The fine finish putty is not intended to align the surface, so after the starting, the surface must be smooth. Finish putty must be applied with a thin layer. In most cases, it is enough to apply two or three layers of putty. The finishing layer needs to make a thickness of no more than 1-2 millimeters. At the same time, the direction of applying each layer of putty should be changed.
If everything is done well, after applying the last layer, various surface defects will be not visible. Although, if the surface is put on the wallpaper, then the presence of small defects is allowed. In this case, the fully smooth wall is not needed.
When the putty on the working surface is driving, it needs to be processed using abrasive skins No. 150, wrapped in a suitable wooden bar or using a grinding machine. At the same time, each dried layer of putty should be treated with a skirt.
You learned how to put the slopes, but it's not all. So, after putty, go to painting of the slope. First, it is necessary to predict the surface with acrylic paint. After that, we proceed to paint the water-emulsion paint. Paint the slope using a roller whose size is selected for the size of the slope.


