How to install a window on the roof Window
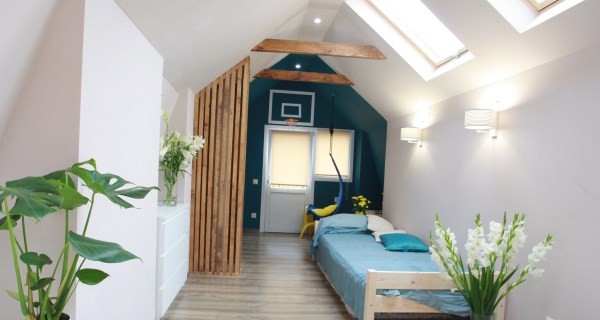
What is the room without a window? Therefore, if you threatened to turn your attic into a residential premises, then the window is required in the roof of the house to light it.
Finding into Europe, surprise, what are the original there, no similar to each other at home. Made in the roof of the photo window, which tourists are brought, I want to immediately build it. How to make a window in the roof? Well, it depends on: one designs are only good professionals, others are simpler.
The simplest auditory window
- By its design, the window in the roof can be:
- in the form of a rectangle. Roof is flat;
- rectangle. Roof Double;
- triangle;
- semicircle.
If you do not have a special professional experience, you still do not find it difficult to build a single type of window into the roof. This is an auditory window with a flat roof. Its installation is performed in three stages:
- it is performed under it a hole in the roof of the frame size;
- customize the frame so that it normally entered the hole;
- mount the window.
It's about how to install the window on the roof will go further. For different designs, the technology is somewhat different, but the preparation is needed anyway.
Preparation
It is necessary to come to work seriously:
- a sketch of the future window is performed on the scale of reference to the roof;
- the optimal width will be the one that is equal to the distance between the rafters;
- if you live in a high-rise building, then you need to get good. Therefore, take a sketch and go to the appropriate authority (Stroyer, Zhesk ...).
Materials and tools
Is there any permission? So you can collect tools and materials. And this is what:
- bar 10x5 cm;
- lining or plywood;
- nails 100, 75, 50 mm;
- protractor;
- corolnic;
- roulette;
- wooden hacksaw;
- vice;
- chisel;
- polyethylene film;
- ready window. Choose such a convenient to care for.
Design of auditory window
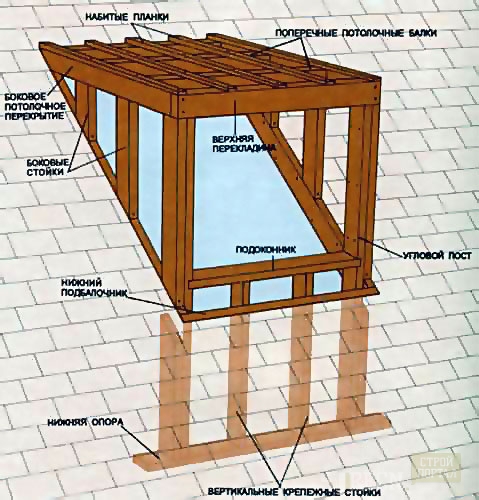
A typical hearing window with a flat roof, more precisely its frame, is built from a bar of 10.0x0.5 cm.
- The beams rafted the roofs, enhance his sides;
- corner posts are acting as holding elements;
- support for the latter is the lower carrier bar, tightly attached to the floor;
- the decoration of the hole in the roof ends with the installation of the panels: upper and lower;
- the outline of the window is outlined by planks. The tile is attached to them;
- in the gap formed by side ceiling overlaps, there are parallel beams;
- under the opening for the window, vertically located racks are arranged. These strength should be sufficient to withstand the load generated by the window.
Getting to work
- We protect the roof site where the installation will be installed;
- under the hole we arrange the bedding;
- fencing a dangerous plot in the courtyard with the exhibition of warning signs;
- construct the frame;
- mount the window. By the way, on the same quality window in the roof, the price from different manufacturers is different, so do not be lazy and compare different options.
At the end of work, each time, we close with polyethylene in case of precipitation.
Technology
We start with the hole, then follows:
Installing boobs
- we take a previously harvested bar and drink 2 panels;
- we place them between the beams;
- fix the nails at the top and bottom of the hole;
- once again, clogging 2 nails through side beams.
Strengthen the beams additionally
- cut 2 brus to enhance. The size is equal to the gap between the panels;
- click to extreme beams using vice;
- you feed all the same 100mm nails.
Construction for angular risers
- cut a bar for the bottom support. Length: take the width of the duff and add 20 cm;
- in parallel, the subable, located downstairs, just under him, is attached to the floor. It is important that the parts sticking on both ends were equal;
- cut another bar. Its length will be slightly more than the gap between the window roof and the floor;
- the workpiece is placed at the ends of the hardening beam;
- cut on notes.
The same is done for the other side.
Installing an angular stand
- Separate two pieces from the bar. Size: a little more than the future window in the roof in height;
- fix the detail, nulling it to the beam of the hardening and lower support. Similarly, the second rack is mounted;
- we take up the upper hardening design and waters it on the reinforcing beam close to the rack in the corner;
- we fix the thickening beam and nail the rack in the corner. In the same way, we mount the lower structure;
With an opposite side, all operations are repeated.
Aligning angular racks
- We take the segment of the bar, in length equal to the depth of the auditory window plus 25 cm;
- put it in one end on the panel, and the opposite we apply to the angular structure;
- control horizontal;
- in addition to the pencil, where the bottom end of the segment comes into contact with the corner stand and reinforcing design;
- for this post, we will cut off the excess with the help of a hacksaw.
Installation of the upper rod and ceiling overlap (side)
- we heat the timber. Length - distance between the ends of the angular racks on the outside;
- put it on the cuts of the racks to that side, which is 5 cm;
- nail nails.
The side ceiling overlap will be a piece of timber, which we used when aligning corner racks and one more exactly the same.
Windowsill
- We take the timing of 2 cm longer than the lumen between the racks at the corners;
- we celebrate the place where the windowsill will stand. Do not forget about horizontal;
- in the corner racks we cut the grooves, deepening by 1 cm and obey with the help of the chisel;
- we insert the windowsill and fix with nails into the grooves;
- cut two segments for fasteners. You feed them.
We move to the roof and engage in transverse ceiling beams. All of them 3. We measure the length of the inner edges of the side beams. The gap between them is 40 cm. With this work, it is difficult to cope with this work. Need an assistant. Further to lateral ceiling overlaps and reinforcing beam you feed the side racks with a 40 cm interval. Then we are trimmed.
Mount the roof
- The number of oblique slats required for installation under the roof, calculate by dividing the width of the roof by 30 cm. Mean the length and cut;
- on the bar 50x50 mm from the opposite ends, we put the tags, retreating from the edge of 1 cm. Connect the marks diagonally. And the regime along these diagonals - the narrowing planks will turn out - 2 pcs.;
- when installing, a wide end must be rotated to the roof of the house, the smooth surface looks down. The narrow side lies on the side ceiling overlap;
- i fix the entire planks consistently. Gloss between them 250 mm. The narrow end is nailed 5 cm with nails, and a wide one - 7.5 cm;
- for tapered slats, you feed the coating - Phaneur or chipboard.
We edit the roof of the auditory window and install the covering boards with a thickness of 25 mm. You feed the raid rollers and a drip bar. We process the cracks with a sealant so that there is no moisture. Now time to install windows into the roof.


