Wood wicket: Installation Instructions Doors,Plot
To enjoy your site and secure convenient access to the territory, you need to put a beautiful gate. It is best to make it from wood - the technology of manufacturing such a design is very simple and the entire door will be hollowed. Detailed step-by-step instructions of how to make a wicket from a tree with your own hands, you will find in this article.
Content
- Wooden wicket - pros and cons
- How to make a wristber from a tree?
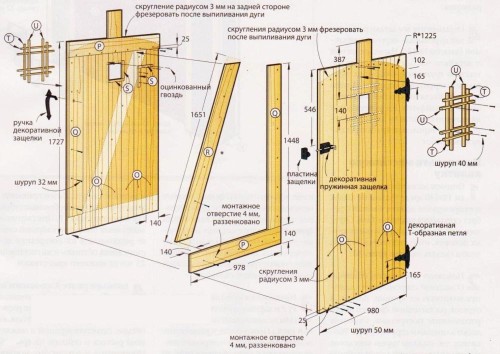
- Drawing of gate
- Mounting Tools Wicket
- Simple wicket - Materials for work
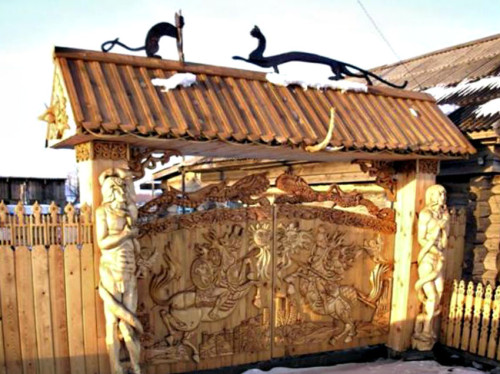
- Carved Wood Wicket - Simple Methods for creating a pattern
- Wicket under old tree
- Installation of water wicket - Basics of design
- Decorative trim Gate
- Interesting Design Ideas Wicket - Video
- Conclusion
Wooden wicket - pros and cons
Before making a writing from a tree with your own hands, it is necessary to understand what advantages this material will give, and what is its disadvantages.
Advantages:
- Strength and durability - provided that the selected breed is correct.
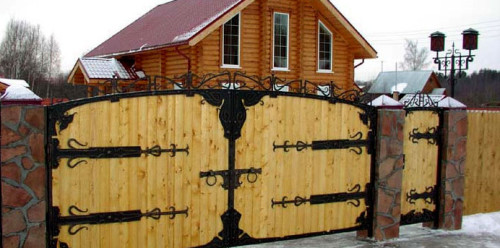
- Attractive appearance - you can create a design of any shape and choose a suitable decorative design.
- Affordable price. Brucks you need can be purchased very inexpensively, and if you use the remaining material after the main construction, then the installation of the wicket is almost nothing to cost.
- The speed and simplicity of assembly - such structures are easy to make with their own hands, even in the absence of professional construction skills.
- No need to apply complex equipment and tools.
- Environmental purity of materials.
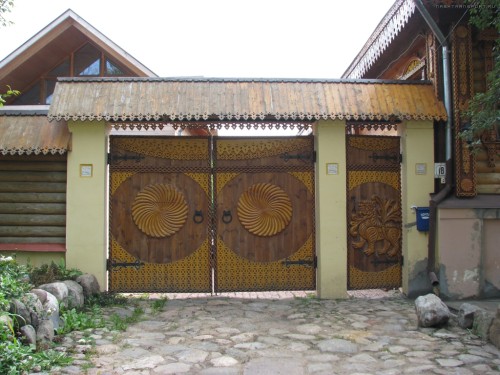
Important! Designer capabilities when installing wickets from wood with their own hands are endless. You can paint in any favorite color product or make painting paintings on it. Today, carved wickets made of wood are very popular today - about how to make such you will learn below, as well as interesting options for the old days.
Disadvantages:
- Low degree of protection against hacking.
- Limited service life - depending on the selected model, it will be possible to periodically restore and correct the position of such a gate.
- Fire exposure.
Important! Such minuses determine the need for additional processing - antiseptics, fire-resistant compositions. Due to this, the time for creating a wicket of wood increases.
How to make a wristber from a tree?
The process of creating the wicket is not difficult, if you do everything in stages, following such an algorithm:
- Rightly determine the location of the wicket.
- Determine the convenient direction of opening.
- Make a drawing, designating all the necessary sizes.
- Pick up the materials for work and assemble a complete set of necessary tools.
- Collect the design.
Drawing of gate
Mounting Tools Wicket
- Drill.
- Hammer.
- Hacksaw.
- Plane.
- Chisel.
- Screwdriver.
- Screwdriwer set.
- Level.
- Rope.
- Pencil.
- Corolnic
- Milling machine.
- Roulette.
- Drill or scrap.
- Plumb.
Important! Additionally prepare a shovel, crushed stone and sand - they will be required to strengthen the supports.
Simple wicket - Materials for work
Choosing materials, consider the fact that you will need elements of various thicknesses and section to create such design details:
- Supports - for them are suitable bars from 10 * 10 cm.
- Frame - it can be collected from wooden bars 4 * 4 cm.
- Boards for plating frame sizes from 2 * 4 cm.
Important! In addition, additional components will be required - the deposits, canopies, loops.
Decorative material
When choosing a wood breed, take into account density, strength, resistance to rotting and deformation of each variety. Such options are suitable for wicket:
- Larch
- Spruce
- Pine
- Cedar
- Oak
- Ash
- Beech.
Important! The choice of a particular variety depends more from your financial capabilities. For example, cedar, larch and oak are the most durable and practical materials, but they will cost expensive. The ash and pine are softer and not so resistant to natural phenomena, but it looks outwardly looks quite worthily and cheap.
Carved Wood Wicket - Simple Methods for creating a pattern
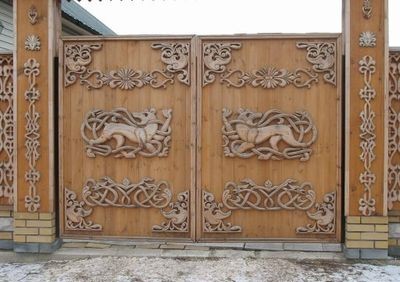
A carved gate is a very interesting option, and make it with your own hands, even the beginning master.
There are 3 technologies, a distinctive feature of each of which is the type of pattern.
Geometric
The geometric wicket in the finished form is a door leaf, on which various graphic elements are present in large numbers:
- spirals
- drops
- lines
- points
- rectangles
- rhombus.
To make such a decorative writing of wood, prepare yourself for painstaking, but simple work:
- Come up with the pattern, drawing up a pre-drawing.
- Arm yourself with suitable tools and cut the drawing on the surface of the wood.
Important! Each such gate is unique. If your own imagination is not enough or there is no desire to invent the pattern, take to the execution of any of the finished projects that you liked.
Contour
Contour carving is another type of handmade only. The technology of creating such a gate is as follows:
- Draw on a wooden canvase drawing or apply it through a copy.
- Along 2 lines of each element of the drawing, shift the deepening of the chisel.
Important! For staining, select a minimum of 2 colors - one for protrusions, another for recesses. This will make the drawing more voluminous.
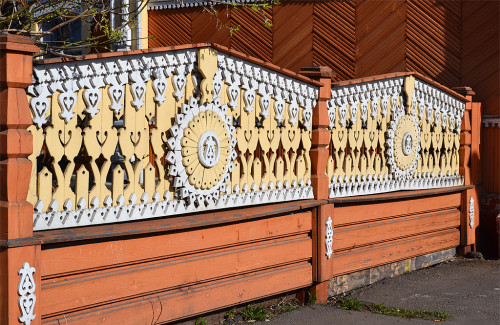
Lacy
This version of the thread is considered the most beautiful, but at the same time the easiest. If there is a suitable tool, it is easy to speed up the process by automating the cutting itself. For this:
- Apply any pattern from 1 or several solid parts to the surface. The drawing may be the easiest.
- In any part of the canvas, drill the hole.
- Insert the jigscription into it and sequentially cut the entire pattern along the contour.
Important! It is possible to facilitate a difficult task of choosing a suitable design. You can only view photo wickets from a tree from various manufacturers and homemade masters or directly objects live if you have such an opportunity. In the second case, you will clearly present yourself all the device of such a door design, which means that the creation of your own will go much easier.
Wicket under old tree
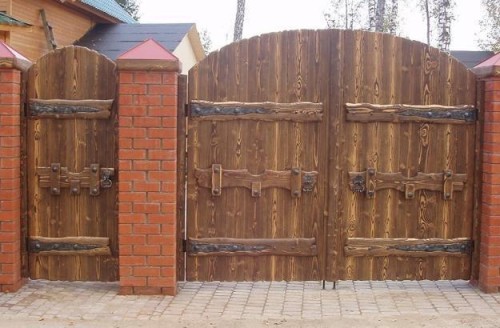
Create a bizarre wicket with an antique effect can be 2 ways:
- staining with special "constituent" solutions;
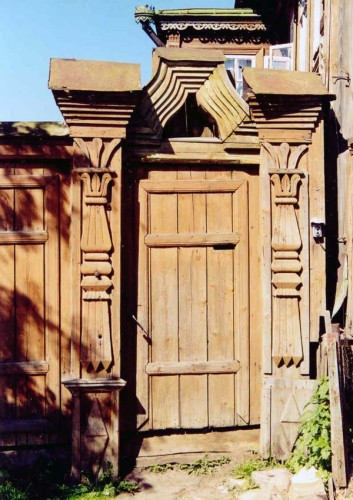
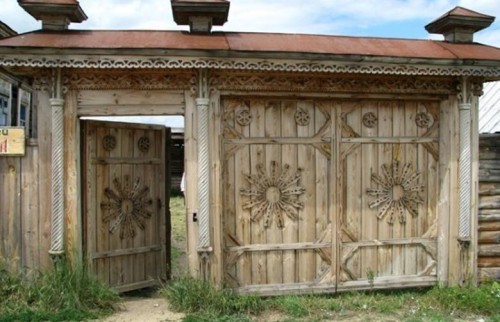
- use additional decor - forged elements, loops and drowsy "under the antiquity".
Important! In the first case, you will not have to largely deviate from the usual scheme of creating a wicket from a tree. In the second, it will be necessary not only to thoroughly think about the location and choose the appropriate decor elements, but also to enhance the design. This is necessary for the reason that metal parts will significantly lose all the product, create a large load, so you need to achieve their maximum stability, so that in a couple of months it did not have to start all the work again. The easiest option is to choose to install the supports are not wooden bars, but boot.
Installation of water wicket - Basics of design
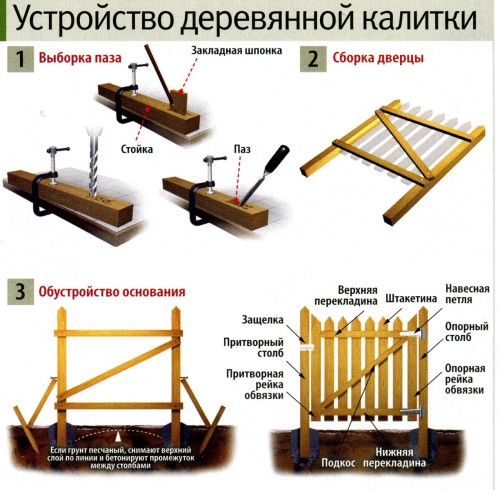
The entire installation procedure will consist of 5 stages:
- Creating supports.
- Build frame.
- Fastening decorative material on the frame.
- Installing all fixing and shut-off parts - loops, casov, locks.
- Finish finish of the door leaf.
Important! Before making a wicket in a fence from a tree, find out a convenient direction for the door opening. In this case, the width of the roadway becomes most often the width of the roadway - if it is small, it is better to direct the sash inside, if sufficient so that the wicket does not clinging passing by the car is only for you.
Installation of support
Before starting work, all wooden materials are for support, frame and trim, treat the antiseptic and wait for it drying. Such a procedure will help prevent wood rotting, increase its resistance to moisture and bugs.
Further act like this:
- Try 2 pits with a depth of 1-1.2 meters.
- At the bottom of the sand pillow with a thickness of up to 7 cm.
- Put the same layer of rubble.
- Both layers are misstressing.
- Fill with cement mortar.
- Install the support poles.
- Open them clearly vertical position or plumb.
Important! Fix so that in the process of setting the cement mixture they are not tied.
Assembly of the carcass
As a result of the work on the manufacture of a frame, you should get a Z-shaped design. For this:
- Spread the bars on a hard smooth surface.
- Make marking.
- Cut the desired length.
- Connect the framework elements.
Important! If there are "borrowers" on any detail, put them in the plane.
Decorative Wood Wicket Oven
The framework of the frame is carried out in 2 ways:
- solid nearby;
- grid with intervals.
In both cases, adhere to these rules:
- Make on the frame pre-markup of the position of the boards.
- Pick all sizes of plating boards for the necessary parameters.
- Secure the sequentially all elements with nails or screws on a tree, checking the evenness of their location along the vertical and horizontal.
Important! If the design is lattice, all the boards should be located at the same distance from each other. No element should be rented.
Installation of shut-off elements
To hang a gate:
- Make a preliminary illustration of its position.
- Mark the locations of the loop.
- Lock the loops in the marked places. Since the loops use most often decorative or forged, they are fixed from the outside.
- Attach the door leaf.
- Adjust its position by level or plunder.
Important! Check that the sash can be easily opened and fitted closely when closed. After that, set the goals and the lock at a height of 0.9-1 meters from the ground.
Decorative trim Gate
The wickets of any kind is usually painted in conclusion. For this:
- Choose the paint of the desired shade - take solutions suitable for external work.
- Treat the entire surface of the primer - it is better to take a universal pentaratal, glyphthale.
- Wait for drying.
- Apply the paint in 2 or 3 layers, making breaks for each.
Important! Some paints prefer varnishing. In this case, pre-stick the canvas, treat the primer, and then open lacquer - also in 2 or 3 layers. Choose only moisture-resistant solution.
Interesting Design Ideas Wicket - Video
Conclusion
Now you were convinced that it is easy to make a wicket from the tree with your own hands. Most likely, more time you have to spend the choice of interesting design, because it will depend on the first impression of your home. But the result of this work will certainly become the subject of your pride!


