Frame the veranda do it yourself Construction
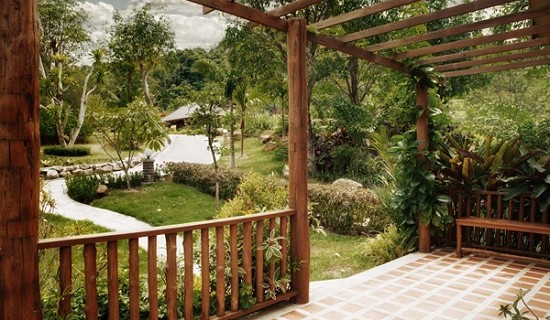
The veranda is an extension to the main building, located so that the entrance door of the house is inside it. The veranda performs practical functions to protect the house and increase the area, as well as decorative - in the summer it is possible to spend time with family and friends.
Construction of a carcass veranda to the house is not capital construction, therefore, with due a serious attitude to the case, it can be built on its own. Since the room is not intended for heating, there is no need for the design of a full-fledged room with heating communications, and its design cannot be called complicated. Here you will receive the necessary instructions for creating a carcass of the veranda with your own hands, ranging from the foundation and ending with the roof.
Excellent when the idea of \u200b\u200bcreating a veranda came to your head during the construction of the main building. Then you can immediately purchase building materials in one style and include it in the main work plan. If this is not the case, it is worth thinking over the problem of compatibility. For example, if the building is made of decorative bricks, some elements of the veranda are also classified with bricks.
Preparation
How to make a carcass veranda? First of all, it is necessary to determine the size. As a rule, it is 4-6 meters long and about 2.5 widths. It should be adjusted to one of the already existing entrances: the main or second (for example, exit from the kitchen in the garden).
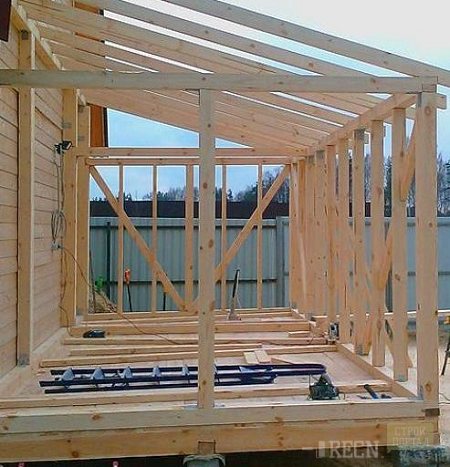
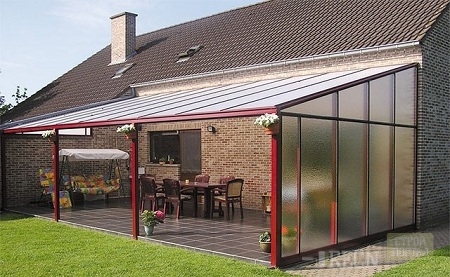
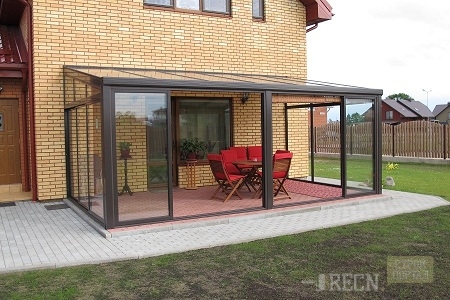
Rice. 1. Frame veranda: photo
The plot under the veranda is aligned with the removal of the upper layer of the Earth (about 15 cm) in order to align it. Use the level. Next marks the horizontal and vertical boundaries of the future structure, all sizes must be perfectly recovered. The fortress and durability of your veranda depends on it.
To make marking, in the required places, pegs are driven and stretch the cords.
Foundation
If the veranda is built to the previously erected building, a separate foundation is needed for it. As a rule, the masters choose the simplest, but reliable type of foundation - column. Under the angular racks, as well as in key points under intermediate frame racks, brick poles are laid.
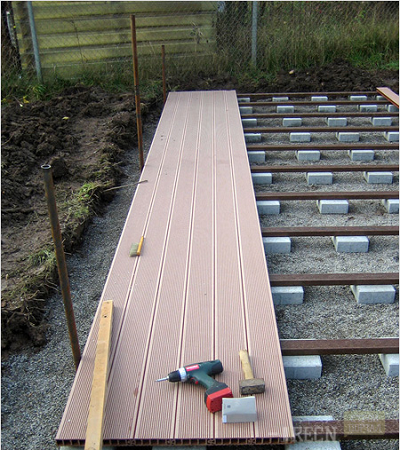
Rice. 2. Column foundation of veranda
To lay the foundation, you must perform the following actions:
- after determining the places at the poles at these points, pits of about 1 m deep into the depth;
- on the bottom of each of the pits 20 cm of sand to create a "pillow" for pillars. If the soil in your area is superfluous, it is better to use crushed stone for these purposes and pour it hot bitumen;
- next, the pit is poured with concrete, and its surface must be perfectly horizontal and smooth;
- on the hardened cement basis, a post made of a planned height brick is erected. The field of an extension must be 25-30 cm below the floor at home. In this case, its roof will be under the sink of the roof of the main building, and the height of its walls will roughly coincide with the height of the walls in the house;
- brick should be deceived by bitumen and fall asleep all the ground with gravel or rubble to fill out possible emptiness.
Erecting wooden frame
For the manufacture of a wooden framework under the veranda you will need a bar with a cross section of 100 × 100 or 120 × 120 mm. You can use asymmetric dimensions, for example, 120 × 80 mm.
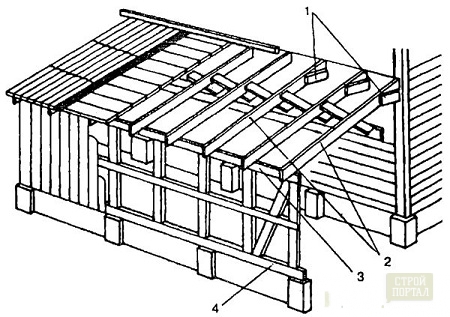
Fig.3. Frame scheme veranda
So, the framework of verandas from the bar is built as follows:
- the foundation poles are based on lower strapping. For a reliable connection, its angles are mounted using the technique "in dragged with direct lock";
- the next step is to cut into the strapping of lags, which will be the basis for the floor;
- for racks, 50x50x50-millimeter "spikes" (special grooves) are prepared in advance;
- racks are attached to the strapping of nails and reinforced brackets;
- when the racks are fixed, embark on the rafter and the upper strapping. Fastenings remain the same: nails, spikes, brackets;
- the horizontal beam ("run") is fixed on the ends ("run"), which is placed directly under the roof, and securely attached to the racks and the wall of the house with the help of anchors;
- beams that are supports rafters are one of the most important parts of the veranda carcass, so their installation and installation must be carried out with special care. The beams should be fastened to firmly to the wall of the house and reach the sink of its roof so that the roof of the veranda is snotched with the roof of the house.
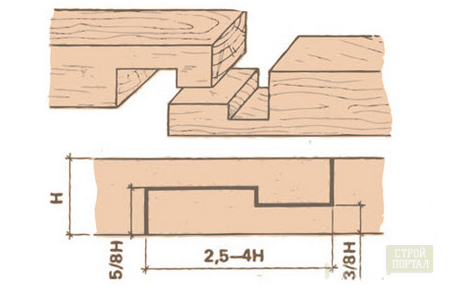
Rice. 4. Fastening "hardworth with direct lock"
On this construction of a wooden frame veranda can be considered completed. The framework of the open veranda is installed in exactly the same way, you can leave at your discretionation of the walls.
Metal frame for veranda
Previously, metal frameworks for building a veranda were extremely rare, as they have low thermal insulation. However, thanks to modern technologies today, we can get a solid and durable basis for an extension.
Rice. 5. Open veranda with metallic frame
Also, the framework of the veranda, made of metal, has a smaller pressure on the foundation due to its low weight. One of the advantages of metallic frame technology is the use of thin-walled galvanized sigma profiles as its elements.
Features of the metal frame mounting:
- thanks to the use of bolts, the welding work is optional;
- installation can be engaged in all weather conditions;
- all compounds of such a frame - bolted, so you will need only an adjustable key;
- the main mounting of the beams is an anchor that layster the foundation. If when bookmarking the installation of anchors was not in priority, check bolts are used, and in concrete, special holes are drilled under them;
- sigma-profile fasteners are performed using standard shaped products that can be purchased at a local building materials store.
Roof mounting
The installation of a single roof of the veranda is the most common among country real estate. Of course, if in your location is too much time and fantasy, you can build a roof to your liking. However, remember that this is the easiest to beginpier and a reliable way of installation.
Rice. 6. Roof Polycarbonate Veranda
Several tips for installing the roof of the veranda:
- before mounting the roof, a cuttack of edged boards stacked either closely or at a minimum distance is installed;
- pick up the roof in one style and color from the roof of the main building;
- when using runner, the flooring will be solid. In this case, it is nailed to the rafters of nails, whose caps should be relent as possible. Next, the runneroid is fixed by rail;
- the roof is coated under the crate along the lower edge of about 10 cm;
- metal roof sheets are connected using folding seams;
- the roof of the abstortocent is installed with a margin with a margin of up to 15 cm. Fasten such a roof by screws with holes prepared for them.
Now you know how to build a frame of veranda from a tree or metal, lay it out the foundation and mount the roof. We wish success in construction!


