Installation of water warm floor Floors
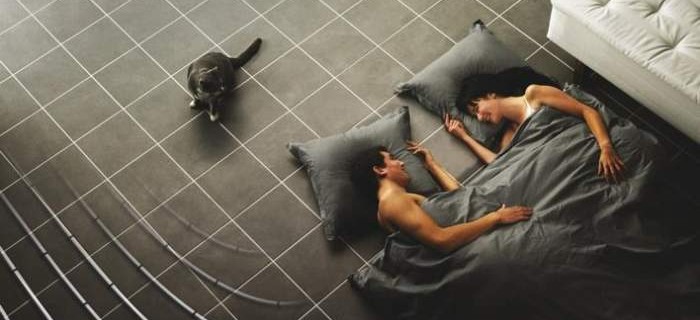
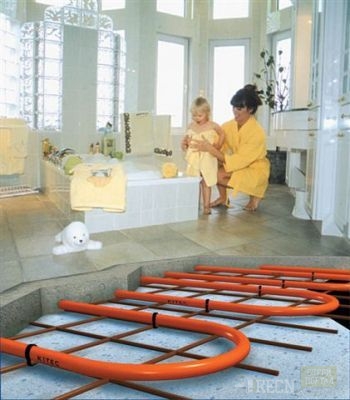
Getting the maximum comfort with rational use of resources is the main task in the home improvement. The system of warm water floors has many good reviews due to indisputable benefits:
• heat distribution with this form of heating is considered optimal;
• Comfortable perception of thermal radiation;
• Low coolant temperature eliminates the occurrence of air ionization;
• energy savings at least 20%, in premises with ceilings with a height of more than 3m - about 50%;
• Lack of standard devices.
The only drawback may be the price of water warm floor, but it depends on the set of factors. The main of which is the choice of workers for the installation of the system.
Content
The composition of the work on the device of water warm floors
The embodiment of a warm water flooring device includes such steps:
- project preparation and calculation of components;
- selection of equipment and purchase of materials;
- installation of water warm floor;
- checking laid pipes;
- pouring system of concrete;
- laying the finishing coating;
- connecting water warm floor.
Project preparations need to be entrusted to professionals
The first point implies the calculation of all necessary parameters to implement the optimal living conditions. Designing should be carried out by a specialist with the presence of relevant documentation. At the same time, it is necessary to take into account many factors, such as the climatic features of the building of the building, the materials used in the construction of the construction, the type of glazing, the desired temperature indicators, etc. Already according to the calculations, the entire system is made, which will be fully implemented independently, especially since the video installation of water warm Floor.
The second point may consider the acquisition of component elements in any construction store or through an online store. So you can save money and make delivery directly to the house.
Correct installation of a system of long-term operation
Installation of the system is the most difficult point of work, many turn to those skilled in the art. But, having all calculations on the hands and manual can independently install the water heat. Installation technology implies stages of work:
- separation of the entire area of \u200b\u200bthe room on the plots of no more than 40m2;
- mount the cabinet for collectors;
- isolation of the draft surface;
- laying the reinforcement grid;
- installation of pipe contours;
- checking the system of working pressure.
1. Initially, the markup of the available area is carried out, the sections obtained should be characterized by the aspect ratio of at least 1: 2. Such marking is necessary due to temperature changes, during which the screed will expand. Laying of water warm floor with such a separation will warn the cracking of the laid mixture.
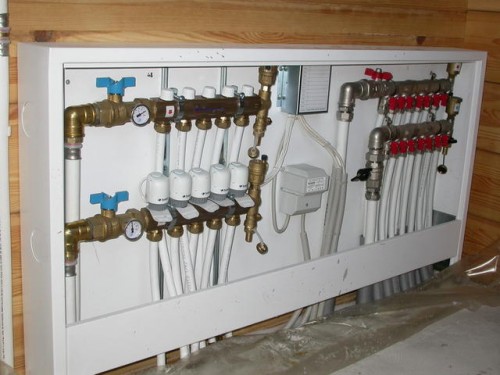
2. Mount the cabinet, it can be purchased in any construction store. At the installation site of the collector cabinet - directly in the wall above the floor surface - pre-reverting with standard tools, such as a hammer and chisel. In the cabinet will be located adjusting elements, docking the heating pipes. The cabinet fed the ends of the return and feed pipe to which shut-off valves wear. The contours of the pipes are supplied to the valves, which are attached to the collector, preferably using a splitter to attach a drain faucet and air lifting and to feed on and on the return pipe.
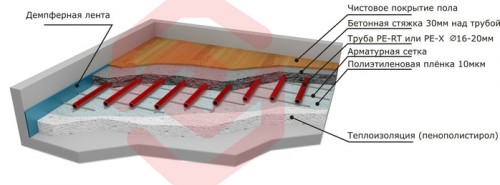
3. For insulation work, you will need: PSB-35 foam, polyethylene and damper tape. The base of the floor is pre-purified, then only coated with thermal insulating material. It prevents the formation of losses from the system, subsequently all heat rises upstairs into the heated room. Suitable for use Many materials, but more often used PSB-35 foam 30-150mm thick. The tape is attached around the perimeter of the entire room and separately selected marking sectors. Its appointment is the compensation of the heat expansion of the screed. From above, the foam is covered with polyethylene film.
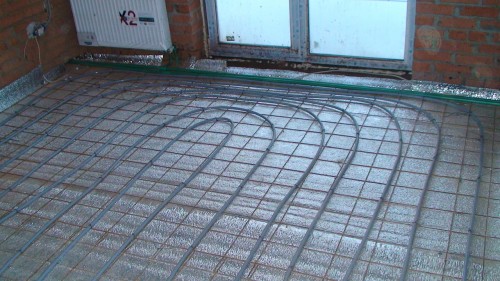
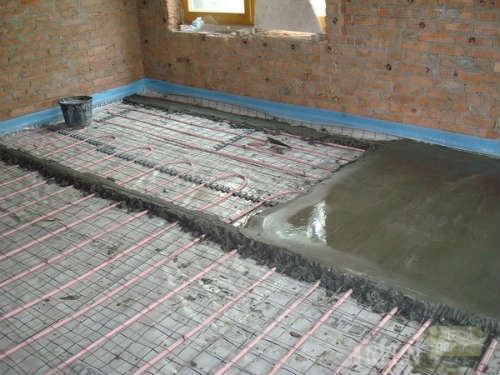
4. The technology of water heat floors provides for laying the reinforcement grid with a diameter of 5mm rods, with the size of cells of 150x150. It is fixed with subsequent pipes. Double reinforcement is often used, the second mesh is placed after mounting pipes.
5. Place the contours of the pipes in accordance with the water warm floor connection scheme in the project, the step must be 75-300mm. But the more often the next pipe is going, the square is heated by the surface. It is recommended to reduce the step near the outdoor walls, the contours are closer to each other - heat loss is compensated for. Also to the wall, the nearest pipe should be at a distance of at least 7cm. If you know how to make water warm floors and some nuances, such as fixing pipes, then the successful embodiment of the work is provided. To the reinforcement grid of the pipe is fixed with plastic clamps, it is not necessary to clamp a strong pipe, because depending on the temperature they can expand.
Compensation seams are formed between the separated areas, in these places, a corrugated coating that serves as protection against damage is worn. Stacking starts from the edge of the exterior walls or windows where the pitch is the smallest. One end of the pipe is fixed into the feed collector, and begin to output the planned circuit, the remaining end is attached to the return collector. Mondation of a water warm floor can have a different price, it all depends on the materials used and the share of independent work.
The importance of checking the mounted system
After the installation is completed, the system is validated, for this, water under the working pressure is allowed. So quickly declared flaws and damage to the finished system. Do not turn off the pressure, conduct a further fill of the screed. For this, a solution of a special mixture for warm floors is prepared, each manufacturer gives recommendations for the preparation of the solution and its laying. The thickness of the screed for water underground should be 50-70mm, no less than 30mm is provided above the pipe layer.
The final stage of all works
Next, the finish coating for the floor is selected, after the final pouring of the concrete, that is, after 28 days, the tiles, linoleum or laminate are already placed. The characteristics of the selected material must be present data on possible use for floor heating systems. Also, with the launch of the water heating flooring system, it is possible to go out gradually on the working constant temperature, and only after the full pouring of the flooded solution.


