Stretch ceiling starry sky Ceilings
Each of us, at least once in life, could not tear the eye from the night sky, filled with an inclied number of stars. Many agree that such a pacifying and romantic landscape would be an integral attribute of one of the rooms in the house. On how to make the ceiling "Star Sky", we will now tell.
Content
Foundation and basic design elements
As a base for the "Star Sky", tension and suspended plasterboard ceilings can serve.
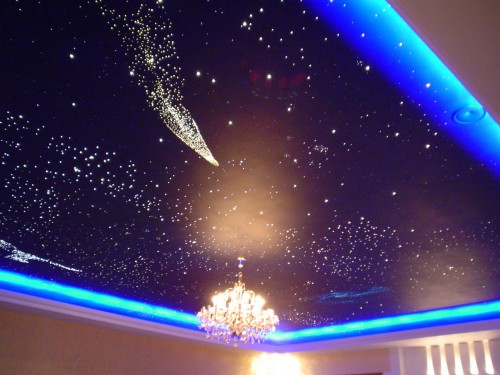
The use of the stretch ceiling "Starry Sky", presented in the photo, has the following advantages:
- speed mounting;
- increased moisture resistance;
- ease of care;
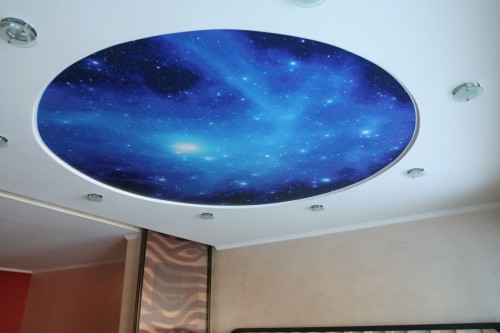
- photo printing and PVC film lead to the creation of additional effects that are shocked by realism both in the night and daytime.
Plasterboard base also has its advantages:
- the ability to deviate a multi-level structure;
- painting in any color;
- convenient laying of optical fibers.
The ceiling "Starry Sky" has such basic elements:
- projector;
- optical fibers;
- controller.
The projector is designed to generate light flows that are created from electricity. Depending on the type of lamps, projectors are:
- lED;
- halogen.
LED projectors are characterized by a rather solid operational period (up to 50 thousand h.). They are shimmering and just burning.
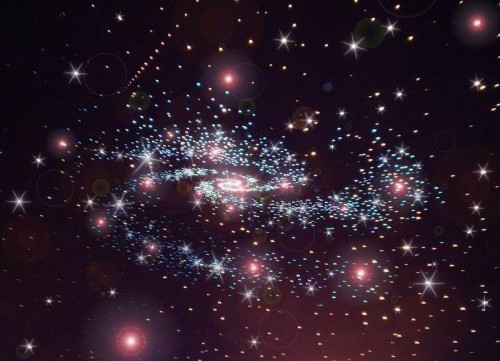
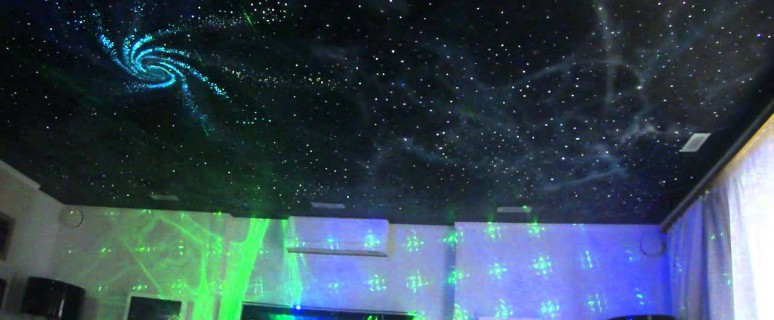
Although halogen projectors do not serve so long, but with their help you can create unique effects. The rotation of the galaxy on the spiral will be especially delightful. Such a ceiling is created using lamps equipped with rotating light filters. To create a genuine masterpiece on the ceiling, several projectors can be installed.
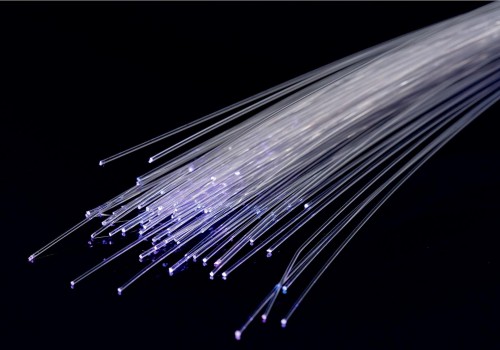
With the help of optical fibers, there is a transmission of light streams for a certain distance. In fact, the ends of the fibers are small lamps that mimic the glow of stars.
The best solution for creating your hands the ceiling "Starry Sky" will be the use of optical fibers that have different diameter. With the help of such "single-caliber" fibers on the ceiling, you can create not only stars of various sizes, but also galaxies.
The main purpose of the controller is adjusting the operation of several light generators. This creates a certain picture of the night sky. The principle of the ceiling is as follows. The projector generates light streams and directs them into optical fibers. From the fibers, the light of different flicker appears on the front side of the ceiling.
Tension ceiling device
Creating a stretch ceiling "Starry Sky" begins with a search site for the location of the projector. To do this, you can use:
- high cabinet;
- andresol;
- ceiling niche et al.
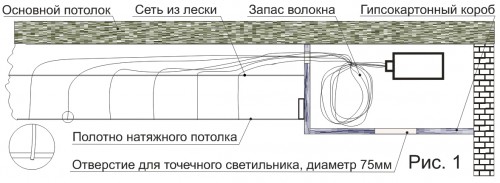
The projector is connected to the optical fibers and is installed in the prepared place. A fishing net is tensioned under the ceiling. It is intended to contain the load from light-conducting threads based on the surface of the stretch design.
The optical fibers are fixed, which are attached to the ceiling with glue or brackets. They are distributed over the entire surface area. This is done depending on the location of the "stars" on the "sky". Each fiber must have the desired length of length.
At the next stage, the tension ceiling is installed with a predetermined "Galaxik" system. To make holes in the stretch ceiling, the canvas need to heat slightly. Holes are made in such quantities as provided. Optimal number of holes - 75-85 pcs. / 1 \u200b\u200bm².
The main problem when installing the ceiling "Starry Sky" can be the product through it through the lighting threads. It is possible to solve it. With the help of a thin hook, optical fibers are located in a vertical position. Fixing the fibers occurs in such a way that their ends be below the ceiling by 5-7 mm.
After pulling the canvas, the optical fibers pierce it. Next fixation of light-conducting threads to the stretch film is performed. Superclay is used for this.
Using the nippers, the removal of the extra part of the threads. Nothing should be on the surface of the web. Otherwise, the protruding fibers will look completely unattractive. Often for this reason, the canvas with a neutral pattern is selected.
A rather original and spectacular way of the "Star Sky" device (albeit more expensive) is the fastening of crystals to the ends of the fibers. In the daytime, they will be blown away from sunlight, and at night - disperse light streams. This technology is recommended to be used in combination with the control panel by which the light brightness increases or decreases.
There is an option when optical fibers can not stretch through the stretch ceiling. It is more complicated. LEDs are mounted to the ends of the threads. All elements are in the inside of the stretch ceiling. LEDs are shouted through the cloth and create a special effect, which is similar to distant flickering stars.
Gypsum Carton Design Nuances
Plasterboard ceiling "Star Sky" set a little easier. Although in this work there are subtleties. The main one is cutting plasterboard sheets in half. This is due to the fact that it is inconvenient (it can be said that it is almost impossible) to proceed the lighting thread through a whole sheet.
Plasterboard ceiling installation is combined with fastening optical fibers. Conditionally this work is divided into the following steps:
- assembly of plasterboard ceiling of halves;
- application of the constellations of the future "Sky" on them;
- drilling holes for fibers;
- numbering ceiling elements;
- removal of plasterboard sheets;
- testing of lighting threads in the holes made;
- re-assembling of the ceiling of plasterboard (based on the populated numbers).
When laying optical fibers, it is forbidden to hurt them. All turns of the material must be smooth. Fibers are lowered below drywall by 3-4 cm. It is necessary to facilitate the decorative surface finish.
When putty and painting the ceiling should not be worn due to the fact that the finishing material will smear the fibers. The threads will still cut off almost to the ceiling itself, and their ends are cleaned.
Some difficulties can cause the process of covering the entire ceiling with putty, since the protruding fibers will interfere. This problem is allowed by plasterboard ceiling with smooth fliesline with subsequent painting. Putty is closed only self-tapping screws and joints between sheets.
When installing light generators, normal access should be organized. The best option is the device of the revision opening in the timeless place. It establishes projectors and controller.
Alternative options
Oracale
A more economical and easy way to the "Star Sky" device on the ceiling is the use of oracal (self-adhesive) film and ordinary nail polish. The only nuance is the presence of a smooth surface. If there are irregularities and cracks, the ceiling will have to be pre-tapping and plastering.
During the drying of the ceiling, you can choose from and applying stars on a self-adhesive film. For this, a brush is used. Pictures can be different, starting with space topics and ending with the evening sky with only appearing stars. It all depends on the imagination and preferences of each person.
A protective film is removed from oracle. The glued side of the material is applied to the surface of the ceiling. With the help of a clean rogue, the oracal film is spilled. Inside it should not be air bubbles.
After sticking the entire film, the constellation of the night sky is drawn. This is done with nail polish, which has a great glow in the dark. "Starry Sky" can be covered by both chaotic dots and a pre-prepared pattern.
Luminescent paint
Application of galaxies can be made on the finished tension ceiling. To do this, you will need luminescent paint and a thin brush. Moreover, it doesn't matter what color has a canvas: monophonic, white or with drawings.
After mounting the stretch ceiling, it is disappeared by stars. You can use pre-made by stencils (galaxies, planets with satellites, etc.). They are applied to the ceiling and apply paint.
This technology is good in that afternoon the luminescent paint is not visible. The main background image is displayed on the ceiling. In the evening, the "Sky" of the room is illuminated by the muted flicker of "stars".
Useful advice
When creating a "star sky" at home, there are a number of recommendations that will allow quality performance. These include:
- the most optimal option is the use of fiber-optic threads with a diameter of 0.5-0.75 mm;
- one cable consists almost from 700 light guides;
- the density of location of the fibers (with a diameter of 0.5-0.75 mm) is 80-140 pcs. / 1 \u200b\u200bm²;
- to create the effect of flickering and changing the brightness of one "star", you will need from 2 to 15 fibers;
- the limit of the bending radius of the threads with a diameter of 0.75 mm should not exceed 7.5 mm;
- cutting the fibers can be made both flush with the stretch ceiling, and below its surface by 2 mm.
To create different in the magnitude of "space objects", you should use the optical fibers that have a different diameter. On average, 1 m² of ceiling area placed 2 large (fiber diameter 2 mm), 10 medium (1 mm) and several small "stars" (0.75 mm).
Video on the creation of the ceiling "Starry Sky":


