
Features of the installation of seamless fabric ceilings do it yourself Ceilings
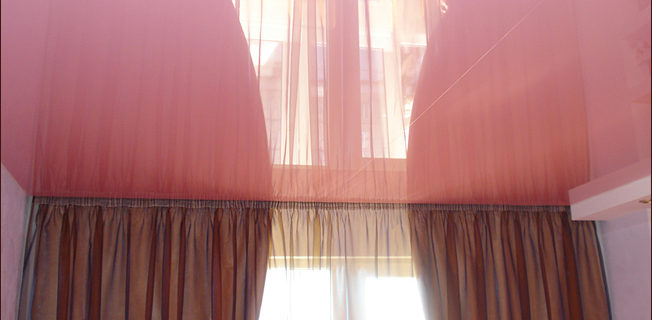
One of the ways to finish the ceiling during the repair of the room involves the installation of stretch ceilings. With their help, it is possible in the shortest possible time to get a perfectly smooth surface. To your attention, more detailed information on the stretch ceilings with the phased description of the installation technology.
Content
Features of stretch ceilings
Stretch ceilings are distinguished by the following advantages and features:
- as a result of the installation of the canvas, dirt and dust are not formed;
- the stretch ceiling is not deformed and does not crack when shrinking the walls of the house;
- stretch ceilings seamless glossy visually increase the area of \u200b\u200bthe room;
- the ceiling heights do not underestimate: for mounting the canvas, at least 4 cm must be required;
- seamless stretch ceilings PVC are able to prevent flooding by holding a significant mass of water coming from the upper floors;
- long service life: With proper care, the canvas will serve several decades;
- under the canvas, you can hide various engineering communications: electrical wiring, ventilation channels, pipes of heating and water supply system;
- do not support combustion;
- do not absorb smells;
- resistant to the effects of chemically active detergents;
- the ability to choose from a wide color gamut palette, including graphic images;
- aesthetically attractive: seamless stretch ceilings (see photo below) Successfully fit into the interior, decorated both in classical and in modern style.
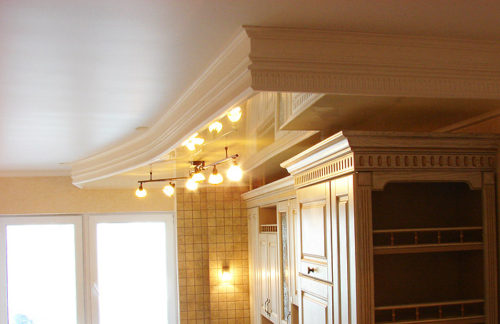
Stretch ceiling in the interior decorated in classic style
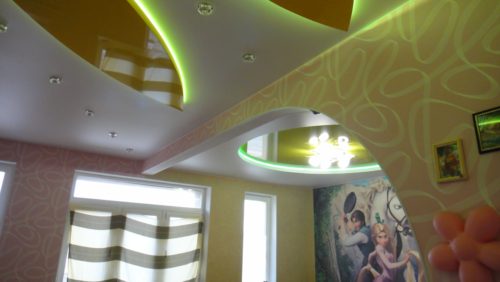
Stretch ceiling in modern interior
Important: Seamless fabric stretch ceilings and PVC canvas require cautious circulation, since the careless touch of the acute object can lead the canvas in disrepair. Cleaning the surface of the ceiling using abrasive detergents is also not allowed.
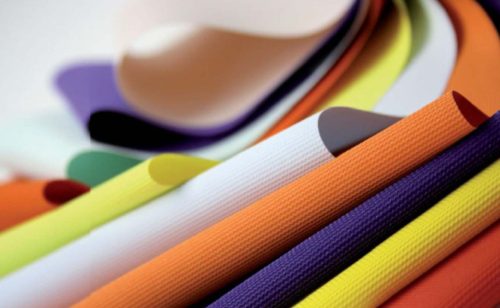
Color range of fabric tension ceilings
Seamless stretch ceilings: installation do it yourself
The qualities of tight ceilings described above should add tissue quality. Unlike PVC-based beverages, they:
- do not fear low temperatures;
- can be installed in the room with a width of up to 5 m;
- do not require special equipment and special skills to install.
The latter circumstance makes it make a choice in favor of fabric ceilings for self-installation.
Some information about fabric cloth materials
Pullets are made for stretch ceilings from the following materials.
- Unpainted rough haze. Differs relatively low cost and complexity of preparation. The bands of the tissue are stitched in the web desired size, after which the seams need to be processed. After that, the canvas are covered with soil and interior paint. A web based on synthetic tissue can be used for self-installation.
- Special synthetic fabrics. More expensive, but more technological at the preparatory stage. They can cause a drawing of any complexity.
Installation of fabric tension ceilings based on Bosi: Step-by-step instructions
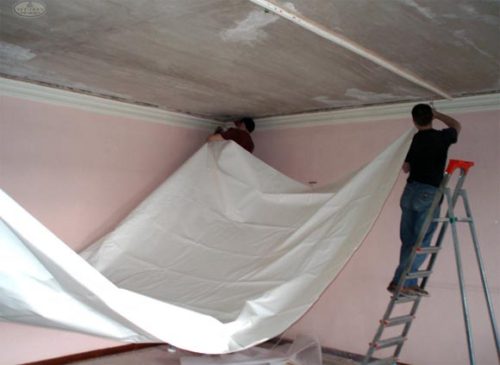
Installation of the tensioning canvas
Before proceeding with work, you must purchase the following tools, devices and materials:
- stapler construction;
- perforator with a drill along concrete (brick) with a diameter of 6 mm;
- electric drill with a set of drills of different diameters;
- spatula for refueling fabric ceilings;
- construction knife;
- laser or Waterpas;
- calcuse. It is necessary to take into account the need for an assembly stock - on each side of 0.2 m;
- reiki mounting wooden 40 × 50 mm in an amount equal to the sum of the length of the walls of the room;
- anchor or dowel-nails for fastening of rails;
- shoe glue;
- pVA glue;
- tracing and glue for her;
- soil for processing Boszya;
- acrylic paint for staining Bosi (can be used by the water-emulsion composition);
- ceiling plinth.
Tip: Stitching Boszya in a single canvas is better to order in the sewing workshop. In the same way, the fabric will qualitatively and handle the seams, which will make them practically imperceptible. Without special equipment it is impossible.
Step by step all the installation process can be represented as follows.
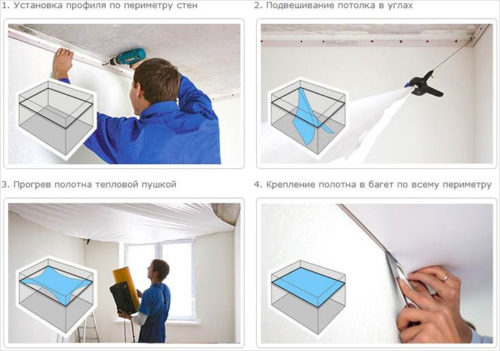
- Marking. Rates 5 cm from the base surface of the ceiling, we put the first mark. With the help of a level from it, we carry out a horizontal line throughout the perimeter of the room.
- Fresh mounting rails. In them every 0.5 m drilling holes for attaching anchors or dowel-nails. Applying the rail to the place of installation, put (according to the holes) of the labels on the walls. To make it easier to observe order, the rails should be numbered and specify numbers in the places of their attachment.
- Installing the canvas. Work is performed by two people. The rake is covered with a layer of glue, after which the spatula refills the edge of the canvas in the slot near the wall, near one of the corners. The canvas is fixed with a construction stapler, stretched diagonally to another corner and is attached the same way. After that, the installation is performed similarly in the area of \u200b\u200bother angles and then - throughout the perimeter. Excess fabric is trimmed with a construction knife.
- Masking of seams by cushion. Seamless fabric ceiling can be obtained after treatment of the canvas composition prepared on the basis of flour blasting, plow and water glue. The ingredients are mixed so that a thick mass is formed, which should be strain. After that, the composition is applied to the canvas and on the tracker, which is pasted on the seams. The edges of the tracing, if they do not stick, should be cut. After applying PVA glue, a seamless canvas is formed.
- Ceiling finish. After the glue dries, everything canopy is treated with primer. Later secure the ceiling plinth, which will close all the slots and brackets. Acrylic or water-emulsion paint is applied in three layers.
Tip: Installing fabric seamless stretch ceilings indoors with long walls begins with the middle of the wall. Moved to the sides, the canvas are moderately stretched and fasten every 0.5 m.
Stretch ceiling seamless fabric matte, made on the basis of synthetic web, is established similarly. The difference is that instead of wooden rails, special profiles are used - baguettes that are attached around the perimeter of the room. The edges of the canvas are filled into baguettes after the folds formed as a result of storage using a construction dryer are reflected.
Duplex Stretch Ceiling: Mounting Nuances
A more complex design is a two-level stretch seamless ceiling. Features indicate that it is possible to create an original interior, as well as:
- hide large base surface drops in terms of level;
- zonate space;
- visually increase the height of the ceiling.
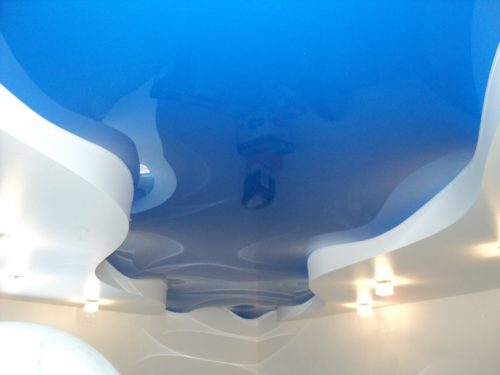
Stretch two-level ceiling visually increases space space
Installation of a two-level stretch ceiling requires compliance with certain rules and is performed in the next sequence of actions.
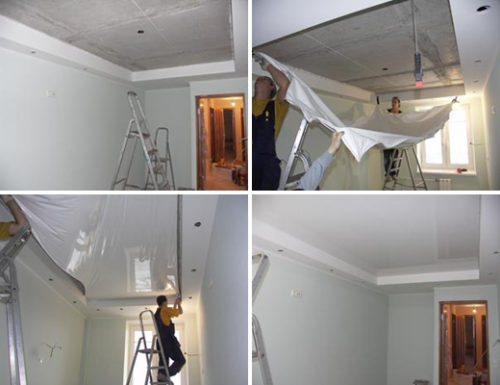
- Marking. It must be borne in mind that the main basic level in this case will be the lower. The schemes for placing the forms of the lower level are drawn up and are projected to the base surface, where the contours of the parts are delineated.
- At the outlined boundaries, the design of plywood and bars is installed. Separate parts of them should be similar to the mounted shelf. It is important that their side parts are not sent to the central part of the room, that is, in the top level zone. You can also use metal profiles.
- For mounting the top level along the inner contour of wooden (metal) forms, baguettes are fixed, retreating 4 cm from the base surface.
- The baguettes are refilled and the canvas. PVC-based material stretch is performed using a heat gun.
- The baguettes reflats the lower level web, in advance the contour. The outer edges are straightened and fixed in baguettes installed along the walls of the room at the level with the level of the lower tier.
- The joints between the walls and the ceiling, as well as the boundaries of the upper tier are made up with ceiling plinths.
IMPORTANT: Wiring for ceiling lights is paired and attached to the base surface in advance. The luminaires themselves are installed in the holes cut into the canvas. In the same holes, special plastic rings are inserted first.
In conclusion, the video of the installation of the stretch ceiling, clearly demonstrating the main points of work.


