Finishing slopes of sandwich panels Window
After installing the windows are often required to produce finishing slopes. There are several options how to do it, and one of the least expensive is the finish slopes of windows sandwich panels. This type of work can be done quite his own, without the need for any help. Read more about the installation procedure of the slopes by the method describe below.
Content
Main characteristics
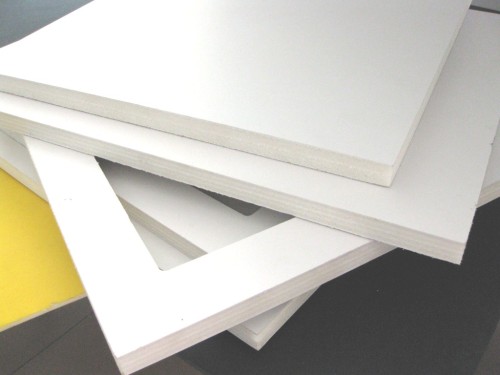
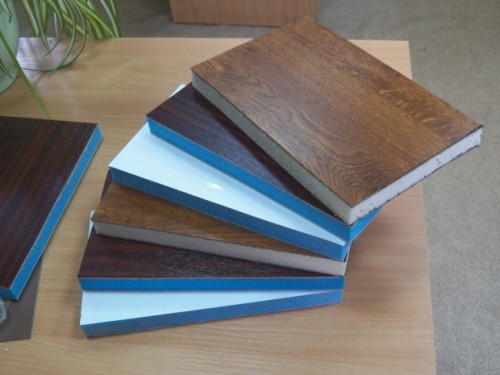
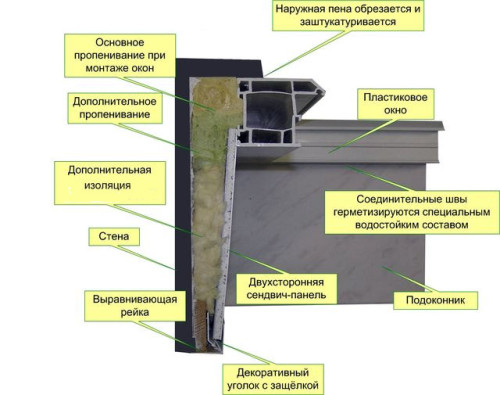
Before considering the procedure for assembly work, you need to get to know about the structure of such panels. Thus, their external side is most often made of durable PVC. As the material for the inner part has been successfully used polystyrene. Between these two layers is a thermal insulation material. One of the most important requirements for thermal insulation - is its fire safety. Such properties possess polystyrene or mineral wool.
It is important that all materials in the construction of environmentally friendly and safe data panels. Such a multilayer structure allows trap heat longer. Mount slopes of sandwich panels can be for wooden and plastic windows. The material thickness should be 9-12 mm.
The slopes of sandwich panels have many advantages:
- In particular, they are strong and durable.
- In addition, they have a high thermal and acoustic insulation of the equation.
- They are also easy to install and have a relatively low cost.
- In addition, these materials are resistant to mold, moisture and mildew.
To date, there is a pretty impressive selection of different shades of these panels. Whereby each can choose what suits him. Today, the sandwich panels are manufactured different in texture, for example, they can be glossy or matte. In addition, they are often under the veneer or other natural material, such as wood.
Consider the process of manufacturing sandwich panels. First, on the OSB board, a layer of adhesive, and then the top sheet of polystyrene is laid gently, then distributed to another layer of glue, after which it was covered with the second SIR plate. Will withstand such a construction until the adhesive is completely dry.
It is worth noting some of the features of the process that must be followed. For example, the adhesive should be applied evenly over the entire surface, but it should be no longer than 8 minutes. Otherwise, it can dry out. When drying takes place foaming, due to which the volume of the composition increases. It was at this point it is best to compress the bonding elements. Force at the same time should create a powerful press. Under the pressure elements are maintained for approximately 2-3 hours. For complete drying requires from 20 to 28 hours. Then cut off the protruding part of the insulation. This can be done, for example, a sharp knife.
slope finishing technology
Often use the following three main technology trim slopes of sandwich panels:
- the mounting foam,
- liquid nails
- on wooden bars.
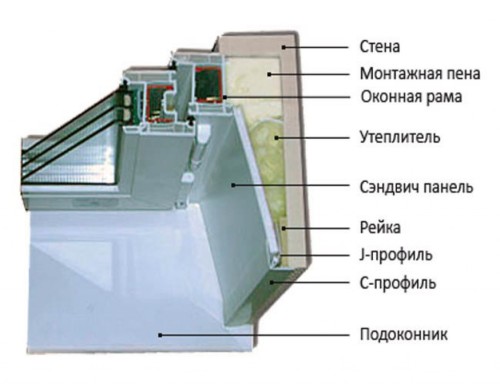
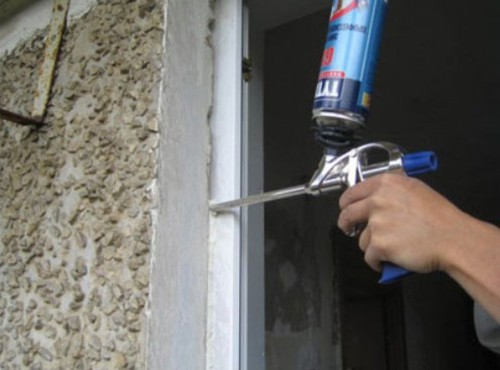
A little more closely at each of these methods, and start with the simplest, ie, with mounting foam. He is well suited when used in sandwich panels have fairly rigid framework. Sometimes the right material specially purchased to order. In general, foam a lot of advantages. One of them is that it is not like parasites. So do not rush to divorce her. Besides, the foam is quite resistant to various types of stimuli. Therefore, this method of installation can be used when working with wooden frames. It includes the following sequence of actions:
- First, make the necessary measurements, then they are cut according to the frame rail.
- Next is going to frame which is fixed in the spacer between the sill and the horizontal upper slope.
- Thereafter panel neatly trimmed and inserted into the previously mounted in the spacer frame. The first side slopes are collected, and after them the upper.
- Before you fill the space with foam, it is necessary to check the set slopes using level. Do not forget that the foam during solidification increases in volume. Therefore, you want to install the spacers.
sandwich is quite suitable for this mounting method, the panel of two layers. To improve adhesion with the foam prior to filling the inner surface and the wall panels need to moisten the plain water. After about 20 hours, the foam hardens, and will undercut it is necessary that it does not protrude over the edge. It remains to "dress" laths.
If the building is not new and its walls in good condition, it is allowed to mount the panels with liquid nails. When using them, you can not make the frame. In this case, the panels will be mounted directly on the wall. This method is most suitable for high-plastic windows.
Priority actions will be as follows:
- First, you need to make the necessary measurements. Then cut the panels and pre-try them at the future site of attachment.
- Then, the work surface must be properly leveled, for example, using the plaster.
- Next, glue the panels will remain in place. We describe this process in more detail. First usually glued top panel and the side already arranged under it.
- When the panels are glued, will deal with the open end portion and the seams in places fit. As for the joints, they can be treated with the usual mixture of putty or silicone. Although today, in some cases for the same use acrylic paint, similar in texture to the PVC, than to create a harmonious look. But the end of the need to be covered with plaster.
- If the windows almost the entire area of \u200b\u200bthe wall, it will look good, if the end of them to make white. Moreover, sandwich panels must have the same color. Previously, instead just end wallpaper.
A third method of installation - on wooden bars. It allows you to reduce the foam installation costs of complex or broken slopes. Sami wooden blocks at the same time will serve as a base for mounting frame.
According to this mounting method the sequence of actions is as follows:
- First, as usual held the necessary measurements.
- Further trimmed girders and from them is going to construct a rectangle.
- Then you need to use the staple gun to fix the frame strips of sandwich panels. Then they are cut and carefully inserted into the frame.
- Now the space is filled with foam, then you need to wait about a day, so that it withered. When this happens, all the excess is cut and installed laths.
Such window slopes are resistant to mechanical damage. It is recommended to use a panel consisting of three layers. It can be used in the work, and a two-layer, but it does not possess sufficient rigidity to serve as a slope.
The slopes of sandwich panels with their own hands
Required tools
The success of the installation of sandwich panels depends, in particular, the availability of necessary materials and tools. When the need:
- starting profiles,
- transparent liquid glue,
- slope cover.
For the removal of measures suitable tape and a ruler. In addition, you will need a sharp knife, jigsaw, screwdriver, screwdriver, screws, and polyurethane foam.
The main stages of
Finishing window slopes with the help of the panels - a fairly simple type of work. Therefore, it can handle even a person with little experience in construction work. The following details describe the process:
- To perform finishing slopes with plastic, you need to decide in advance what materials are needed and in what quantities. To do this, it is measured the height and width of the opening. This will allow the correct calculation of the material required for installation.
- Further, according to measurements, the first panel can be cut. It is attached to the frame with screws in steps of about 15 cm.
- On the frame is necessary to remove the protective tape.
- Then you need to prepare the other panels that are cut in size by means of jigsaw easily.
- Then all the cracks must be filled with foam. By the way, it will still play the role of additional insulation. Thereafter, the panels can be removed from the protective film and set the material on the desired place.
- During operation between the panel and the sill seam is formed which must be closed using a special starting profile. All the resulting void is best to fill as soon as possible. When this is done, the remaining space is flush with the outer edge of the wall is filled with foam again.
- Then according to the dimensions of the finish strip is cut. The first is better to install the left part of it. The same sequence is placed on the right side strap.
- To the appearance of the slopes turned out neat work from all sides must be performed in the same sequence. It is necessary to carefully do all the measurements carefully and saw all the necessary details.
- The first set side slopes, and only then can be mounted on top slope. On the sandwich panels usually have a film that is best removed only after it is finished.
- Further again measured length and width of the upper slope. Also, you need to make a turn angle measurements sides. If everything was done correctly, the values \u200b\u200bof these angles must be the same.
- Next the top panel is mounted, which closes the starting profile. Then one part of the upper panel is attached to the first side panel and the other side - to the second.
- After carefully excised finishing profile adapted to the upper slope. Each panel for smooth joints are cut at an angle of 45 degrees.
- After that, the space above the upper slope once again filled with foam. When this is done, you can install the finish bar. Upon completion, you will need white mounting adhesive to fill the joints. In this case, it is necessary to remove the excess as soon as possible.
- Generally, finishing slopes panels sandwich panels is considered one of the most economical types of facing windows. This makes use of the F-profile. Take a sharp knife, and cut into strips 50 mm larger than the dimensions of the window opening. On the edge of the panel to put on the cover profile. The bands on the corners should be arranged overlapping.
- Line cut edging rascherchivayut with a simple pencil. Then cut. It's not easy, but the result will please you. Joints is recommended to treat with liquid plastic.
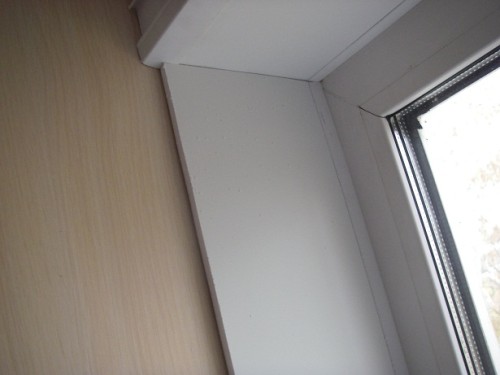
- After finishing a window opening is very good looking. In this case, the interior will look complete. Should not rush to the completion of the installation of the slope. Between the wall and the panels often voids to be filled with foam before installing F-profile. It will serve as an additional sound and heat insulator.
It remains to be plastered space under the windowsill. To do this, is preparing a white gypsum plaster. If the installation of slopes was observed all the specifics of the work, the result is a design that is not afraid of cold weather. As you can see, to carry out such an installation requires quite a bit of time and effort.


