Open veranda do it yourself Construction
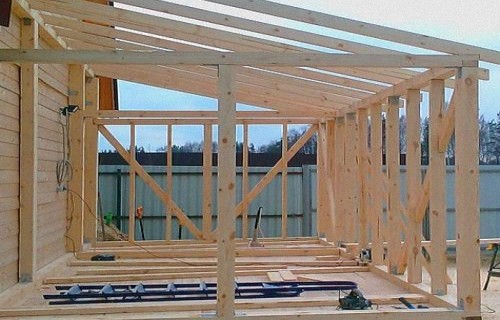
In the summer, after work or during meals, it is good to spend time in the cool veranda coolness. If during the construction of the house this moment was not thought out, it is easy to perform the construction of an open veranda with your own hands. It will not require any special skills or expensive tools.
Content
Choosing materials
The open veranda is building:
- wooden
- stone
- monolithic
Each material has its advantages and disadvantages, both in the construction process and subsequent operation. Consider each of them in more detail.
The most common look is wooden. This is due to the simplicity of construction. The tree is easily processing and accepts any architectural solutions. Most of the projects of the open veranda are designed to use wooden floors. In addition, if the need to disassemble the veranda is the easiest way to dismantle wood.
Stone verandas are raised less often. As a rule, it is advisable if after construction there is an unspent brick. From it, reference pillars and fence are made. Specially buying stone does not make sense.
The monolithic support poles are made by analogy with stone verandas, if the material remained unsumed.
How to build an open veranda
The construction of the veranda consists of several stages:
- design,
- construction of the foundation,
- floor construction
- construction of supporting structures,
- roof construction
- decoration.
Even before the start of the design, they make a revision of the tool. To work, you will need:
- shovel bayonge
- shovel Soviet
- wheelbarrow,
- lobzik,
- trowel,
- corto for a solution or concrete mixer,
- screwdriver
- hammer,
- ladder.
If for some reason one or several tools did not turn out, buy them. The specified inventory is more useful for the fulfillment of various houseworks.
Design
Design work always begin with the preparation of the construction concept. Open verandas whose photos are posted on the Internet and building logs are perfectly suitable as a sample from which you will be repelled.
The veranda is called the buildings that are adjacent to the house. Therefore, the first thing to pay attention is the roof. Usually, the structure is placed on the facade and make a single bed in front of the entrance door. But, there are options for arranging the veranda with a side part of the house. As a rule, this option is used if possible to make a separate output.
The next principal moment is the type of foundation. For the veranda make:
- monolithic foundation
- ribbon foundation.
Monolithic structures make sense to apply if there is a need to strengthen the foundation of the main house or there is no possibility to raise the height of the floor of the veranda. If the support pillars are planned from a stone or a monolithic basis, then we make a one-piece foundation.
The only limitation for the use of a ribbon foundation is a low height of the base. Build such a foundation very quickly and does not require significant costs.
Next, choose the floor. If a monolithic foundation is used, you can lay a laminate or linoleum. For a belt foundation, a wooden canvase is made. This is used to mount the wooden floor. But the choice of materials is not limited to this.
Now we build support columns. Their only functional task is to maintain the roof. Therefore, their appearance can be absolutely any. If you stayed on the construction of a wooden cottage, but you liked how the columns are decorated with decorative stone, they can easily simulate even on wooden beams. For this, the foam is gained by the desired thickness, and then the decorative stone is glued.
When the layout is ready, think about decorative design. This should be a complete composition. At the same time it is necessary to withstand style. Open veranda to the house and photos that you will find help make the right decision.
Construction of foundation
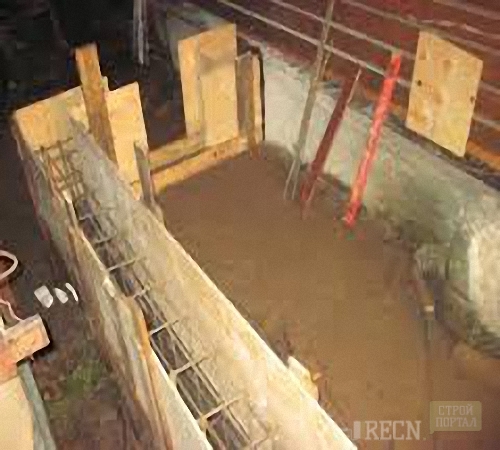
Construction of a monolithic foundation for the open veranda to the house is performed according to the following scheme:
- dig a hole under the base of the veranda of a depth of 20 cm,
- fill the pit with clay, gravel or other drainage by 10 cm,
- make a formwork for 10 cm above the ground level,
- pour concrete.
Perform work is necessary at a plus temperature. Another fundamental point is the ground of the soil. This must be done so that the soil does not sleep and the foundation has not cracked.
When concrete becomes, it is necessary to water water for three days. At air temperature from 20 to 25 degrees, this is done every 6 hours. With 30+, the concrete is wetted every 4 hours.
The ribbon foundation is made as follows:
- dig around the perimeter of the foundation of a hole with a depth of 10-15 cm,
- fill a pit with a 5 cm drainage,
- install formwork at 5x above the ground level,
- pour concrete.
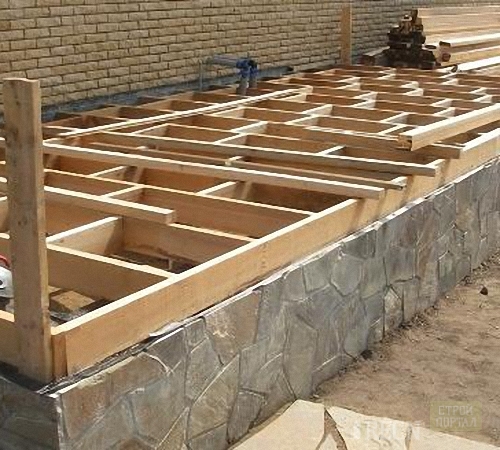
The remaining height is recruited using brick columns. Typically, the floor veranda is done on the same level or on the step lower than in the house.
In the columns in parallel, wooden beams at least 5x5 cm are mounted. Each 50 cm under the beam build a support column without a foundation. As a result, a ready-made basis is obtained. Instead of genital boards, they are sometimes expanded by the usual canvas to which the linoleum is rack.
Do not recommend to make a pillaby foundation, since small rodents can settle in voids under the veranda.
Floor construction and supporting structures
Answering the question of how to make an open veranda and flooring for it as high quality and durable, it should be said that the optimal choice is a floorboard. But its use is undesirable with a monolithic foundation. In addition, before making the floor, it is necessary to build a reference columns. This is done so that the emphasis accounted for the foundation, and not on the surface of the floor covering.
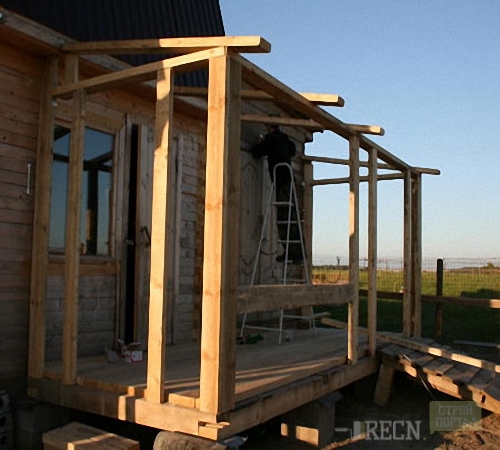
If you have chosen a monolithic foundation, the most convenient to build stone supports. In the case of a tree will have to be more complicated. Before installing wooden supports, you must earlier to collect the roof frame. The upper part of the support will be securely attached to the frame, and the lower stand under its own weight.
For fastening, either long screws or metal corners are used. And screws, and the corners are screwed on top into the end of the support beam. This allows you to disguise the connection.
Support beams must be located at least 2 m from each other.
As soon as the columns are installed, go to the floor mounting. The features of this process depends on the material you have chosen. Do not recommend for an open veranda in the country to make the floor from tile. The remaining options are acceptable. The fastest - put OSB plates and cover them with linoleum.
Roof construction
In order to make high-quality roofs, it is not enough to explore the open verandas at the cottage and their photos. Climate features should be taken into account.
For regions with strong winds, it will be necessary to fully strip the roof so that the wind does not undermine the roofing material. Accordingly, it is necessary to make the minimum allowable angle of inclination. For a profile, it is 23 degrees, for slate 25 degrees, for bitumen bases - 10-15 degrees. The choice in favor of the latter is obvious.
For rainy regions, the main emphasis is on high-quality drainage, as well as isolating the roof adjoining to the house. Permissible angle of inclination up to 35 degrees.
It is also necessary to take into account the fact that single-table roofs can not be done too long. In winter, snow and support columns can not withstand weight. Optimal length up to 3 m.
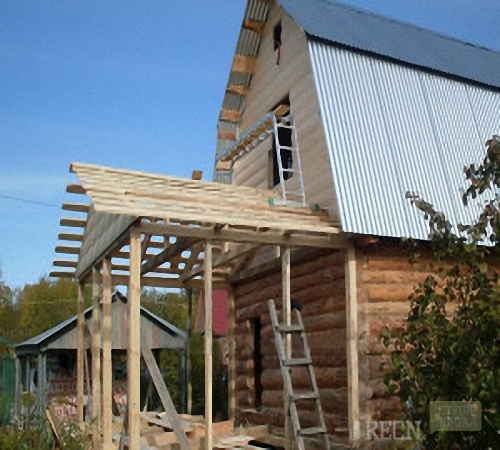
The roof itself is built according to the following scheme:
- assembly of truss farms
- installation and fastening of farms,
- extending
- insulation,
- laying roofing material.
Stropil farms are collected according to the console type. There are two installation options:
- standard,
- using an additional basis.
In the standard version of the rafter resemble the elongated rectangular triangle. Such a design is used if the length of the roof does not exceed 2 m. For more massive floors, an additional support is used. It represents the beam to which the rafted and rigle is mounted. With this solution, the rigle can be at an angle of 90 to 30 degrees.
The supporting beam is attached to a dowel to the wall of the house. Dowels are at a distance of 50 cm from each other. This design element is able to withstand the roof even without reference columns. In this case, the maximum roof length will be 2.5 m.
The open veranda will work with their own hands, if you try to make the roof as well. For a single roof, the location of the farms is permissible at a distance of 50 cm from each other.
After the frame is set, make the extender. Try not to overload the roof with extra boards. It is enough to rinse only those canvases that serve as the basis for fastening the roofing material.
Parosolation on the veranda is not installed. Because of the good circulation of air in this not necessary. For waterproofing use a special film. It is installed over the box.
The last stage is laying the roofing material. Whatever you stop, there are general recommendations:
- on earth prepare and cut the material,
- cover down with rows
- use for mounting nails or screws with insulating rubber band.
Decoration
Construction of an open veranda involves the creation of a complete image. This will help decorative elements such as:
- fake diamond,
- facing tile
- decorative plaster,
- colored woodwork for wood,
- wooden decor elements.
With the help of these materials, you can create the most thoughtful and cozy rest area. In order to use most of the specified decors on the tree, you need to strip it with foam. It is important that the fragrance canals remain for the tree. Without access oxygen, the board will start rotting.


