Wall-mounted ceramic tile laying technology: detailed instructions Tile
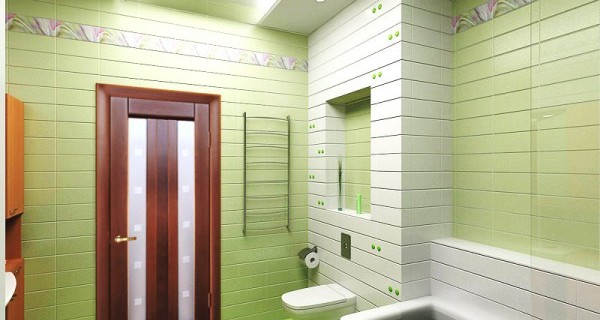
Wall ceramic tile remains the best solution for finishing the kitchen, bathroom, bathroom, laundry. But the cost of its laying often reaches the value of the tile itself. Therefore, many are interested in the question of how to lay wall ceramic tiles. If you follow certain rules, you can perform this work independently and save considerable funds.
Content
Stage first: wall preparation
This is an important stage, from which the quality of the future surface depends. All actions are performed in the following sequence.
- Dismantling of the subtletene and furniture that came into disrepair.
- Disassembling the old ceramic tile with a perforator with a nozzle in the form of a chisel or manually - with the help of a chisel, hammer and hatching. Traces of glue should not be left. Work should be performed in protective glasses and gloves.
- Evaluation of the quality of plaster: It should be checked if it should be raised if you spend your finger along its surface.
- Weak stucco with blooms is considered a toporist and chisel.
- A durable surface is tested for vertically with a plumb or rule with a level. At the same time, the presence of concave and convexities is performed.
- Deviations exceeding 3 mm per 1 m are aligned with plaster.
- Evaluation of perpendicularity of walls with the help of the square: with significant deviations amendments are made.
Alignment of walls
To start work, you need to have a set of tools:
- large spatula (approximately 1 m, for applying a mixture to the base);
- small spatula (10-20 cm, for a set of mixture);
- grater;
- master OK;
- drill with a nozzle mixer;
- water level;
- capacity for kneading the working mixture;
- rule.
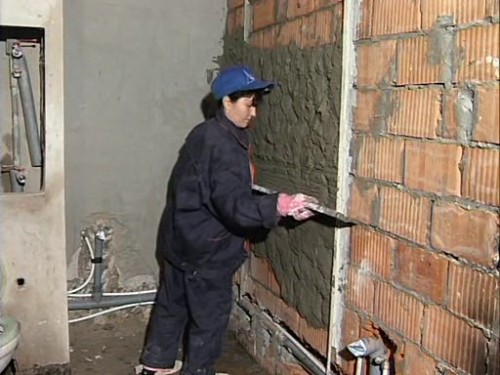
The alignment of small sections of the walls by cement-sandy solution is performed by a small amount of working mixture, which is thrown by a trowel on the wall, after which they are rubbing the grater, aligning the surface. Water level check the quality of work. For a wall with a large area, this method is not suitable: it is necessary to act as follows.
1. After checking the degree of irregularities of the walls, we select T-shaped beacons necessary for the formation of the surface. The height of the ridge sets the thickness of the layer and is selected in accordance with the quality of the base.
2. To the wall vertically, with the help of a solution, at the corners, both beacons. It is required to monitor that they remain in place before drying the solution: you can fix them in several places to the alabaster.
3. Check the verticality of the lighting of beacons using the construction level.
4. Near each profile, we drive nails at equal distances from each other (about 0.5 m) and between them stretch the rope so that it relies on the ridges.
5. In terms of rope to the wall, the intermediate beacons.
6. For the next day with the help of small and large spatulas on the wall below, we apply an aligning solution to the top level of the ridges.
7. Rule remove excess solution.
Beacons can not be removed if the cladding of ceramic tiles is planned at the entire height of the wall, otherwise the rust trail will appear through the wallpaper or decorative paint. The recesses in the plaster after removing the beacons are aligned with the same solution using a trowel and grater.
Stage Two: Choose ceramic tiles
Tile is outdoor and wall. The first is characterized by greater strength and specific weight, low water absorption. The thickness of the ceramic tile wall is usually somewhat large than that of the floor. In addition, the wall surface can be a glossy, which is extremely undesirable for the floor.
In specialized stores there is always a largest wall ceramic tile, such as ceramic tile Kaleidoscope: it depends on many factors, among which is the manufacturer, quality, complexity of patterns and textures, sizes, etc. The latter plays an important role: the size of the wall ceramic tiles should be selected, knowing the size of the walls. This will help to avoid unnecessary "trim".
The color of the tile is also important: usually, it is selected in accordance with the overall concept of the interior device. It must be combined with other elements of the finish. For small rooms, a ceramic wall-mounted tile is recommended: it visually expands the space. But the white color is very marked and many prefer not to use it. There are other solutions: a light gray wall ceramic tile with quite good lighting looks no less effectively.
The drawing on the tile is a matter of personal taste, but this question should be focused on the style elected for this interior. But large patterns look in the rooms of a large volume: a wall panel from ceramic tiles can be laid in them. In the premises of small appropriate to use ceramics with a small pattern or without it without it.
Tile quality is estimated by several parameters. This is the monochromicity of the color, the absence of surface defects and deviations from the plane. It is necessary that the sizes of the wall ceramic tile are strictly observed: GOST 6141-91 allows deviations by width and length not more than 0.8 mm. This is important for the convenience of mounting. There are limitations for deviations in thickness.
Countries that have achieved the greatest success in the production of wall ceramic tiles - Italy and Spain. Strength, wear resistance and durability of these countries will not disappoint the most demanding buyer. You can choose the option of any color, size and shape in various price categories. Wall-mounted ceramic tile Mistral deserves special attention: it combines sophistication and tenderness.
Together with the tile, you should choose the decor - borders, friezes and special glue for its laying (this will help the advice of the Seller consultant). All materials should be purchased: part of the tile will be spent on the "trimming".
Third Stage: Laying and Laying Tiles
First you want to stock tool:
- tilecase;
- string with abrasive spraying;
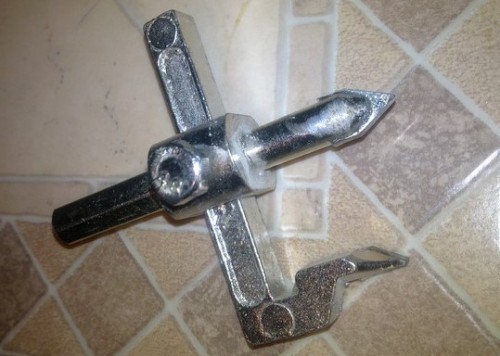
- "Ballerinka";
- special laying and gear spatula;
- plastic remote crossbars 2 mm (but there is a tile that is stacked without them).
Now proceed to laying the tile.
Before sticking it to the wall, it is necessary to properly distribute the tile so that ugly narrow "trimming" should be thrown into the eyes. Three folding methods are distinguished: classical, rustic and wretched.
In the last method, start working from the angle, where they glue the whole tile. Continuing a series, it is energized, as a rule, a narrow "trimming". It looks not good if the width of the "trimming" less than half the width of the whole tile.
With rustic laying, the angular trimming is divided into two parts: one of them is glued at the beginning of the row, and the other is at the end. Wall lined in this way looks even worse. You can avoid these troubles by applying a classic way.
To do this, lay out in one row tiles from the angle to the corner and then shift the composition from the center to the edges. As a result, the space remains not occupied by tiles, which is filled with "trimming", the width of each of which is more than half of the width of the whole tile. A wall lined with such a layout of the tile looks more attractive. In some cases, it is possible to artificially reduce the size of the wall to avoid using the "trim": this can be performed by overlapping the layer of plaster or using drywall.
If a revision hatch is needed on a narrow wall, a rustic layout is applied: this is a special case of distribution of ceramic tiles. The reason for choosing this method is explained by the fact that modern revision hatches are counted: their cover is facing tiles. At the edges of the hatch, most often, you have to lay a narrow "trimming". Often without it can not do and when laying tiles on a wide wall, if the location of the hatch cannot be changed.
Laying tile is performed as follows:
1. The glue composition is prepared in a special capacity: a dry mixture of portions is added to water, and then stirred with a drill with a nozzle in the form of a mixer. The consistency of the finished mixture should be pasty.
2. The height of the room is measured in order to determine whether full rows will fit on the wall. If not - the incomplete tiles are glued below, but begin work from the second row: for its support to the wall, a metal profile or a flat wooden rail is temporarily attached.
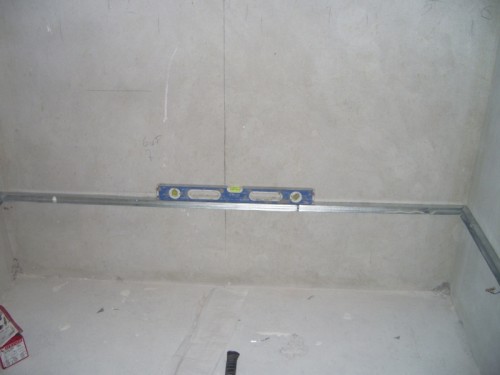
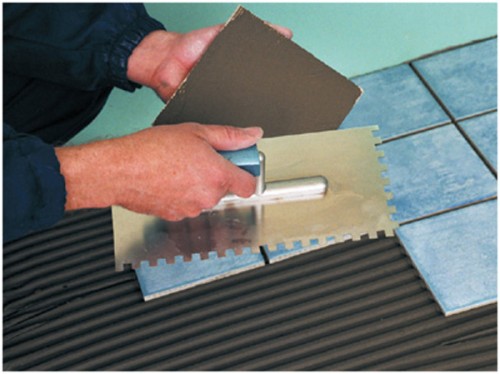
3. Taking into account the correct layout, the lower row of tiles is glued, and then - all other rows. In this case, the tile glue is distributed on the back of the tile and the base of the toothed spatula.
The distance between the tiles should correspond to the thickness of plastic crosses: usually - in the range of 2-4 mm. Seam is required to compensate for the thermal expansion of the wall.
4. With the help of a thread and construction level stretched between nails after laying the second row, the horizontal of the rows is performed. To control the vertical direction on the wall, the corresponding lines are drawn.
5. The seams between the tiles can be cleaned immediately after gluing the next row. Tile cleaned from dirt.
6. After the end of the styling of the tile, the seams are filled with a special white or melted mixture - grout. This uses a rubber spatula.
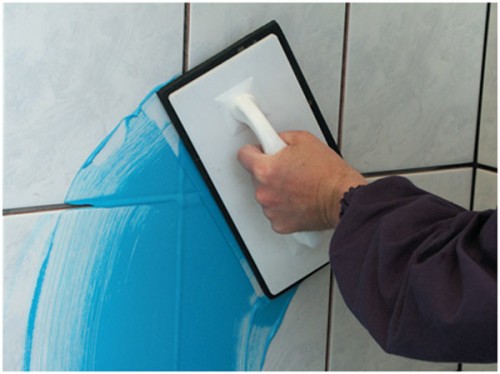
7. The process is completed with the final cleaning of the wall with a wet cloth and detergent.
How to cut and drill ceramic tiles
If it is necessary to cut the wall tile, uses tiles. If the tile is fragile and has a glossy surface - a conventional glass cutter and a metal ruler are used for cutting. The edges of up to 5 mm are dry with special side sides or are scrambled with grinding circle.
Round holes are drilled by the "ballet", a diamond crown or pumped up with an abrasive spraying.
The ceramic tile is drilled by a carbide drill, with low turns of the clamping cartridge of the electric drill and without impact.


