
An extension of the veranda to the wooden house do it yourself Construction
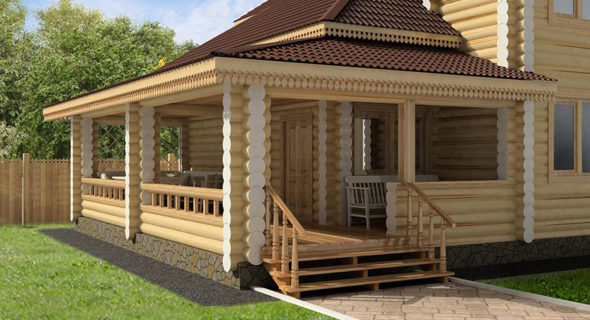
In order to increase the useful area of \u200b\u200bthe house or create a recreation area adjacent to the house, you can build a veranda. An extension of the veranda of a wooden house can successfully complement the main structure. But before proceeding with work, you should familiarize yourself with the main rules and some construction nuances.
Content
- An extension of the veranda to the wooden house. Where to start
- An extension of the veranda to the wooden house. Construction of foundation
- An extension of the veranda to the wooden house. Installation of the skeleton part of the veranda
- An extension of the veranda to the wooden house. Construction of walls
- An extension of the veranda to the wooden house. Installation of roof and floor
- An extension of the veranda to the wooden house. Installation of doors and windows
An extension of the veranda to the wooden house. Where to start
The start of construction is always preceded by planning future works. It is necessary to determine the appointment of additional area. For example, an extension of the veranda to the bath is needed in the absence of a rest room. If it is necessary to storing the tool - the extension of the veranda to the cells will help to solve the problem. A closed veranda attached to the residential house can serve as an entrance hall or kitchen.
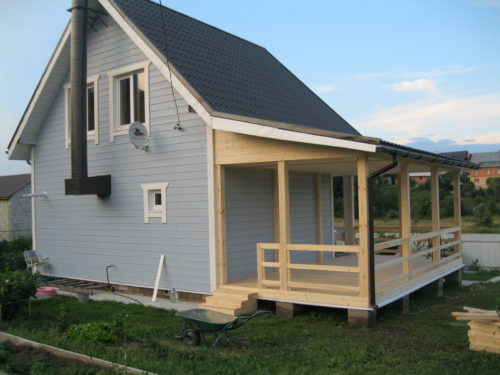
Veranda attached to the bath
In each case, you must perform the following:
- examine the overall architecture of the house and the plan of the site: the future extension should be organically fit into the landscape;
- take into account the internal layout of the premises: the exit to the veranda must be comfortable;
- make a project of an extension;
- choose materials for the foundation, walls and roofs;
- determine how to fasten the design details.
An extension of the veranda to the wooden house. Construction of foundation
The extension of the veranda to the summer house can be carried out on the columnar foundation, on the tape small and on the foundation with a depth of location below the level of primerization of the soil. The latter is necessary if the new basement is planned in the new premises. But most often the construction is carried out one of the less costly ways.
Corresponding device (pile) foundation
The basis of this type is suitable for the construction of light structures. Best for this purpose suggest screw piles. Work is performed in stages.
- It is determined and the territory is determined, where the extension to the veranda will be performed with their own hands: bushes and trees must be cut down, stumps are haroring, dended.
- They are marked by spicy of the pile screwing place: they must be installed in the corners and in flights - every 1.5 m. It is carefully checked and geometry is adjusted.
- In places of screwing the piles make small recesses.
- Piles are installed in the recess and screw into the ground to the maximum possible depth.
- Piles are aligned horizontally: clipped along the line marked with a water level.
- Steel "Pyataks" are welded for fastening the strapping.
Important: The pile foundation must be "loaded" almost immediately after its installation. Otherwise, spring boot of soil can deform the base.
A columnar foundation may also be monolithic (concrete) or erected from concrete blocks. To do this, you need to do the following.
- In predetermined places, pits, a depth below the level of soil freezing in your region (usually 1.1 m is sufficient). The width of the holes should allow further work.
- At the bottom of the pits, the layer of sand and a layer of large rubble (each one is 100 mm). The subference must be sealing.
- Formwork is erected and reinforcement (for monolithic supports) is performed. Concrete poured. The upper formwork level of all supports should be on one horizontal level.
- For support from blocks: Concrete blocks are stacked in each row and are fastened with cement mortar.
- Putting and reverse swelling of the soil, which must be sealing.
- The waterproofing material in 2-3 layers is stacked on top of the support and the blockage is mounted.
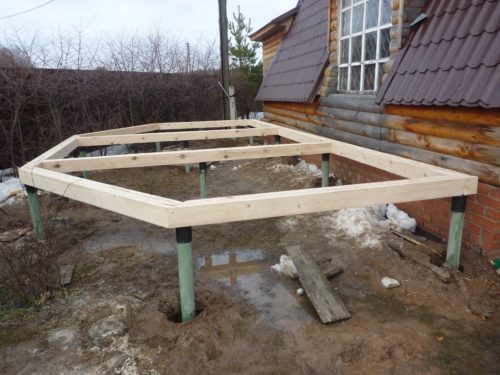
Stamp foundation with lower strapping
Fill of fine breeding belt foundation
The basis of this type has an advantage: there is no need to build a special design that closes the intervals between pile. In addition, the ribbon foundation allows you to make an extension to the veranda with your own hands from any material. The algorithm of work on the device of a ribbon foundation of small embedding the following.
- Marking for the foundation is done: pegs in the ground, the cord is stretched between them.
- According to the marked contour, a trench is thrown with such a calculation to have enough space for the formwork device. Trench depth - 0.7-0.8 m.
- Formwork is built from boards and sheet plywood. Side backups are installed, the upper bandage is mounted.
- At the bottom of the trench there is a subference from sand and rubble, a seal is performed.
- Armature is mounted: rods are used with a diameter of 8-10 mm, which are welded or binds to wire.
- The formwork in one reception is filled with concrete solution. In order to get rid of air emptiness, the solution is repeatedly sainted throughout the volume of the rod from the reinforcement.
- After 48 hours, the formwork is dismantled, perform vertical waterproofing (bitumen coating) and reverse swelling. Further construction is produced in 28 days - after complete secretion of concrete.
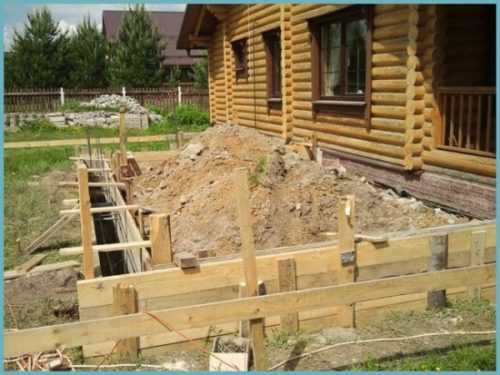
Formwork for a small-breeding foundation of the veranda
Important: Due to the fact that the foundation of the main part of the house is not related to the foundation of the veranda, there is a precipitate of an extension and its skew. To avoid this, it is necessary to strengthen the front of the base, making it deeper in the corners and increasing its width.
An extension of the veranda to the wooden house. Installation of the skeleton part of the veranda
An extension of the veranda to the house with their own hands at this stage involves the construction frame structure. The main operations are as follows.
- On top of the base base, the blockage of wooden bars is mounted. It is recommended to use material from solid rock wood (oak, beech, etc.). Between the bars of the strapping and supports, waterproofing should be provided.
- Climbing elements are connected to the tree floor. Nails are used for additional attachment. Previously in the corners of BRUSEV, holes are drilled with a diameter slightly smaller than that of nails.
- Every 0.5 m in the bars of the lower strapping, the grooves with a size of 50 × 50 mm for fastening the lag. On top of the lag, the floorboards will be laid.
- Places to install racks.
- At the corners and in the planned locations along the contour of the lower strapping, the racks are mounted. Special fastening parts are used - metal corners and brackets. The vertical position of the racks is controlled by Waterpas.
- Racks adjacent to the outer wall of the house are attached to her anchors. Intermediate racks are temporarily strengthened by ships.
- Themeal beams are installed, which are also necessary for the transverse stability of the structure.
- Mounted upper strapping similarly to the bottom. At the same time, it is necessary to make a shot for attaching rafters.
- Mounted a truly veranda system. The upper part of the rafter is attached directly to the outer wall of the house.
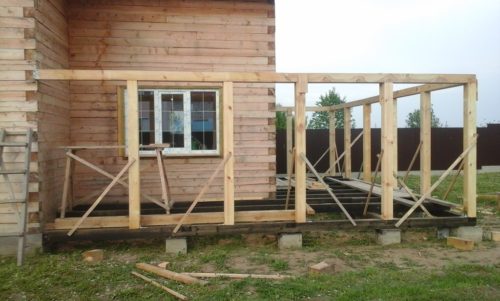
Frame part of the veranda
Important: the rafter system and the roof of the verandas should be constructed so that the roof of the house covers the entire design. It is important that the veranda adjoins the house as close as possible.
An extension of the veranda to the wooden house. Construction of walls
The outer lining of the walls starts from the lower level (from the base) and is carried out to the upper strapping. Use a rashbrus or block house for this: such a material is perfectly combined with a wooden house exterior.
Wooden lining, OSB sheets, moisture-resistant fane are used for the inner casing.
As a rule, the veranda is a room that uses in the warm season, in connection with which the insulation is not required. But in the event that the extension of the veranda to the house with their own hands (see photo below) is planned for use in winter, you must do the following.
- The floor is insulated: before laying the boards, the layer of clay is poured.
- The roof is insulated with mineral wool: it must be no less than 250 mm.
- Mounted windows with a two-chamber double-glazed window and doors with insulation.
- Walls of veranda must be measured by a design that is shown in the diagram.
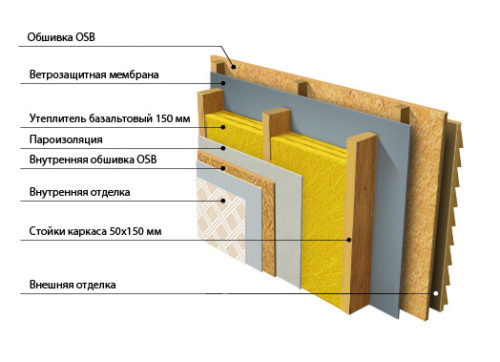
Structure of the walls of a warmed veranda
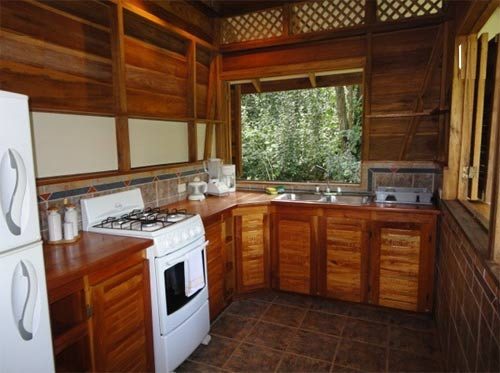
Insulated veranda can be used as a kitchen room
An extension of the veranda to the wooden house. Installation of roof and floor
The peculiarity of the roof of the roof of the veranda is that it is usually a single-sided with a small angle of slope. But in some cases, it may be a continuation of the skate of the house, but should not be a tough connection between them.
An extension of the veranda with hands (photos of your attention) can be planned with a transparent polycarbonate roof. Such a veranda will always be well lit.
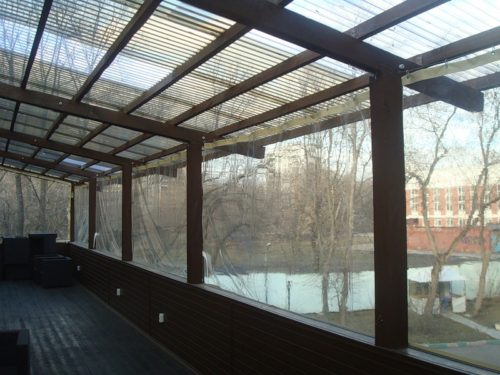
Veranda with roofing of transparent polycarbonate
During the installation of the roof, the following is taken into account.
- In the place of adjusting the roofing material, the veranda to the roof of the house is installed a protective profile that prevents rain moisture (see photo below).
- A solid suit is mounted: for a laptile veranda, it can be finishing the ceiling. A tipped board is used, moisture-resistant plywood or OSB stove.
- Roll waterproofing is laid on top of the rafter system.
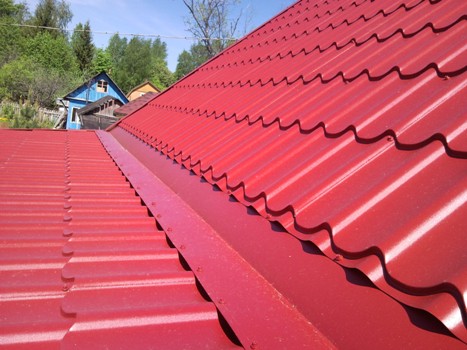
Protection of the junction of roofing systems from moisture
IMPORTANT: Details of the rafter system and the brackets of the crate should be treated with the flame and antiseptic agent.
For the floor, a deck board is used (more expensive) or boards of wood coniferous rocks, carefully dried. Board thickness - not less than 40 mm. They are laid on lags and fasten with self-draws. The deck lacquer is used as a protective and decorative coating.
An extension of the veranda to the wooden house. Installation of doors and windows
The windows are ordered by the size of the openings, taking into account the height of the sub-column strip (30 mm) and the gap around the perimeter - 10-15 mm. Finished designs are installed on the following technology.
- Remove the sash or extract double glazed windows.
- Install the frame in the sash and exhibit in the level of horizontal and vertical parts. At the same time, the entire frame should be in the plane of the outer wall of the veranda.
- Between the side details and vertical parts of the opening insert wooden wedges. In the same way, the position of the lower horizontal part of the frame is adjusted. At the same time, in the upper part, the gap should remain free to avoid deformation of the structure.
- The correctness of the frame is checked.
- Fill the gaps of mounting foam.
- After 24 hours, the surplus of foam is cut and closed the gaps to the navigation.
- Install double glazed windows and sash.
- Install the windowsill.
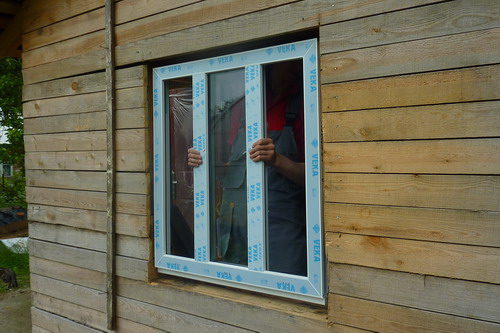
Installing the window on the veranda
Installation of doors is performed as follows.
- The box is installed in the opening and fixed by wedges. Strictly vertically using anchor screws attached the side of the box with hinges.
- The door canvas is hung.
- In the position of the closed door, the loose part of the box is exhibited so that the door canvas tightly occurred in the opening.
- With the help of anchors, the remaining three sides of the box are attached.
- The gaps are faded and closed by navigate.
In conclusion, we propose to once again get acquainted with the extension of the veranda to the house with their own hands: video with a visual demonstration of original solutions.
Taking advantage of the advice set forth in the article, you can independently attach the veranda to your summer cottage or even a country cottage.


