Repair and replacement of wind fittings Window

Plastic windows, similarly, like wooden, need timely maintenance. In order to ensure their uninterrupted work, sometimes a specialist carrying out repair and preventive work should be called. However, you can try to complete a small repair personally. About how the maintenance of plastic windows and replacement of fittings - let's tell later in the article.
Content
Troubleshooting Handle
The main problem is to loosen the handle. In this case, you will need to pull the mount:
- To do this, first removes the pad located under the hand. So that she starred without much difficulties, you need to pose her fingers and turn at a right angle.
- After that, with the help of a cruciform screwdriver, tighten a couple of bolts. It must eliminate the malfunction.
Some rooms are installed special handles. For example, in the nursery, handles are used with clamps that do not allow the baby to open the window independently. In such cases, repair work is carried out somewhat differently:
- First of all, in order to remove the old handle, you need to remove the lining and unscrew the locking bolts with a screwdriver.
- A new handle should be placed in the same position in which there was old.
- When the handle is installed, the bolts will be tightened.
Another frequent breakdown is the jingle of the handle:
- In this case, first of all, you need to find the cause of such a malfunction, after which it is eliminated. For this handle is removed. Then the mechanisms responsible for its mount are lubricated.
- All items need to be cleaned from dirt. This can be done with a brush and vacuum cleaner. In addition, machine oil and glass oil and glass was used for cleansing.
- Sometimes after that the problem remains. This is possible when fixing bolts are too tightened. In this case, you should try to loosen them a little.
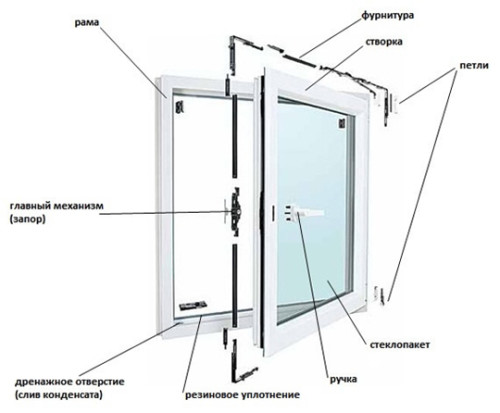
Swimming the handle is possible due to improper operation of the locking mechanism. If this mechanism is working, then using it you can fix the window sash in the desired position. To solve the problem with the jam, you need to do the following. First of all, you should take the lever blocking the handle. It is usually located on the end of the sash itself. The lever itself is a plate, which, with a sword, are removed under a certain angle of sealing gum. In some designs of the window, the lock lever looks like a support that can be constructed.
Troubleshooting and Defects Sealing Gum
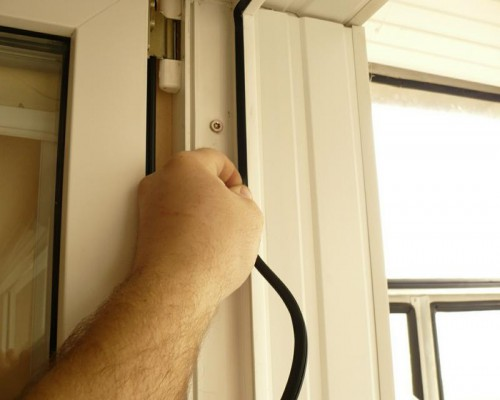
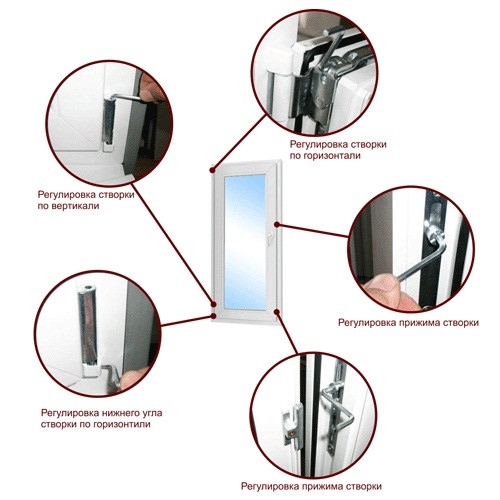
Worn sealing gum is a completely natural process when operating the window. The main reason for this is the long-term operation and temperature differences. When the gum is wearing, it becomes less elastic, which, in turn, leads to the fact that the window begins to drive. In addition, sound insulation is suffering. Today there are a special mechanism in the windows by which you can adjust the clamping force of the gum. In general, the clamping force must be controlled periodically. And it follows at least two times a year.
To regulate the sealing gum, such a mechanism is provided as the RACF. It has a rounded cylindrical shape. This mechanism is located in the core of the plug. The response hook is located on the frame, when tuning the axle, the rubber band is pressed against the frame. To reduce the gum, the protruding part of the said mechanism should be sent to the inner side. To support you need, on the contrary, turn it into the outer side.
Preventive work
Pollution and dust, which appears on accessories as a result of long-term operation, leads to the fact that the mechanisms are worse than their functions. In order to prevent the repair of the plastic windows, the following order is performed in the following order:
- First of all, the sash should be removed from the loops. Without this, repair is almost impossible.
- When it is removed, it will be necessary to remove the decorative elements that can interfere with the repair.
- Then the top loop is knocked out the axis. To do this, first is made on top, and after - from below. After that, the axis is extracted without any problems.
- Next, you should get the leaf from the bottom loop. Now you can unscrew a pair of bolts under a plastic overlay and thus remove the handle.
- Next, screws are unscrewed, on which accessories are fixed.
- Then the window mechanism can be removed from the groove and lay on the table. It will be convenient to rinse all parts by means of a special liquid and tassels.
- When accessories are cleaned, you need to dry all the details.
- All components of the windows that are subject to friction, need to be lubricated with machinery or special oil. After that, accessories can be put back to its place. Before installing the window, it is recommended to lubricate the loop.
Replacing accessories in plastic windows
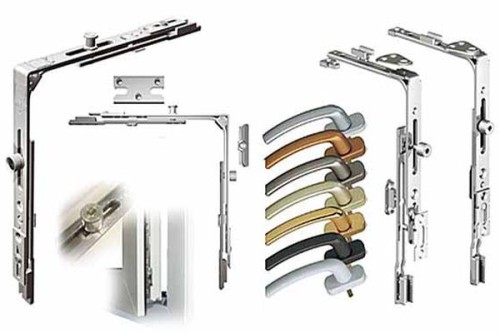
Fittings usually change in two cases: a strong breakdown or expiration of service. If everything is more or less clear with the breakdown, then many people simply do not know. The regulatory service life of the accessories is 8-11 years. Replacing wind fittings are still possible when the manufacturer has set less fixing elements than it was necessary, which led to the deformation of the sash. If you are not sure to handle the replacement of window fittings yourself, it is better to hire professionals for this.
Order of work:
- Dismantling the scales - from this usually begin to replace the accessories of plastic windows. In addition, you will need to remove the handles and the main castle. Moreover, the lock without removing the handles will not be possible.
- The handle is removed quite simple. To do this, its foundation needs to turn the decorative lining and unscrew several fastening screws. To remove the lock, it will also be necessary to first remove its mounting plates. In addition, you will need to unscrew several screws.
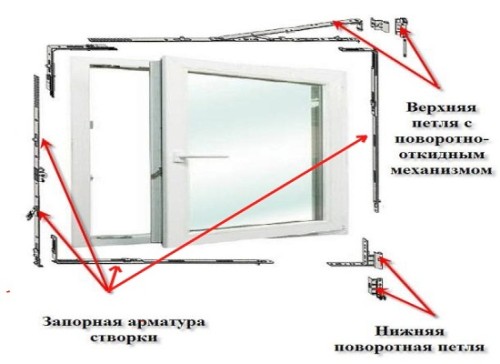
- For mounting the scaper and installing the lower middle lock, the sash is kept in a hanging position. When it is done, the sash can be removed. To do this, first get pins with loops. Moreover, first knock them off the top, and then shifted the sash to yourself and remove from the bottom.
- When the sash is removed, you can dismantle the remaining fasteners. This is done quite simple. Next, you can set the upper corner switch. Do it need a short side up.
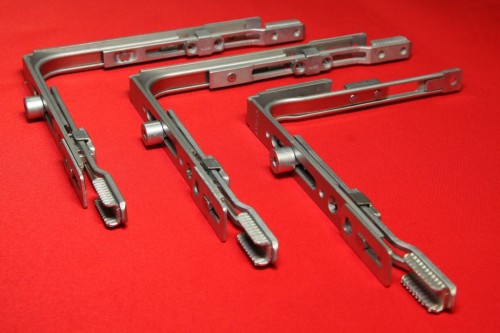
- Then you can perform measurements and marking of scissors. According to the data obtained, you need to cut off the item, and after how it should be cleaned so that there are no burrs.
- Before putting the scissors in place, they will need to fix the rear medium clamp, which was previously dismantled. Do not forget to install back fixing plate plates.
- Then the line of the clarification of the basic transmission is scheduled, everything that needs is cut off with a grinder, and the ends should be signed similarly and poll.
- After that, screws are unscrewed, which are fixed with a loop to the frame. When it is done, you can remove the upper and lower loop.
- Next, begged the installation of loops. Before this you need to make marking for holes. It is convenient to perform using a special layout that can be purchased separately.
- To install a loop in place, it must be evenly cut downwardly. In this case, the template should not rest in the slope.
- Installing the bottom loop implies drilling. It needs to be done neatly without strong push. Otherwise, when the drill is passed through a metal amplifier, it may break. Hurry in this matter will not lead to anything good.
- After installing the bottom loop, the upper, as well as fixing sash. To do this, the template is installed on the desired axis of the accessories, and then the loop can be successfully put on the sash.
- The loop is fixed on scissors. For this, the split washers are rotated clockwise without unnecessary effort. If you make too much effort, it can lead to the shlins of hexagons will be torn.
- The boiler loop will be fixed, you can install the sash and secure it with the pin. After that, the handle is installed in its place. The new handle usually has fixing rivets that need to be removed after installation.
- Mechanisms are recommended to lubricate with consistency lubrication. Next, you can put the response strips and blocking elements of the sash. At the same time, it is impossible to forget about the need to adjust the sash after its installation. It's easy enough to do it. So, the adjustment planks are rotated on the pin. In addition, it is recommended to adjust the slope and the lift of the sash. This is done relative to the window frame.
When replacing accessories on the windows, it is important to take into account some aspects:
- So, most likely, you will have to acquire the accessories of the same brand as it was established. The fact is that the details from different manufacturers are most often not interchangeable.
- In addition, it is important to determine from which window profile the window installed with you is made. This depends on the type of accessories, which is purchased to replace.
- During the purchase, do not rely only on the words of sales managers, but try to study this question yourself.
- Finally, making a replacement personally without proper experience, you can wash your personal time.
Replacing the glass in the PVC window
Order of work:
- In order to replace the glass in the plastic window, the double-glazed windows are removed. Then put it on the table so that the damaged window is from above.
- Now through a knife you need to cut the glass from the glass. After that, replace the frame of the glass chain and put a new one.
- Before putting a new glass into place, the frame must be filled with air dryers. Without this, the selection of condensate is possible, which is why the window will often foggle.
- Now remove the measurements from the glass frame and add about 30 mm from each side. If you do not have the finished glass to replace, then it should be cut it or order.
- Now on the surface of the glass you need to smear the silicone sealant. After that, it is necessary to wait until Silicone is driving. When this happens, glass can be installed in place. It is important to fix the strokes. It will only be left to install the double-glazed windows in its place.


