Repair lighting with your own hands Lighting
Repair of lighting networks precedes the repair of the internal or external decoration of the room and is performed immediately after dismantling work. The process consists of two stages. Lighting repair can be performed by a specialist who has minimal electrical installation skills. A homemade master will be odd to remember some techniques and rules.
Content
Indoor Lighting Repair
It is necessary to examine wiring. Aluminum wires in single-layer isolation are subject to replacement. In the panel apartment of the old planning work more convenient to perform with the helper. Replacing the wires is carried out as follows.
- In the shield turns off the power supply in the room. It is necessary to turn off both lighting machines and the rosette: wires can be held in common junction boxes.
- Disseminate distribution machines, disassembled switches.
- A new cable is prepared: its bare centers temporarily twist with bare cores of an old cable near the switch.
- The old cable is carefully removed from the channel, while the new must enter it. To do this, it follows one of the installers to pull up old wiring on the part of the junction box, pre-disconnecting it from other wires.
- Similarly, the feed cable and wire, laid from the distribution-cutting to the lighting device.
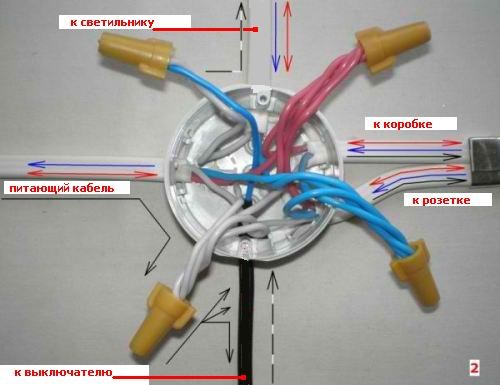
- Connect the wires according to the scheme indicated in the photo. Install switches, lighting devices, closed the distribution channels and after checking the correct installation of the installation - include lighting.
Replacing the cable laid in the strokes is performed after the plastering layer is removed. If the replacement is combined with reconstruction (if you need to transfer switches or lighting points), additional shoes are needed. They are cut through with the help of a grinder and a circle with a diamond spraying.
What wires are used for repair
The old posting of lighting networks is recommended to change on wires with copper veins. Select the section on the table.
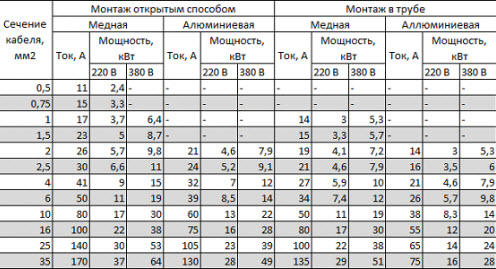
The type of cable for the apartment can be selected from the following list:
- VNG-3 × 2.5 (three copper veins with a cross section of 2.5 mm² in isolation and a common sheath of PVC plastic) - paired from the shield to the junction boxes.
- VG-3 × 1.5 and WDG-2 × 1.5 - are used for gasket from distribution boxes to switches and lighting devices.
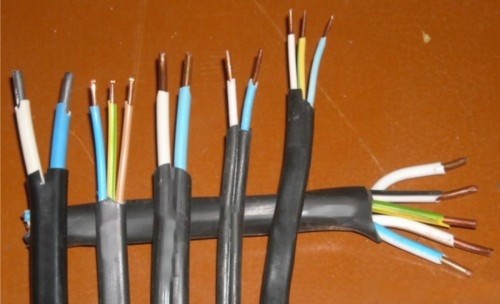
For a private three-phase dietary house, the BG-5 × 6 brand cable is also used: it is made from the main shield to the distribution shield of the lighting.
Current lighting repair
In order to avoid fires and emergencies, it is necessary to periodically perform the current repair of lighting networks. He suggests the following events.
- Inspection and tightening of contact screws in cartridges and switches: the operation is recommended at least once a year. Due to the heating of the metal, involuntary screwing screws occurs, which weakens contact. As a result, sparkling and burning contact arises.
- Checking the integrity of the cartridges and stripping contacts in the cartridges of incandescent bulbs. If necessary, the central contact is needed slightly bend up.
- Check the condition of the compounds in the distribution circuits and shields. In the case of detection of burning and melting isolation, the connection should be renovated.
Repair of lighting devices
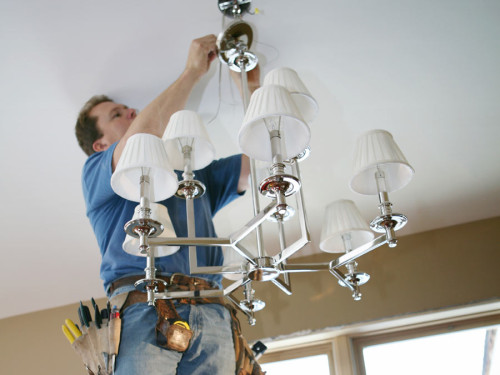
The need for repair of chandeliers and lamps occurs if the light sources cease to light up or begin to "blink". In order to accomplish it yourself, you need to own certain skills.
How to replace the cartridge in the chandelier: Some Tips
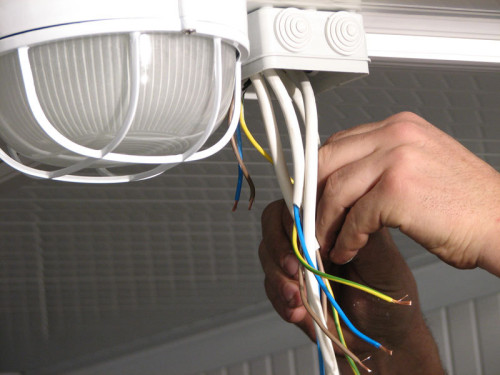
If the light burns after the outbreak in the chandelier region (lamp) and felt the smell of the burner plastic, it means there was a short circuit and a cartridge should be changed. To do this, do the following.
- Turns off the power to the automatic machine in the shield. You can not trust the keyboard switch, without making sure that it bursts the phase wire. It is necessary to wait for a while that the details of the device are cooled.
- Unscrewing the decorative nuts, remove the glass cover.
- Carefully unscrew the bulb. If it is not unscrewed the bulb or socket remains in the cartridge - will have to replace it.
- Turn off the "skirt" of the cartridge.
- Use a screwdriver to loosen the screws on the terminals and disconnect cables.
- In reverse order setting a new cartridge.
- Attach the wire: the polarity of the cartridges in the new sample does not matter. But for safety when installing the cartridge the old model neutral conductor is recommended to connect to the terminal connected to the cartridge thread. The screws should be tightened as tight in two or three doses.
- We put in place the ceiling.
Tip: before fastening the new bulb, you should rub the cartridge threads and cap lamps with crushed pencil simple pencil. This will prevent them later "prizharivanie" to each other.
Repair fluorescent lamps
The most common problem with a choke and starter. But first you must make sure that the voltage supplied to the lamp circuit. After that, we check the lamp and the fault is detected by the following features.
- Lamp power supply voltage must be stable: vibrations should not exceed 5% of the nominal.
- We see that the room temperature has dropped to the critical (for stable lamp operation) values.
- Set in place a new lamp is not working. If it is lit up for 15 seconds - the old lamp must be disposed of.
- In that case, if the installation of the new lights have failed, prozvanivatsya choke coil, check the contacts of the cartridge.
- Perhaps the starter no longer lock the electrode heating circuit. Replacement starter trouble shooting.
- If the lamp lights up weakly and "flashes" on the one hand - it needs to be "flipped". The fault has not disappeared, and "flashing" the lamp observed from the same side - it needs to be replaced. In the event that the nature of the glow has not changed - probably a short circuit in the cartridge by "flashing" the phosphor.
- The normal operation of the lamp is turned on again testifies to the fact that the air has got into the flask. This lamp must be replaced.
- Darkened lamp outputs mean throttle malfunction. At failure of the working cathode and the starting current will not match the VAC (voltage-current characteristics) of the device.
- a throttle fault is diagnosed and if the light flickers in waves over the entire length. Otherwise (if the current-voltage characteristics are normal) will blame the lamp itself.
- Spontaneous periodic extinction and risi lamp indicates a starter fault and the lamp itself.
- Dull glow means wear of phosphor or choke. To clarify this, you should measure the operating current.
It should not be left for a poorly running lamp without attention: the element of the scheme may cause a breakdown of another part.
To learn how to independently repair the energy-saving lamps, you can view the next video.
Repair of LED lighting
As a result of the operation of LED lighting, various kinds of faults occur associated with the failure of one or more system elements. During diagnostics and repair draw attention to the following.
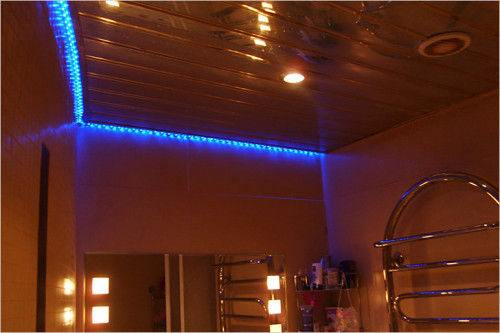
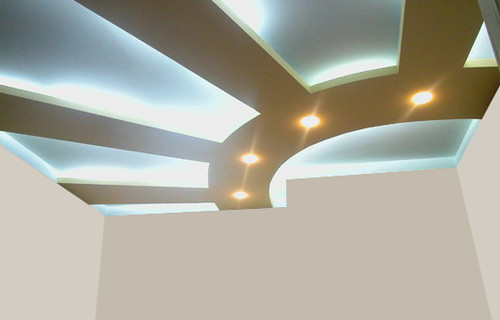
- Repair of the ceiling with lighting around the perimeter arranged using LED tape (if it is not completely lit), start from checking the power supply. You need to examine all the detachable connections. Then you need to make sure there are 220 V voltages at its input. This can be done using a multimeter or simply connect the desk lamp. After that, check the output voltage multimeter. It should be equal to 12 ± 1.2 V (10%), otherwise the power supply is defective.
- Multicolor decorative LED RGB ribbons are controlled using the controller and remote control. It is important that the infrared controller sensor is installed correctly, otherwise the LED ribbon will be poorly controlled or stopped working. It is necessary to check the battery of the remote control: if she "sat down" (rated voltage - 3 V), the remote will not work.
- To check the controller, you need to submit to the LED tape connector (taking into account the polarity) power 12V in turn for each of the three wires (the fourth - "+" from the power supply), bypassing the controller. If the tape glows in all three cases - you need to replace or repair the controller. Otherwise, the fault must be sought in the ribbon itself.
- Make sure that the tape is properly, it is possible using any DC power source with a voltage of 5-15 V. Even weak glow at 5 V will be enough to make the appropriate output.
- The reason for the failure of the LED ribbon can be multiple excess of the voltage from the bats for the power supply unit. In this case, the key transistor to be replaced is to blame. It will be impossible to restore the work of the ribbon without its replacement.
- Separated separate LED can be replaced by a similar one.
- Repair controller for a layman in electronics limited inspection circuit board after careful removal from the housing. Attention should be paid to the presence of defects, "cold" rations and darkening caused by overheating of conductors and the failure of the radioactive elements. Discovered the damaged parts can be replaced by similar, bad solder joints to re-solder. Other repairs are carried out using special equipment in the presence of certain skills.
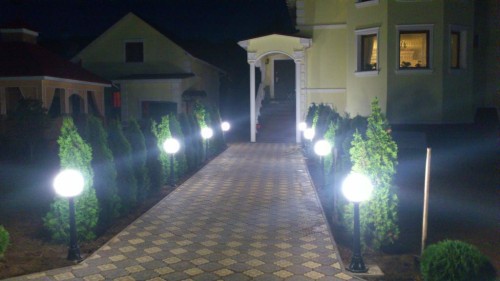
Repair of outdoor lighting networks
Repair of street lighting begins with check supply voltage. The reasons for his absence could be:
- tripping on power supply company;
- trigger voltage circuit breaker or relay obschedomovoy shield;
- open or short circuit wiring lighting gardening area;
- there is no contact in the circuit breaker.
It is necessary to use a multimeter to check for voltage switchgear and socket contact in the lamps. It is necessary to observe safety precautions: denude twist in junction box is only allowed after a power failure.
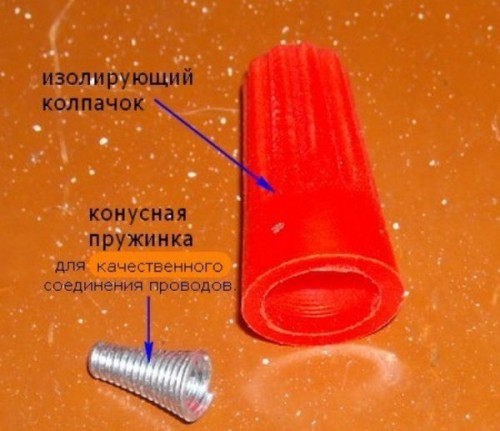
In the event of a wire break its connection is permitted (excluding spans of overhead lines). In this case, the insulation integrity restoration is done using special connectors.
At the junction of the installed junction box that allows you to control his condition and repair as needed.
If during the examination of foreign postings were not identified her injuries, further repair outdoor lighting requires troubleshooting in lighting devices. Lamps, is used to illuminate the infield, are divided into two categories:
- autonomous, powered by solar panel and battery;
- network, operating from a network of 220 V.
latest repair technology as described above. In stand-alone fixtures reason for refusal can be the failure of the battery end-of-life. His replacement will eliminate the problem.
Using the information contained in the article, you will be able to troubleshoot or repair the lighting system luminaire.


