Stuccoings of walls cement mortar: Step-by-step instructions Walls
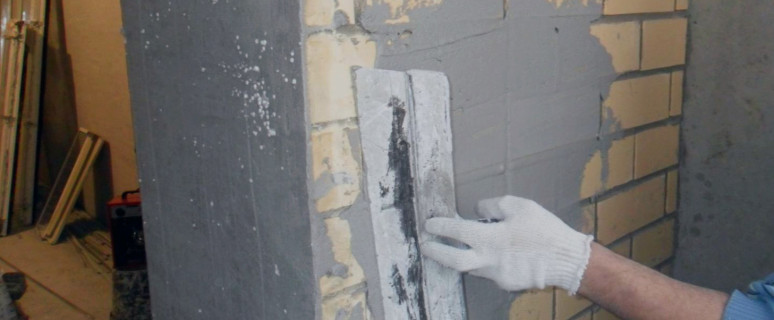
The plaster of walls cement is the most common procedure that is carried out in the construction process. It must be said that this is a fairly simple process, but it has a lot of subtleties that it is clear about to say. Moreover, newcomers often have issues related to the elementary stages of work. In this case, it is also very important to prevent any serious errors so that the created surface is solid and durable.
Content
It should be noted that the process of plastering walls consists of several important stages. The most important thing is to be attentive and responsible for any work performed by high quality.
In the same material, we will consider in detail all the complexity of the process of plastering walls, as well as analyze every stage of construction work. Ultimately, using our instructions, it is possible to carry out full repair itself.
Main preparatory work
Even those walls that have been plastered, which were only erected on the eve. In addition, it should be borne in mind that the preparation of surfaces to this process may differ depending on whether the wall is based on what material. And it is worth remembering.
Next, we will consider in detail the specifics of the preparatory work:
- Walls from concrete blocks. The bad news is that with concrete blocks cement incredibly easily slides. This is due to the fact that the material has a practically perfectly smooth and smooth surface. Accordingly, in this case, it is necessary to be especially careful that the final result is quite acceptable. As for the preparatory work, in this case it makes sense to pay attention to the couple of tips. First of all, a thin layer of tiled glue can be applied to the surface of the wall. Previously need to project the wall. This will increase the grip of cement (plaster) with the surface. In addition, you can install a plaster grid that makes the created cement layer much stronger. In some cases, builders intentionally make irregularity on the surface, but this is a rather risky option for beginners.
- Walls of brickwork. Often, the problem is that the construction brick is not amenable to plastering. However, and from this situation there is an output. Most often to stack the walls, a doom is created. Often for this in the intervals between bricks are robbed nails to which the wire is screwed. Next, you can freely start the plaster. In addition, as in the case of concrete blocks, a thin layer of tiled glue can be applied to the surface of the wall. After 24 hours, the main repair process can be started. Again, you do not need to forget about the plaster grid, which also performs its function very well.
- Plasterboard surfaces. To carry out plastering walls from drywall, it is necessary to simply project the surface. It is worth recalling that plasterboard plaster often occurs within the bathroom.
- Walls from slag blocks. Most often, the slag blocks have a rough surface, so they are incredible to print their plaster simply. For this, it is enough just to moisten the wall, and the cement solution will hold securely.
- Woods of wood. Of course, the wooden walls are very rarely amenable to some finish, but if you need to stack this surface, you should, again, to preload the surface, as well as install the plaster grid.
- Walls from the shell. Here the situation is almost similar to what we have with slag blocks. For plaster, it is necessary to abundantly moisten the surface with water.
In addition, there are some specific situations that should definitely know. It is often happening that the walls are distinguished by the presence of irregularities. In some cases, the deepening on the surface is 10, and 20 cm. It is obvious that in front of any work related to the wall finish should lead it to the proper state. To do this, you can use the most ordinary cement solution, which you need to fill the recesses and other irregularities. Only after complete pouring can continue repair work.
In addition, there are situations when it is necessary to finish a previously plastered wall. With this situation, there is a need to remove old plaster. Fortunately, this process is quite simple. To do this, we need to arm a perforator and remove all the remains of plaster. If there is no perforator, the usual ax will be completely coming. However, such work should be carefully. If the plaster was created on the basis of lime and sand, then separating this material from the wall will be incredibly simply even without the use of the perforator.
If the process of removing the plaster was too complicated, the problem may hide in the paint layer present. In this case, you need to take a sharp object (awl, scissors) and try to remove the layer.
Features of the grid installation
It was previously mentioned that the plaster mesh can be used to apply plaster. It should be borne in mind that such a decision will allow you to be sure that the work carried out will be qualitative, and the plaster itself will be in excellent condition for long years.
Moreover, the grid prevents the appearance of cracks, which are often formed several months after repair work. The reinforcing grid, exactly as plaster, should have an anti-corrosion coating.
The mesh is attached using metal dowels. The location of these fasteners occurs through the chess principle. For cutting mesh, you can use conventional scissors.
Installing the mesh occurs from the bottom up. Just "to wear" the grid on the dowels driven into the walls. If necessary, you can lay the reinforcing material of the Vanest, to avoid possible mesh passes. Before plastering the walls, make sure that the material is reliably held on the dowels.
The installation process of Mayakov
As in many other construction work, the beacons are used as a guideline. With their help, the highest chance to get a smooth and high-quality surface.
As a lighthouses, it is best to use special metal profiles, however, it is possible to save, making a choice in favor of boards or dried bugs of the cement mortar.
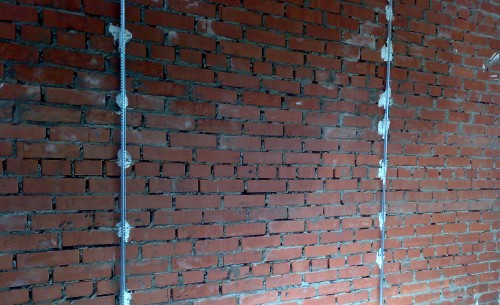
To install the lighthouse profiles, you must make several holes (in the vertical direction), and so into several rows. Special bells are placed in the holes, which will be a kind of fastener for profiles. With the help of an ordinary thread, you can verify the vertical level so that all surface elements are located smoothly. Next, you can use screws on the basis based on the bracket based on the shouldhem. After that, it can be applied to the fasteners of some volume of cement, which will allow the design even with a large load. It should be borne in mind that there should be a small distance between the profile and the wall, which will later be filled with plaster.
It can be done differently: first sketching several points from cement on the surface of the wall, and already based on the mixture to have a light profile. In this case, it is necessary to arm the construction level to control the exact location of all elements.
The above procedures in the case of complete shocking should be carried out throughout the wall area. It should be borne in mind that the most important thing in this process is a flat surface, so special attention should be paid to the location of the beacons.
Cooking for plaster
To begin, it should be noted that the preparation of plaster needs to be carried out only after all the events mentioned earlier. The mixture will quickly dry and gains strength, so you need to act quickly and efficiently.
First of all, it is necessary to determine the grade of cement, since the ratio of ingredients depends on this. For example, if we use the grade of cement 400, then the process will require a smaller volume of sand than when the cement of the brand 500 is activated. Much also depends on the manufacturers themselves that can slightly change the properties of cement. Thus, it is better to carry out additional consultations with specialists.
The mixing mixture occurs in the concrete mixer. However, if it is absolutely a bit of the solution, you can restrict ourselves to a small container. For stirring, in this case, you can use a building mixer.
It is worth remembering that the finished solution must have a condition at which the mixture can be kept on the wall surface (several folded layers), however, the cement began to slide when the cement began.
Also do not forget that various additives are often added to the mixture. Their volume in the mixture can be practically insignificant, but the properties of the material may have a serious effect. These may be grasp accelerators. There are additives and opposite action. For example, if we have prepared too much solution, you need to take care that it is premature not frozen. Accordingly, additives are used, slowing downstream. Moreover, how long this process will occur depends only on the amount of the supplement used.
But often additives during the preparation of the cement mortar are not used, since the classic mixture has all the necessary properties.
Pickle
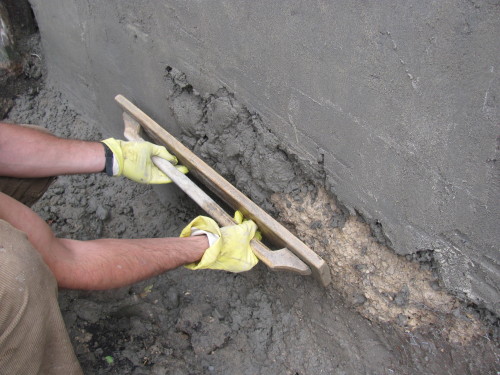
At the very beginning you need to arm a trowel or bucket to sketch the prepared mixture on the wall. If the layer of plaster should be thick, it is better to use the second tool.
Drop the solution should be left up. It should be done sharply and at an angle of 45 degrees so that the mixture does not fly out, as it usually happens. Thus, it is necessary to type the solution until the cement mix layer is equal to the mounted beacons. Only after that you can move to the next step, which consists in aligning the surface.
Leveling solution rule
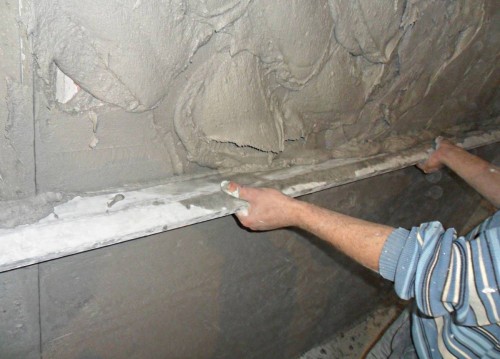
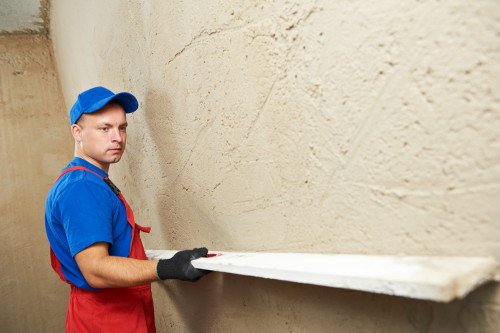
Armed with the rule, it is necessary to pull the mixture located on the wall surface, from the bottom up. It is necessary to do it strictly for beacons. The essence is that the lighthouses must be located with a certain step that matches the width of the rule. At this stage, it is very difficult to allow any error, so even a beginner will easily cope with the task. However, the alignment occurs not as fast as the mixture may be too thick.
Next again patch the solution to the surface and continue to pull. It should be borne in mind that similar manipulations we wire throughout the surface. It is best to make this work in sectors that are conventionally located between the beacons, as it is not possible to cover the entire wall with cement - not the best solution, because it is too quickly seized.
Battle works
After all the above works, the next stage comes - rapid. It is necessary to proceed only after the mixture applied to the wall sufficiently dries. To check it, you need to slightly push the surface to the surface. If the cement is pushing, then it is still early to start these works.
For the grout, it is best to use a clutter board. Surface grinding needed circular motions. It follows this until the surface becomes completely smooth. It is advisable to prevent the situation at which there are too noticeable flaws on the wall surface, then it will have to wait for a very long time.
If the repair process is too delayed, it should be borne in mind that the grout can be carried out even the day after applying a mixture on the wall. But at the same time it will be necessary to moisten the surface with water.
Frequently often at the stage of drying the plaster (already after the grout), cracks begin to form on the surface. Therefore, within a few hours you need to periodically make water with water. It is especially important to carry out such manipulations in hot weather, when the risk of cracks is extremely high.


