Solar collector do it yourself Climate

Owners of private houses often strive to make their housing not only more practical and efficient, but also less costly in service. A relatively recently used solar collectors, which allow you to organize hot water and even the heating of the cottage with minimal costs. Acquire the finished installations is quite expensive, and at the same time make your own hands the solar collector is not so difficult. In this article, we offer several ways to solve this task.
Content
What is a solar collector?
Inherently, this HVAC equipment, which is used for hot water production with its subsequent use in the water and heating system. The principle of operation of such a system is to change the density of water at the time of its heating, thereby ejecting hot fluid occurs upward. 
The main difference of such systems is that natural resources are used to heat, in particular, solar energy, which is absolutely free. A properly constructed solar collector allows you to extract this energy even in a frosty day or under cloudy weather. Therefore, the use of such a device is possible not only in summer, but even in autumn and winter. 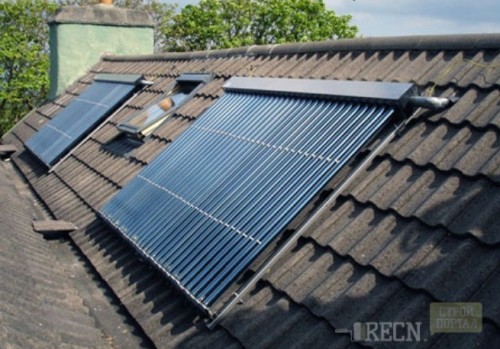
Device of a solar collector
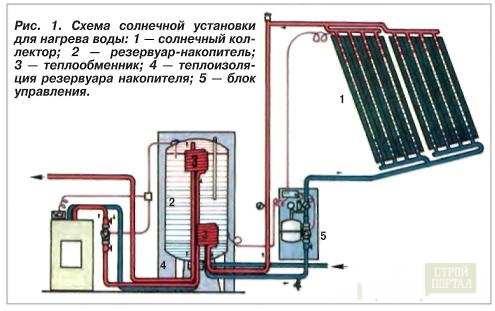
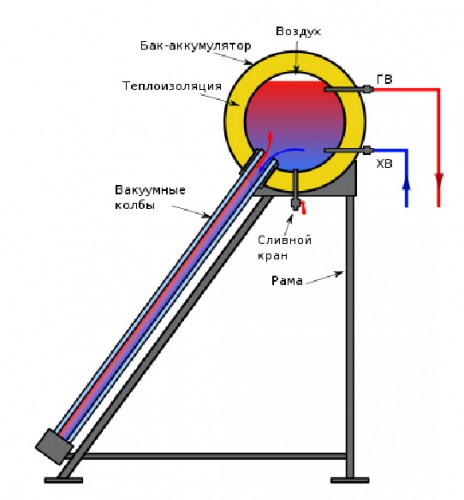
The design of the full system of the solar collector necessarily includes several main elements - this is:
- device for extraction of solar energy;
- capacity for accumulating hot water;
- heat exchanger;
- the heat-insulating structure that reduces the cooler cooler speed.
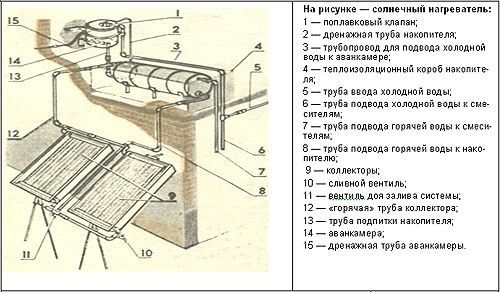
Important! In automatic systems of a more complex design, a system is also used to control the system that makes it possible to adjust the degree of heating and the distribution of the coolant through the hot water supply pipelines and the heating system. Vitely familiarize yourself with the solar collector device will help below the proposed scheme.
How profitable to have a solar collector?
The use of a solar collector, of course, will give certain advantages - this is:
- saving artificial energy resources;
- full refusal from them if you have a small cottage or the volume of water consumed and the heating is small;
- the ability to reduce the costs of purchasing a finished device, if you collect a collector with your own hands from the primary materials;
- getting the necessary energy for the decoration of hot water supply and heating, if centralized networks are located far from your cottage and there is no possibility to connect to the highway.

Important! At the same time, keep in mind that for the most efficient heat emission, require a sufficiently large collector area. Set them for this reason mainly in the roof of the house, and that will entail decrease the aesthetic appeal of the roof. In addition, we note that to completely abandon the energy in the case where a large area of \u200b\u200bthe house, and you have a large family, is unlikely.
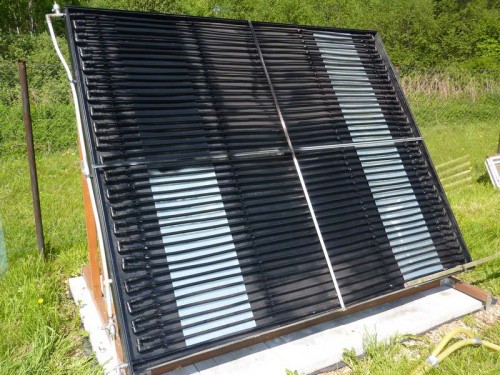
What are solar collectors?
The classification of types of solar collectors is carried out in several principles. The first one is productivity. The determining criterion is the temperature that can be achieved by plates extracting energy. 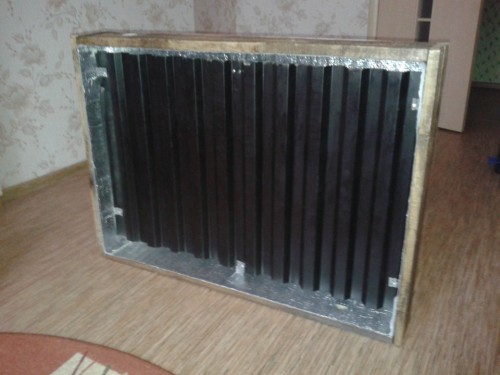
For this principle, solar collectors are distinguished:
- High temperatures are predominantly industrial collectors who cannot be collected at home.
- Average temperatures. Such devices are able to heat the water to 80c. Thanks to this, they are quite suitable for use in heating circuits.
- Low temperatures are compact devices, with which you can heat a small amount of water to 50c.
Important! When choosing a suitable option of a solar collector, focus on the following standard requirements: The device must provide a volume of 100 liters of water for 1 person per day, although the average consumption is 30-50l. For the performance of each 100l temperature in 45-50c, the area of \u200b\u200bthe device in 2 m2 will be required.
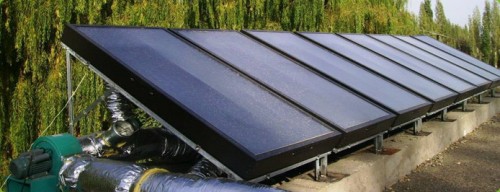
Depending on the form and functionality, the following variants of structural solutions distinguish:
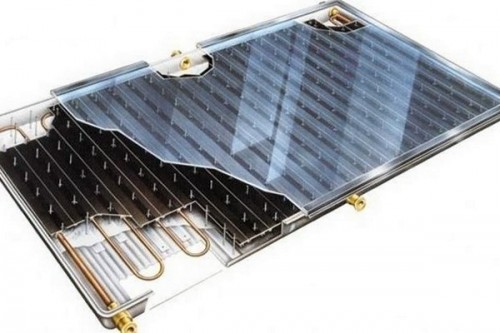
- Flat solar collector. Such an appliance is a flat box, most often from metal. Inside it is placed black plate, which attracts sunlight. The box is closed with a glass lid, which enhances the energy supply efficiency on the plate itself. A low efficiency in just 10% can be enhanced by using an additional layer from an amorphous semiconductor.
Important! The advantages of this collector are in the minimum assembly costs, the possibility of installation at any angle, high productivity in the summer and the property of self-purification from snow and land. They are installed mainly when designing heating systems in rooms, for various household needs and heating pools.
- Vacuum tubular solar collector. The main structural element of such systems is glass tubes with high-selective coating. They are designed to capture solar energy, and also serve as direct heat conductor. When designing the tube, they are distributed across the area - some are outside, others inside. Between them Vacuum, which provides long-term preservation of the obtained heat. High tightness of the device is achieved due to the installation of multilayer glass.
Important! Such devices are quite effective even with low illumination or at low temperatures. In addition, there are other indisputable advantages - small sailboat, simplicity of assembly, long period of operating manifold in 24-hour mode, low heat loss.
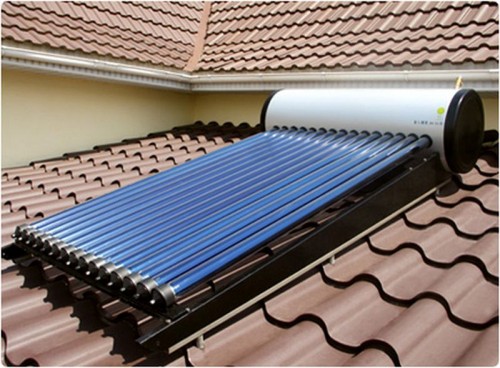
By type of coolant, these devices distinguish:
- Liquid (water) solar collector. In these systems, liquid circulates. Depending on the complexity of the design and the requirements for the efficiency of the efficiency of the efficiency, they can be issued with open and closed circuits of heat exchange, with glazing and without it.
- Air solar collector. This type is characterized in that it is heated not water, but the air itself. They are used mainly for drying C / X products. To improve the quality of the result, can be equipped with fans for forced convection, which is why maintenance becomes more expensive. The main advantage of air collectors is that they do not freeze in the winter.
Important! In addition to these varieties, there are still a number of more complex designs that are used mainly to solve larger tasks.
How to make a solar collector with your own hands?
Make a solar collector for heating or hot water is not as difficult as you might assume. Below is several options - both the most simple structures, and more complex, but effective. What kind of choose them, determine yourself, based on personal requirements, the presence of a particular material and professional construction skills.
Important! Examples are given in order by the degree of complexity of assembly and costs for consumables.
Method 1. Collector from the hose
You probably, more than once, when processing your own plot in the summer, we noticed that if we water the flower leaf from the hose, which had long lay in the sun, it would flow rather warm water from it. Based on this observation, the following construction was developed.
Important! Such a device is easily and quickly mounted. Excellent option for giving, where there is no need for much hot water consumption. From one hose in a length of 100 m and a cross-section of 20 mm, about 20-30 liters of finished hot water can be obtained. If there is a need for greater volume, you will have to use not only a cumulative tank, but also a circulation pump to create forced water circulation or make several hose collectors.
Assembly instructions:
- Buy one or more pipes with a cross section of 20-25 mm suitable length - 50, 100, 150, 200 meters from polyethylene or the usual dark color hose with the same characteristics.
- Place the pipe spiral on a canopy area on the roof of the house or directly on Earth.
Important! Please note that reinforced PVC hoses for this idea are not suitable, as they have too thick walls.
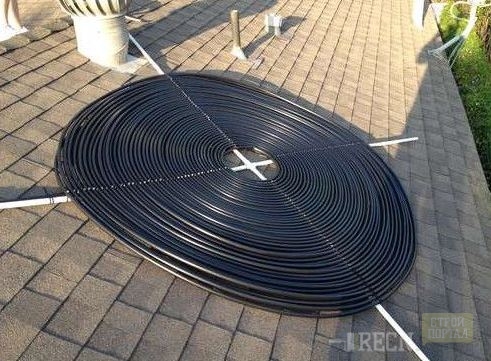
If the roof slope is sharp enough, make additional actions:
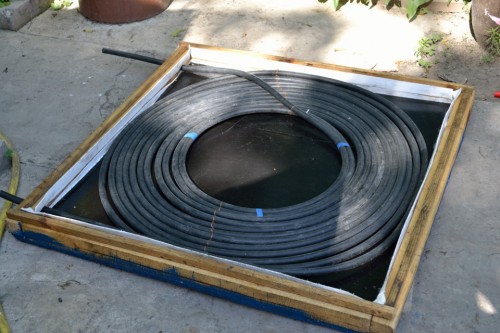
- Make a box for fixing the rolled hose using a plywood sheets with a thickness of 6 mm and a cross section of 40 * 40 mm.
- Process the finished base of the antiseptic.
- Color box black.
- Make inside the hose on the spiral.
- Fix the position of the turns with metal or plastic clamps, ordinary or slate roofing nails, driven them between the pipes of the pipe.
Important! The last action will help to exclude the deformation of the collector when exposed to temperature and water. After you make sure how much such a solar collector works, make the calculation of the quantity you need to obtain a certain amount of water per day. Note that the use of such modules is appropriate only in the summer.
Method 2. Collector from the window frame
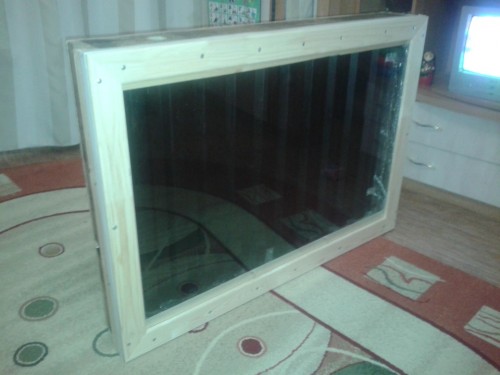
Today, wooden windows are used somewhat less, but, nevertheless, many have retained old frames when replacing them on plastic or new wood. This part of the window is just aimed at designing a solar collector, as the frame is a ready-made box for a natural battery. 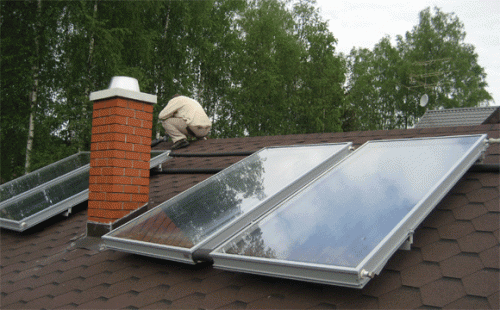
Assembly instructions:
- Open the frame.
- Remove the glass.
- Place the heat insulator layer on the bottom, the thickness of the cloth of which is at least 3 cm.
- Clean the sealing rubber around the perimeter.
- Take a galvanized steel sheet by window frame.
- Paint it in black color matte paint.
- Top of the heat insulating material, put this sheet - it will attract solar energy.
- Buy plastic, PE or copper pipe with a 1/2 inches section.
- Put it on the surface of a sheet of a spiral or a snake.
- Secure the pipe clamps.
- Cover the frame for the second half.
- Shy it with screws to provide high-quality fixation and monolithic design.
Important! Install such a collector at an angle of 15 degrees in summer and vertically in winter or autumn.
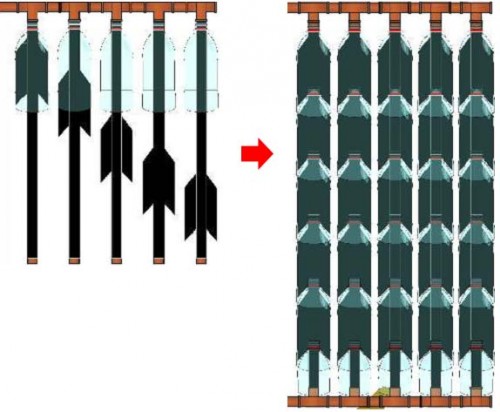
Method 3. Collector of plastic bottles
Another fairly simple design option, the cost of which is low. The main advantage is that even during sunrise and sunset of the sun, an energy extraction occurs, and the rays penetrate almost at an angle of 90 degrees inside the bottles. 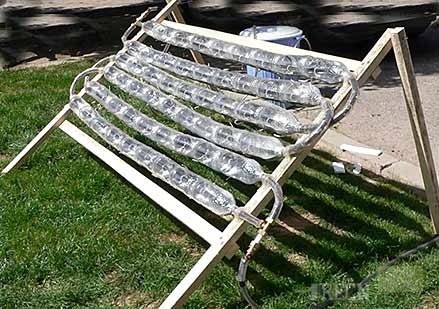
A set of materials for such a solar collector is featured:
- used Covenants from under the juice or milk;
- plastic bottles of the same shape;
- PVC pipe external cross section 20 mm for hot water;
- tees suitable for hot water pipelines.
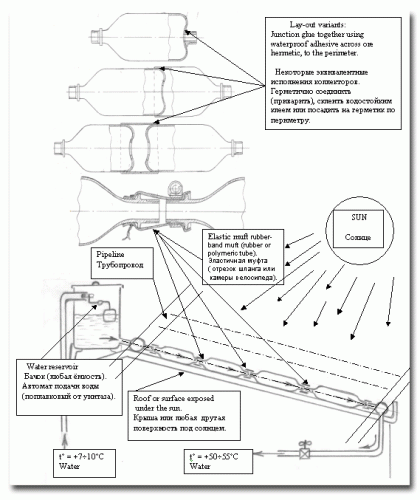
Assembly instructions:
- Select the required amount of bottles.
- Rinse them and remove the labels.
- Make a template from cardboard, turning the 30-centimeter sheet into the pipe, putting it on the bottle.
- Cut the bottom of the bottle through the cardboard line.
- Rinse all tetra-packs.
- Rinse them thoroughly to remove all the remains of the liquid and exclude in the future the unpleasant smell of rotting.
- Color them black, using matte paint.
- Paint pipes are also black.
- Wait for complete drying of all the details.
- Put the first bottle of the neck forward on the bottle.
- Put the next tetra-pack of a narrow part forward.
- Insert it into the bottle until you stop.
- Repeat the procedure with the amount of bottles up to 5 pieces at a pipe length of 105 cm.
- Install pipes on a metal or wooden support.
Important! When placing a cumulative tank, select a place by 30-50 cm above the collector itself. Forced circulation in this design is not required, as the water, heating, will naturally rise up, and cold to descend from the collector. If you need to hold the water temperature in the accumulative tank as long as possible, warm it. Bottles are desirable to change no less often than 1 time in 5 years, since over time their light-permeability decreases.
Method 4. Collector from the old refrigerator
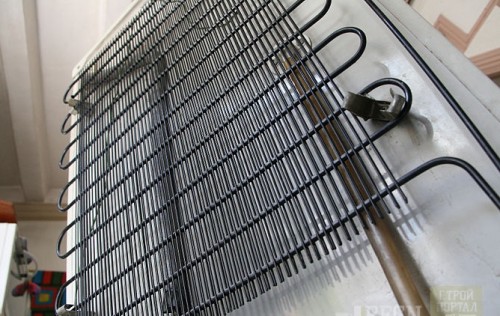
Old refrigerator, failed, can also come in handy. It is used for a solar collector capacitor, which will reduce the time to assemble the heat exchanger. The only nuance is that, since it still circulated freon and oil, it is desirable to use such water solely for technical needs, but not like drinking.
Important! In addition to the condenser from the refrigerator, a car radiator can also be used in this system. In this case, the efficiency of the device will be higher.
Additional materials that will be required for this type of collector are:
- rubber mat - It is used for the substrate;
- foil;
- scotch;
- wooden bars with a cross section of 50 * 50 mm - of them mounted the case;
- glass - suitable from the window frame.
Assembly instructions:
- Remove their refrigerators rear capacitor grille.
- Measure it.
- Prepare Brucks of the desired size based on measurements.
- Collect the case from the prepared parts.
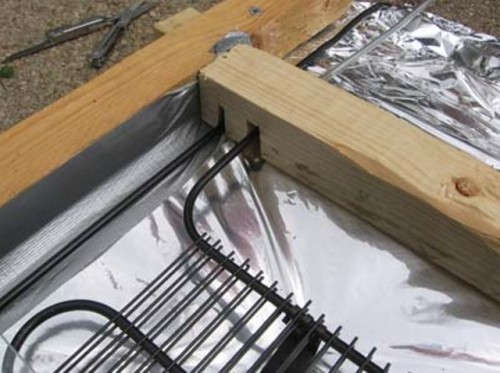
- Place a foil sheet on the bottom of the body to ensure that the heat exchanger is also heated from the back side.
- Puck all the slots around the perimeter of the rope of scotch.
- Pribe the bars from the back of the collector to secure the heat exchanger.
- Make grooves in the frame for pipe output.
- Top tube heat exchanger Bend up to ensure efficient natural circulation.
Important! If the capacitor tube does not bend, then the pump will be required for forced circulation. In this case, even aquarium pump is suitable, and the accumulative tank can be installed anywhere. In the case of a natural movement of fluid in heating, a storage tank is placed above the collector.
- To secure the capacitor inside, use the holders from the refrigerator.
- Below on the frame, screw the 2-3 screws that will hold the glass from the climb.
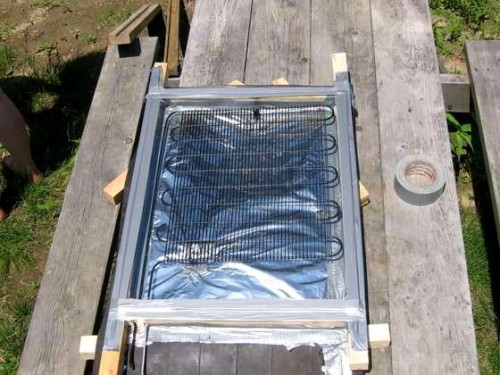
- Cover the whole design with glass.
- Seamize throughout the perimeter of Scotch.
Important! The effectiveness of such a collector you can calculate in advance based on the tests already conducted. The data obtained when testing the system at 25 ° C corresponded:
Method 5. Collector from polypropylene
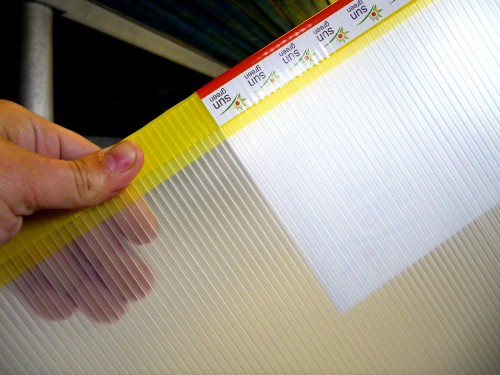
This design of polypropylene is a solar flat battery with dimensions 2400 * 550 mm. Such parameters are selected taking into account the features of accommodation - between rafters in the attic. The efficiency of the device is high enough, as each square centimeter falls under direct contact with water. Another advantage of this option is that you can independently define suitable parameters and change as needed.
Important! To make sure how appropriate time and money to assemble such a solar collector, read the test data:
Materials for work:
- cellular polypropylene (not polycarbonate!);
- polypropylene pipes with a cross section 1 1/4 inches;
- a sheet of plywood with a thickness of 5-10 mm;
- garden hose cross section appropriately used by pipes;
- foam leaf 2 cm thick;
- special adhesive for PE products, for example, 3M Scotch-Weld ™ DP-8005 or fit special equipment for connecting polyethylene parts if it is already available.
Important! This construction of the solar collector is more complicated than all of the above methods. Therefore, it is desirable to have certain skills to work with polyethylene material to obtain a qualitative result, and it is extremely neat during work.
Assembly instructions:
- Drill holes in plugs with a diameter suitable for pipe tips.
- In the pipe, make a cut with a circular saw to insert a sheet polypropylene into it - the width of the propyl is identical to the width of the sheet.
- Collect the design and make sure it is reliable and tight fit all the details.
- Declaring all surfaces that will be shy using acetone.
- Apply the glue sequentially and connect the desired items immediately, since it dries very quickly.
- Promazhte all corners of the adhesive.
- Make technical pause in 24 hours to the adhesive composition is completely cured.
- Connect the collector to the water garden hose.
- Check the tightness of the structure.
Important! If a leak is found, dry these places, degrease and seal.
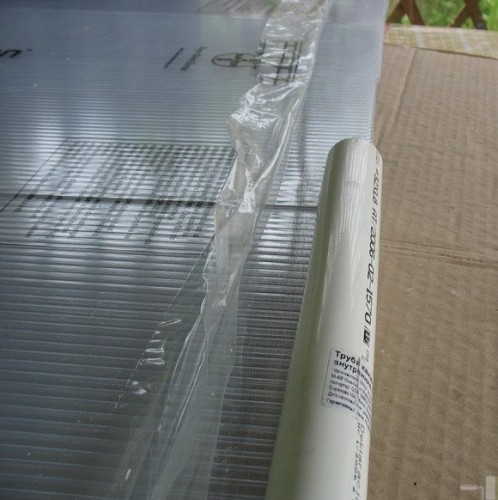
- Take a plywood sheet, and cut it at the desired size, based on the reservoir parameters - be it a base unit.
Important! Note that the features of the installation of this design does not require the presence of the usual body. Rama serve themselves rafters.
- Drill holes for the output taps.
- On the installation site collector podstelil foam sheet thickness of 2 cm, to prevent heat leakage from the back side.
- Collector surface color matt black.
- Install the finished unit in the selected location.
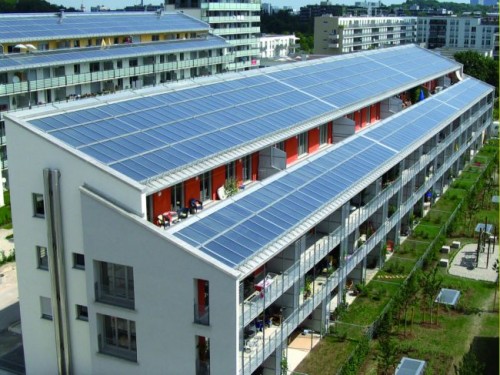
Important! Note that installing the solar collector must always be at an angle, and the storage tank - higher than the device itself. After filling in water, make sure that all air has gone out of the system - no bubbles inside. Otherwise, the performance will be much lower.
Conclusion
Build a solar collector with their hands - it's not a very difficult job, which is quite a force to any handyman. But to get a really high-quality result, which will allow time to get hot water in the right amount and place your heating at home with minimal maintenance costs money, it requires not only that. Be sure to pre-select the appropriate installation scheme, based on your personal needs. It may be the work of collector:
- only water in summer;
- only hot water all year round;
- water and heating, including winter.
Depending on the scheme will be changed and the number of necessary additional supplies and equipment, as well as the scale of the required area under the header itself, which is also important. Please note in advance all the details, and you will appreciate how this cost-effective solution to waste energy from the sun for personal purposes.


