Construction of a two-sheet roof with your own hands Construction

Roofs of country houses can be different in shape, but the practical owner tries to choose the optimal solution. The construction of a two-sheet roof of the house will always be relevant. Such a roof is a reliable design, and build a two-tie roof with your own hands while complying with all rules, easy enough.
Content
Advantages
Double roofs began to construct a long time ago. This design has a lot of advantages:
- Perform the roof construction can even inexperienced builder.
- From the material side, the purchase of all building materials will not be overhead.
- The roof device - its slope will avoid the accumulation of snow and precipitation.
- The double roof is suitable for any home project, regardless of the base form.
- Running the roof of the two slopes is easy enough.
- Showing a fantasy, you can decorate the roof with additional decorative elements.
Roof construction of two skates
A two-tight roof has a simple design - these are two inclined planes that rest on the walls of the house. The design includes two end end of the triangular shape - the frontones. If the roof is high enough and the area of \u200b\u200bthe house is not small, then in this space you can place additional rooms. Such space is called the attic, and before the additional space was called the attic and used on economic purposes.
Rafters for gable roofs are divided into two types: when placed on the rafters mauerlat and the second option - to the floor joists. To have an idea of \u200b\u200bthe scale of the work, on the Internet, you can watch a video by typing in the browser: "gable roof of your videos hands."
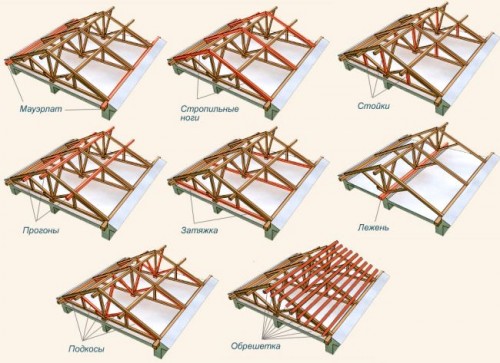
The design of the roof. Main elements:
- mauerlat
- rafters
- Stands
- runs
- toke
- Sill
- struts
- lathing
Construction of a two-sheet roof with your own hands
Experiences, how to build a gable roof itself, having the roof project should not be. After the calculation has been made, and purchased all the necessary materials, you can get to work.
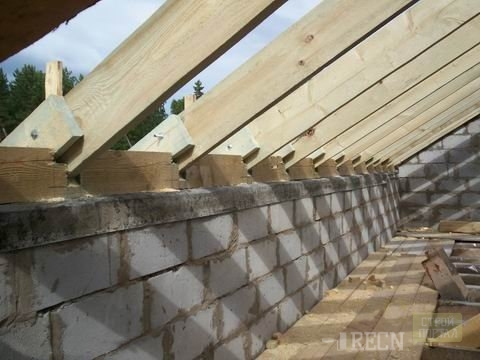
1. You have a brick box of 8x8 meters of the house, a height of three meters. Construction of the roof of any configuration begins with the installation mauerlat (element building structure, a log or lumber, which fits around the perimeter of the building). Mauerlat must be installed on the inside surface of the wall and from the outside - it should lay the brick so that it was not visible. Laying bricks is necessary so that the upper part mauerlat performed by two or three inches above the bricks. This is to ensure that the load is distributed from the roof only and does not load mauerlat brick.
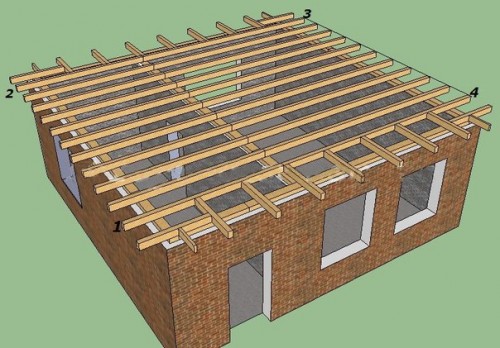
2. Now you need to install the floor joists - wooden boards 100h200 mm. Set beams perimeter defining a width of the cornice. The standard width of about half a meter. After the extreme beams are installed, it is necessary to expose others. A distance between the beams depends on the size of the boards. If this is the standard size of the floor board 50h150 mm, then the distance between the beams is about 60-70 centimeters. It is best to stick with the step of 60 centimeters to when installing roof insulation there are no gaps.
3. After installation, long beams are set short. They must be placed at a distance of one meter around the perimeter of the house. Such a secret to avoid sagging.
To work is not an inconvenience, it is necessary to have on hand fasteners, roof brackets and screws. Nails for fastening the beams to mauerlat need to use 150 size.
After the beams are distributed and secured, comes the turn of laying planks. Boards are a kind of flooring. To lay the planks fit batten or inch.
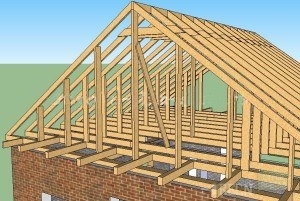
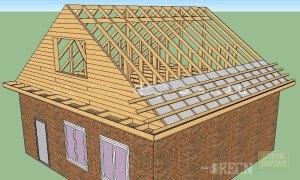
The next step is to install a bar. First you need to install the racks using the level of 50 to 150 mm for this or pinch and attach them to the struts. The struts then can be removed. Racks need to be located about three meters away. First, extreme racks are installed, then intermediate. When the entire rafter will be erected, the intermediate racks are removed and the rooms can be equipped in the formed room at the top floor.
The height of the racks choose arbitrary, it will depend on which form will be your roof. In most cases, the height of the rack is equal to the height of the first floor of the house.
On the installed racks you need to fix the timber. In several places, the skiing bar (an ordinary board of 50 sizes to 200 mm or 150 mm) is fastened with bolts.
It came a line of mounting rafters. To get a sample of the desired size, you must make a template from the available boards. Take a 25-size board with a size of 150 mm and apply it to Brusa and Bake. We note a pencil line and cut the workpiece. Scroll template ready.
To perform each stage of work without errors, you need to have a drawing of a two-piece roof.
This option with a template of the rafter can be used when a two-tie roof device is new. If the new roof is installed on the old house, it is not worth risking, and it is advisable to try rafters each time. The secretion of the rafter: after installing one rafter, immediately you need to install the opposite, thus, the load of the skating timber will be removed. If you do not adhere to this rule, the bar may be a story.
How to make a double roof yourself. Nuances of work
Watch the video how to build a gable roof, with the support of friends and family, you can get your job done and to complete the next stage of building a house without any problems.
In the middle of the work, when a gable roof structure is almost ready, without a little advice can not do. If the roof length (its slope) is large, it is natural to ordinary board (standard - 6 meters) will be missed. As you can do in this case:
- Convenient and fast, but not always the cheaper option - just order the board to size.
- It will take more time, malozatraten. You will need to connect the boards by applying existing scrap boards. The junction is better to carry out from the bottom and under it is necessary to substitute another rack. In order to attach the joist to the beam, using nails, screws, special fixing plates of metal.
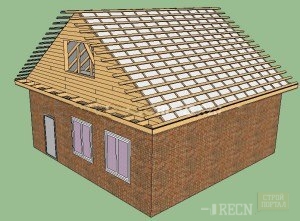
The next stage of the construction of a double roof can be viewed in the photo.
Under each of the wooden bars (rafters), you need to install a beam and a rack, excluding extreme bars.
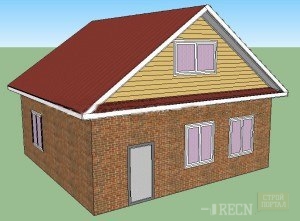
- The completion of the facade of the house is the fronton. To make it right correctly, you need to install the racks - they will serve as a frame. If a window is present in your dual-tide roof project, you need to do the opening. The sizes of the window can be designated by itself, depending on the wishes. After completing the frame, the frontone needs to be seen by the board. Standard board size - 25 by 150 mm.
- We strifted the cornice boards around the perimeter of the whole house. If you have proven to arrange the drainage system, just the moment came to do this. For gutters, metal holders or plastic can be applied. They are attached to the blackboard. Plastic are considered practical and comfortable.
Obsek.
- Secure the waterproofing canvas on the rafters. It is convenient to attach the film with the help of a construction stapler, the insulating material stripes need to be attached to the brass, so that the moisture does not succeed between the joints.
- Then you need to make a crate for metal tile or other material (according to the instructions attached to the material) and cover the roof. Completing the work, you should make front-distance sings and sv.
To understand how to make a double roof with your own hands, look this video:


