Facade Warming Technology House Insulation,Walls
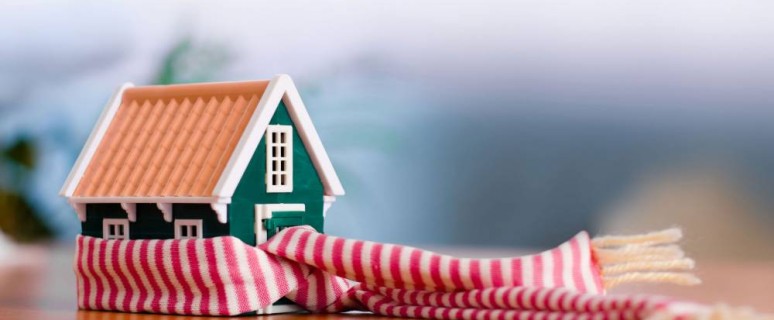
A qualitatively insulated house is a pledge of comfort, comfort and considerable energy savings. The investment of money and time in creating good thermal insulation in the future will minimize heating costs, as well as extend the life of the construction. In this article we will tell, what materials are suitable for a similar purpose, as well as describe in detail the technology of the insulation of the facade of the house.
Content
Requirements for thermal insulation material
There are several types of materials that can be sewn the walls of the building outside or from the inside. Before choosing the appropriate option for the insulation of the facade of the house, you should pay attention to what the requirements for it are presented:
- First of all, the material must have good thermal insulation qualities. This will ensure a comfortable temperature in the house not only in winter, but also in the summer.
- The weight of the insulation also plays an important role. The easier the material, the easier it is to transport and mount it.
- It is desirable that the insulating layer had good vapor permeability, then the walls will be reliably protected from dampness and delights.
- Material should make it possible to make a subsequent decorative finish.
- An important parameter is the service life of the insulation.
- Ecology is the first thing to pay attention to the insulation of the inner walls.
- The safety of the material is also very important, try to choose non-combustible tools for the walls of the walls.
- The price of the material for the insulation of the facade of the house plays a role when choosing an option, but should not save at the cost of the insulation to the detriment of its durability and practicality.
Types of materials for the insulation of the facade of the house
- One of the most popular means for thermal insulation of buildings is considered foam. Its main advantages include lightness, high porosity, ease of installation. The cost of such a material for the insulation of the facade of the house is also very democratic, which makes it so popular. Polyfoam reduces heat loss by 70%, but it also has some substantial cons. First, such a material does not pass the air, which means that the walls are at risk of mold. Secondly, the foam cannot be called an eco-friendly material, since in the process of burning it melts and emits toxic substances into the air. Thirdly, small rodents love to settle in the thickness of such insulation. Among other things, the foam is unstable to the action of some chemicals, for example, acetone.
- Mineral wool has undeniable advantages in comparison with foam. It is environmentally friendly and completely non-combustible, can withstand heating to 1000 ° C. The heat insulating properties of Minvati are also at height, besides, it does not come into contact with aggressive chemical environments. Such a insulation is characterized by good vapor permeability and moisture resistance, but it costs somewhat more expensive than the foam counterpart.
- For insulation, the facade of the house is used and such material as Penoplex. It is considered an ideal option for the outer decoration, since it is not completely afraid of water and moisture. Due to the high indicators of strength and density in the thickness of the fastener, rodents will not be treated, moreover, such plates are harder to damage than soft foam.
Thermal insulation of the construction with your own hands
Preparatory stage
The insulation of the facade of a country or any private house starts with preparatory work:
- At first, from the walls, if possible, dismantle all the protruding details: lighting appliances, gutters, ventilation grids, air conditioning blocks, windows, various communications.
- If the walls are covered with plaster, it is checked for strength by climbing. Displaced places are shot down, cleaned, ground and smeared with fresh plaster mortar.
- Then check the wall for the presence of irregularities, as well as the degree of its verticality. Problem zones are denoted by chalk, and subsequently close or believed.
- If there are places covered with oil paint on the walls, they should pay special attention. Such paint does not pass the air and has poor adhesion with other materials, so it needs to be read or washed with a solvent.
- Before insulation, the walls also need to be cleaned of mold, fungus, rust, heights, fats and other contaminants.
- The insulation installation is proceed only when the walls are properly aligned, communications are installed, all wet internal works are carried out, the roof is mounted and waterproofing is laid.
Installing the guide profile and external window sills
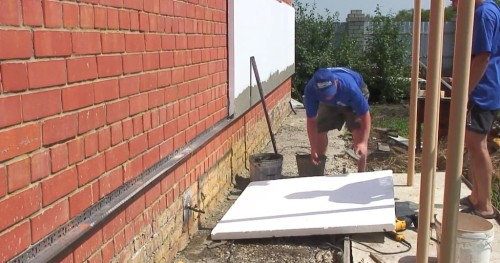
The slab insulation is taken on the guide profile. To do this, on the wall, at the beginning put a mark where the bottom edge of the insulation will be located. Then this point is transferred to all the corners of the building using a hydraulic level, and then paint a smooth start line with a coated cord.
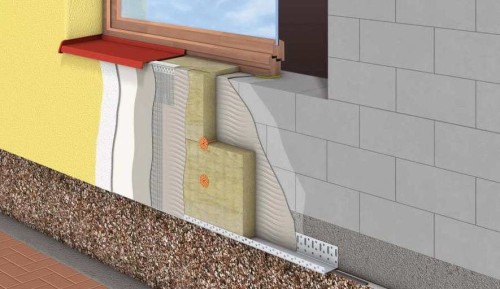
Along this line on the wall I am mounting a guide profile that will maintain the first series of material so that it does not slip down on the cheese glue. The starting profile in thickness must correspond to the plates of the heat insulator, it is screwed to the surface with 6-millimeter dowels, making steps of 30-35 cm. At the corners of the building, the guide profile is connected using slashes or an angular connector. Between the parts of the starting plank, special plastic connecting elements are also mounted, which can compensate for linear expansions of the material under the influence of temperatures.
After installing the starting profile, it is embarked on fixing external windowsills, attaching fastening to the windows. The outer window sill should be for the surface of the wall about 3-4 cm, therefore it is carried out on the distance equal to the thickness of the heat insulating material plus 1 cm.
The next stage is the external slope of windows, it is possible to take a thinner material for this work. After the process is completed, the insulation, used for slopes, should be due to their limits by approximately 1 cm.
Installation of insulation
Among several ways to insulate the facade of the house, the most popular is the gluing of the material to the surface of the walls. The adhesive substance freezes quickly enough, so it is necessary to use it for the first 2 hours after cooking. This means that glue is prepared immediately before applying and make a small portion, which can be spent quickly.
In kneading glue, there is nothing complicated, the instruction for its dilution is most often indicated on the packaging of goods. For the preparation of the composition use deep plastic container. Water poured into it, and then fall asleep the right amount of dry raw materials. To stir all the lumps, use a building mixer or a drill with a special nozzle. Then the adhesive insist about 5 minutes, and stirred again, after which it is ready to apply. The thickened adhesive composition is forbidden to dilute with water, it can be mixed only again.
Installation of insulation on the walls can be described as such a sequence:
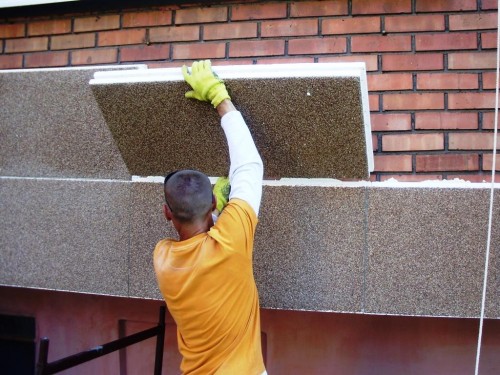
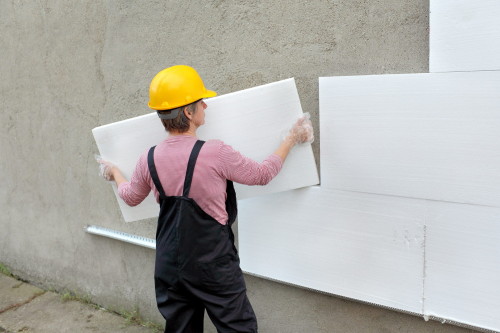
- For work take 2 spatula: 80 and 200 mm wide. A small spatula of glue is applied to a larger tool, and they already smear the wall. The installation of sheets is made from below, aligning the first series of material on the starting profile.
- If there are irregularities on the surface, you can put more adhesive masses in these places. Uniformly adhesive composition is applied only on perfectly smooth and smooth walls.
- Having finished with glue, the surface fragment, the first plate applied to it, press it a bit. Then lubricate the next site and mount the second slab, I joking it from the first. Glue spoke from gaps remove. The result of the work is constantly verified using a construction level and control threads.
- The gaps between the individual plates should not exceed 2-3 mm. If the distance turned out to be large, it will later have to be embedded by mounting foam or close with suitable insulation stripes.
- Near the doors and windows, the material must be installed so that the joints of the plates and side slopes have not formed a single line, their offset should exceed 20 cm.
- In places of corners, a toothed connection should be performed, that is, not to form the formation of a single vertical seam.
- After gluing the material, it is additionally nailed to the wall to ensure greater reliability of the attachment. Before feeding the material, at least 3 days will wait until the adhesive composition does not dry.
- The insulation is fixed on the wall with the help of special fastening elements - fungi. They are dowels consisting of plastic caps, sleeves and nail. Nails can be both plastic and metal, and plastic products are better used for the insulation mounting. Metal is not only more expensive, but also creates cold bridges.
- Mushrooms are driven down in the center and at the corners of the plate. On 1 m² walls should have about 6-8 fasteners. In the area of \u200b\u200bdoorways, window slopes and corners of the building are driven extra dowels at a distance of about 20 cm from the ends of the insulating plates.
- Dowels are chosen based on the thickness of the material. Another 5 cm is added to this indicator - 4 cm will go into the wall and 1 cm will be the thickness of the other layers. Before installing fungi in the wall, the holes are drilled, making them about 1.5 cm deeper than a given length.
- Then the mushrooms are then inserted into the velocked holes and drive spacening nails. Fastening elements should be placed with a wall surface or perform no more than 1 mm. If the mushroom is hampered in deep enough, it is removed, it is still a little deepen the hole and insert a dowel again.
Creating a reinforcing layer on the wall
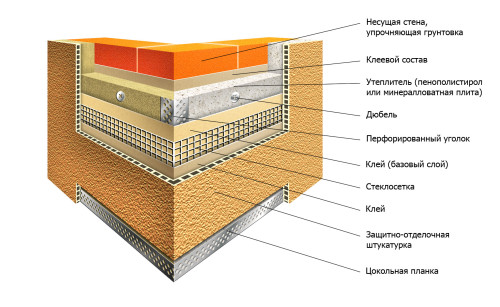
The next step in the insulation of the facade of a private house is the arming of the reinforcing layer. He plays the role of strengthening the design and is made from a special grid. Thanks to such an operation in places of joints and openings, cracks will not be formed.
All the protruding corners of the building, including slopes and decorative elements, should be equipped with perforated plastic corners or aluminum. Corners are fixed on glue, pressed to the surface with a spatula and hanging, focusing on the construction level. Claimed glue believes, the remains are triturated along the working surface.
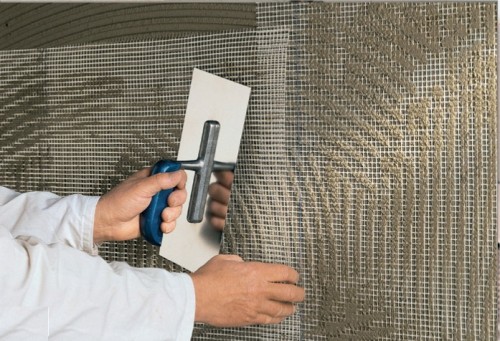
After installing the corners and fixation of the reinforcing elements, the mesh mounting across the wall is proceeded. Such a grid is made of fiberglass, which has alkaline stability and tolerate the calculated loads well.
Before applying the material to the surface, it is thoroughly grinding with coarse sandpaper, and then well purified from the resulting dust. Then the grid is cut by suitable fragments if the house is single-storey, you can cut off parts, in length equal to the height of the walls. Then the working plot is covered with glue, trying to observe the uniform layer with a thickness of up to 2 mm. The adhesive composition is applied by a metal grater, then a mesh fragment is applied to it and rub it into the crude mass with a wide spatula. Smoothing movements are sent from the center of the canvas to the edges.
Next after this, without waiting for the drying of the glue, they apply another layer. Then the adhesive solution is smoothed as carefully, so that the mesh canvate did not bother on the surface. A day later, when the glue is dry, it is grinding sandpaper and correct the shortcomings with putty. After another 3 days, the surface is covered with a primer containing quartz sand. To such a primer, it is much easier to apply decorative plaster.
The insulation of facades of residential buildings should be carried out in warm and dry weather, when the ambient temperature is 5-25 ° C, and the humidity does not exceed 80%. It is desirable that on the wall in the process of its processing did not fall bright sun rays, rain, wind.


