Making chairs for the kitchen with your own hands Interior items
Nowadays to buy furniture - quite annexious pleasure that requires large investment. Especially this can feel young families with children when the family budget is designed to a penny and does not provide additional spending. Optimal output from this situation can be the manufacture of some furniture items with their own hands. Naturally, make a kitchen or sleeping set without special training will be problematic, but simple things, such as kitchen stools, can be tried. Firstly, this process can save enough funds, and secondly, joy and satisfaction from a good result can raise the mood and self-esteem for a long time. So, you should try. About how to make a stool for the kitchen with your own hands, then in the article.
Content
- Selection of material for the manufacture of tobabere do it yourself
- Required tools for making tobabere do it yourself
- Preparation of parts for assembling chairs for kitchen
- Build a wooden chair for the kitchen with their own hands
- Trim Chairs for small kitchen
- Tables and chairs for kitchen: photo
- Kitchen chairs do it yourself: video
Selection of material for the manufacture of tobabere do it yourself
The choice of material for the manufacture of the token does it depends on the design that will be selected. Usually this object of furniture makes the following materials:
- Chipboard - plate, which is produced by pressing woodworking waste. Sold in the form of plates of various thicknesses, due to which it is well suited for the manufacture of cabinet furniture. The laminated chipboard differs from the ordinary plate decorative coating, which has wood texture, but it is more expensive than usual. This material looks very attractive, and is often used for the manufacture of furniture. However, both the usual and laminated chipboard are very afraid of moisture, and the humidity of the air in the kitchen room often changes. In addition, there is a sharp change of temperature in the kitchen, which also does not benefit this material. From high humidity and temperature drops, chipboard can be brewed and "swell." Not protected ends from moisture ingress simply relax. Based on this, chipboard, albeit the cheapest option, but not quite the right solution for the kitchen.
- Natural tree. The most durable and beautiful material. However, natural wood processing requires special skills and tools. For example, without a milling room, it is quite problematic to cut the grooves in the details for their compound. And it costs the material is expensive to try to experiment with him.
- Plywood. Pretty durable and beautiful material. It is not too expensive, but unlike chipboard, it is not afraid of temperature drops and high humidity. That is why, for the manufacture of stools, the most optimal choice will be a birch plywood with a thickness of 20 mm. The size of the standard sheet of this material is 1750x1750 mm. Such a sheet is quite enough for the manufacture of three stools.
Required tools for making tobabere do it yourself
In order to make a simple kitchen stool with your own hands, you will need:
- Electrolzik. This tool will help cut the necessary parts from the plywood sheet to build the tokeret. Without it, manually do it will be problematic. For the production of work, it is necessary to use a canvas with small teeth. The cloth for the jigscoat with large teeth will "tear" the edge of plywood, porting at the same time its appearance.
- Screwdriver. It will greatly simplify the support of the toaster. Together with the screwdriver, it is necessary to prepare a set of bits, including hexagon. To build the toaster it is better to use confirmates. This is a screw, in the head of which a hex hole for a hexagon key is made. If the screwdriver is problematic, you can use a drill with an adjustable frequency of revolutions. However, in view of the absence of a brake in most models of drills, it must be used carefully, especially those models that have a metal cartridge. The fact is that they have a big inertia and can spoil the workpiece.
- Grinders. It is necessary for pre-processing parts before assembling and painting (varnishing). You can use simple emery paper, however, with a grinding processing process will be far faster.
- Drill with drills ø5 and Ø8 mm. If there is a screwdriver, you can use it, the power is quite enough to drill holes in the plywood. For rechargeable screwdrivers, it is better to charge two batteries so that in case of discharge, do not stop.
Preparation of parts for assembling chairs for kitchen
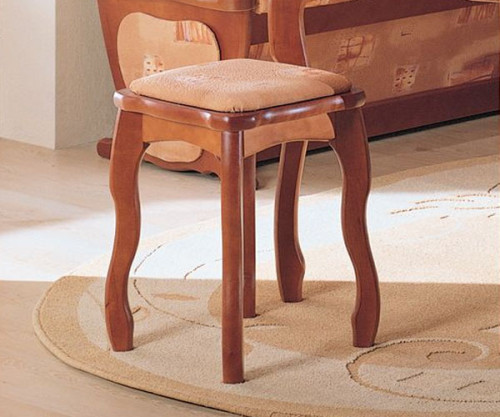
The first thing is to cut the plywood sheet in templates. In our case, the stool will have asymmetric forms. The seat will have the form of a rounded quadrilateral, and the legs are the form of a curly letter "x". In order to simplify the task, it is necessary to draw on the surface of the plywood sheet sketch of details on the surface: one legs and tobupet cover. Then these two details can be used as stencils. In this case, all items for several items will be identical.
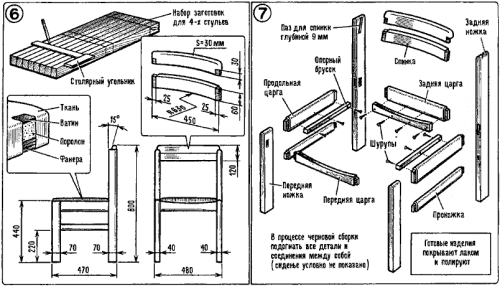
Tuberet details on average can have the following dimensions:
- Top of the toaster 400mm x 400 mm.
- Tabevet's leg 400 mm x 320 mm.
- Rigors strips (they are installed between the legs to enhance the design) 270 mm x 120 mm.
After applying the contour of each part, it is necessary to carefully cut it with the jigsaw.
Next, the cutting parts are processed to the design status. The fact is that the jigsion is almost impossible to cut the perfect contour, so it will have to be eatened by sandpaper. The places of the cut must be seized to remove the offices that can be injured when carrying the toaster. Safes on the contour is better not to remove. Due to the structure of plywood, in which the fibers are perpendicular, the removal of the champers can leave a lot of lencross. Round sharp corners with coarse sandpaper. Then the ends of the blanks are covered with varnish and after its drying are treated with fine sandpaper. The process is repeated until the perfectly smooth end turns out.
Processing the surface by the veil, if it is planned, it is better to carry out before the assembly process starts. Then the surfaces will be more homogeneous, because the assembled stool will be more difficult to open the uniform layer of material. But the varnish can be produced on the collected stool. In this case, they can be compactly placed in the air, for example, on the balcony.
Build a wooden chair for the kitchen with their own hands
Building a stuff from the prepared parts to produce quite simply.
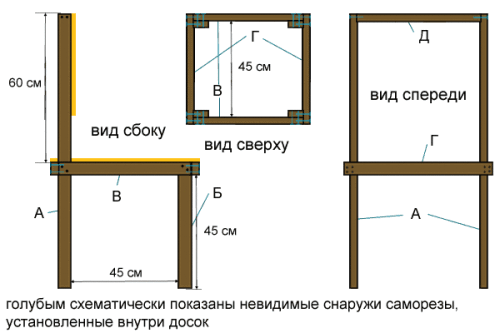
First of all, it is necessary to mount stiffery strips. For this, there are two legs together and two pairs of holes with a diameter of 8 mm are drilled in certain places. Then it is installed on the screwdriver hexagoned bit and with the help of configmatics connect the strap with legs. When conducting this operation, it is necessary to be neat. If the confirmant does not go straight, and at an angle, he can bundle the plywood and go out, spoiling the workpiece. In this case, it will have to be filled again.
Now it remains only to fasten the upper part. To do this, from the inside of the legs, a screw with a diameter of 5 mm is screwed to 2 corners to each. They will play the role of the connector between the legs and the seat. After that, the upper part is installed, which is also fixed using self-samples.
Trim Chairs for small kitchen
If the product made by your own hands will be used in the kitchen, then you need to take care that it is convenient to sit on it. Naturally, it will not work on a hard stool for a long time for all known reasons, so the surface of the seating is better made as softer. In this case, the "gatherings" in the kitchen with friends will bring only positive emotions.
For this operation, the upholstery material will be needed: ordinary furniture foam (density 32) and upholstery fabric. The latter should be quite dense to have resistance to abrasion. For upholstery, you can use dermatin.
Also from the tool for this work, scissors and industrial stapler will be needed.
Order of work:
- First of all, it is necessary to cut a blank from the foam rubber, the size of which must correspond to the size of the upper part of the toaster. To make it right, you can attach the surface of the top of the toaster and circling its contour on the foam rubber.
- Then you need to cut the desired piece of foam rubber and with the help of glue glue it to the surface of the seat. After the glue gets free, you need to take a stapler and over the perimeter to break the brackets to the surface to the surface for additional strength.
- Next, a piece of upholstery fabric is cut. Its lengths and widths should be enough so that it can be tightly attached to the stool. From how uniformly the fabric will be stretched, the appearance of the finished product will depend on.
- To attach the fabric to the surface, it is necessary to decompose the tissue on the new surface and attach to it top of the toaster. Then carefully break one edge and pierced it with a stapler. After that, the opposite edge pulls out and breaks back again. The side edges are also fixed in the same way.
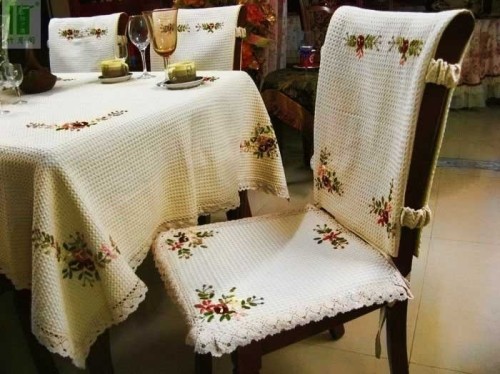
The stool-colored stool looks more attractive, and it is much more convenient to sit on it. However, it is necessary to choose an easily washable material, because the probability of pollution of the surface with fat or other contaminants should be increased. In this case, poor-quality fabric will be unusable in a short time. The most optimal option for finishing will be dermatin, although it costs a little more expensive.
Having attached a little effort and a small amount of materials, you can make inexpensive chairs for the kitchen, which will decorate the interior.


