Design interior design - how to make Useful advice

Any of us may encounter the need to create an interior design project when buying new housing or overhaul of old. Today, such services can be ordered in specialized agencies, but it is always pleasant to save, especially in such an expensive business like this. In this article, we will consider the development of the interior design project, we will describe the maximum of the nuances and the features of this work, as well as tell you how to collect the desired package of documents for construction.
Content
Drawing and approval
The interior design takes a lot of time and strength. To make the most complete and detailed design project, you must have at least engineering skills, not to mention the technical and artistic side of the process. For this reason, not one, but several specialists of different profiles attract to work.
Stages of creating a project at the initial stage:
- Start the creation of any design interior design of an apartment or a private home is necessary with measurements of premises. This is the basis of all work, because the faithfulness of all working drawings depends on the accuracy of measurements. The bill is on millimeters, therefore it is necessary to approach work very responsibly.
- After you removed all the data, you need to draw a measurement plan. In this case, the best helper will be a special computer program. If earlier the engineers had to be drawn everything manually, today it can be trusted by a smart car.
- Make a technical task - a document in which all your wishes will be set forth in detail regarding the future design of the house or apartment. To do this, you need to clearly represent how your future dwelling will look like. Check out the logs with examples of the latest interior solutions, think about the possibilities of improving the functionality of small rooms, etc. Your main task is to collect together the maximum information so that you can begin to implement the written. Than more details will be a description of the interior design project, the easier it will embody it into reality.
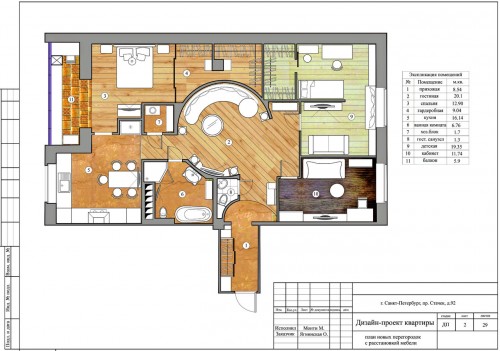
- When you identified where furniture, plumbing and equipment will be located, mark their overall dimensions and plumbing in all its axes. To do this, it is necessary to create two plan: on one there will be a binding of plumbing devices, on the other - the placement of equipment and furniture with bindings.
- Create a plan with which you will build partitions and openings in the house. Here it is necessary to describe all the information regarding the installation and disassembly works - what walls to clean, where to build the arches, put partitions or cut the extra windows. So, in blue, in the drawing, you can highlight the walls that will be built, and the red - which should be demolished. If necessary, make a footnote with explanations, for example, "insulated loggia" or "make a step".
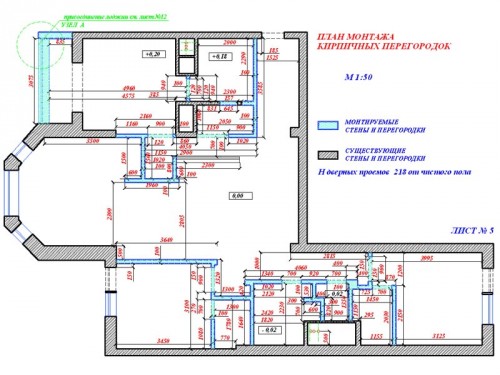
If you need to coordinate the planning and the project in the relevant instances, it is recommended to make a special unified drawing with future changes and their dimensions. After agreement, it is possible to start the next stage of the process - the development of the ceiling and floor finish.
Plan-drawing of floors and ceiling
It is possible to start the development of flooring and ceiling coatings only after approval of the design interior design of an apartment or at home. At this stage, it is necessary to consider composite questions to the smallest detail, solve structural and spatial tasks. The floor and ceiling are not just flat horizontal useless planes in housing. In the skillful hands of the designer, they become functional and decorative elements of the interior.
First you need to create a scheme of functional zones, in other words, consider zoning area. So, if it is a big studio, mark the place for the kitchen, bedrooms, workspace, hallway.
With the help of various flooring, it is possible to spectacularly visually divide the room into several functional zones, without sacrificing free space. On the contrary, you can combine the area with a single texture cover, creating a feeling of air and by setting a certain style to the interior.
Film plans for each room are necessary schematically, the main thing at this stage is to designate the boundaries and types of floor coatings.
At the same time, you can create the design of future ceilings - to come up with where the niche, stucco or other architectural sings will be located. On the "ceiling plans" it is necessary to designate the boundaries of facing materials, detailed layout of heights, mark the location of the ceiling lighting (lighting script), calculate the area and make the layout of the coatings, if necessary.
After studying the plan of floors and ceilings, you can proceed to work with electricity and wiring.
Electrician: Plans and Schemes
Plan-drawing of the ceiling and the layout of the ceiling and wall lighting are directly related to the location of the switches. At this stage, we should consider the methods of connecting all the lighting devices and their groups.
Electrician Plan Creation Tips:
- On the plan you need to specify the view of each switch and the number of keys on it. The design of the interior design project should be as accurate as possible so that there are no errors in the subsequent, and the result did not disappoint you. It is necessary to make measurements and specify the height on which each switch is located, as well as binding to the nearest wall, opening or partition. Using arrows, specify which device is included in one way or another.
- If you work with large rooms in which several inputs lead, it makes sense to think about installing duplicate switches from each doorway. So it is possible to control the lighting from different points of the room.
- After completing the work on the circuit of connecting the ceiling lighting, make the wall lighting binding on the same principle - to the nearest wall or partition.
- Develop a plan for placing outlets and household appliances. Mark where there will be a TV, an acoustic system, computer, modem or router, etc. Also specify, at what height will be the sockets. If you install warm floors, do not forget to mention all the electrical components. Here it is necessary to describe the type of sockets: normal, television, power, telephone.
Additional interior elements
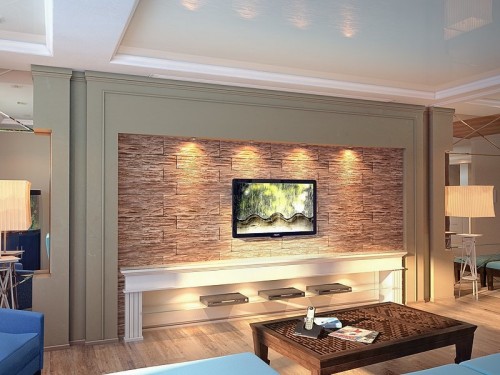
Sometimes you want to retreat from the generally accepted classics and turn your zidin into the work of architectural art. You can do this with a variety of decorative elements and engineering solutions. So, for many years, the ceiling niches of drywall are not lost in which the backlight is mounted. So you can create a soft lighting that does not tires the eyes. The services of diversity lovers are also all sorts of architectural elements: semi-column, columns, arches, bas-reliefs, stucco, etc.
Whatever way to decorate your home you chose, all this requires the most detailed explanations in the drawing. Schematically indicate the structural features of the interior detail, its size and location in space (height, distance from the ceiling, floor, radius, etc.).
If you select a complex multi-level ceiling, you need to create a separate plan with bindings, radii and mesh for the structure.
If earlier it was possible to limit ourselves to a schematic designation of the boundaries of floor coatings, now you need to describe everything in more detail. For example, if you are going to make cladding with ceramic tiles, you need to make a detailed layout plan. In the store, select the desired tile model, specify the exact dimensions, not forgetting to take into account the seams and the direction of the layout. Only so can the most accurately calculate the desired amount of material so as not to overpay the extra money.
It is also recommended to perform a tile layout in color so that you can begin to create a harmonious color gamut of the room.
Scanned walls
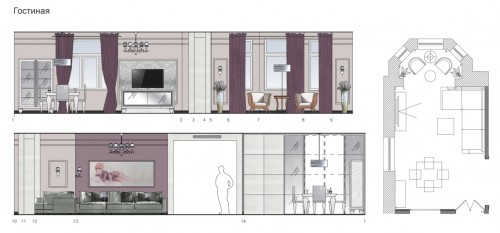
The sweeps of the walls of all rooms play the role of peculiar navigation to create a design interior design of the house as a whole.
To make the wall scan, follow these steps:
- Name each room on the plan-drawing of an apartment or at home. Assign the sequence number from the scanner in each individual room. Marking, as a rule, start from the entrance, moving clockwise.
- There are special programs to create virtual interiors. In order not to spend time on drawing, use such a program and make a detailed wall scan on which you display the location of all items of the interior, equipment, switches, windows, switches, etc.
- Since you thought all these nuances in advance, you will not be difficult to choose suitable items in the program.
- Gradually, tolerate the walls of the walls on the drawings of the rooms, where indicate the height and location of the elements relative to each other.
Estrase
After creating sweeps, you can accurately calculate the required amount of materials for each wall, ceiling and floor in square meters. Square meters, in turn, can be easily translated into the right amount of tile packs, paint cans, wallpaper rolls, etc.
Calculate how many travel meters of cornices, plinths and moldings you will need.
At this stage, you can create a color design interior design room with a specific tile layout.
Do not forget to indicate in the estimate of the doors, window frames, lamps, plumbing, furniture, etc.
Estrase will help you navigate in the construction market and do not spend more than necessary.
Computer visualization of premises
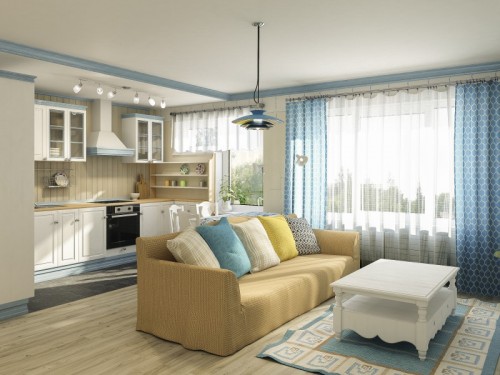
The design project of the interior of the house can be completed with a realistic computer 3D-visualization of all rooms. It is done with the help of modern computer programs that allow you to see how your future home will look and correct possible shortcomings to direct construction.
With a variety of textures, textures and colors, you can give the project maximum realistic. This will facilitate the choice of finishing materials, furniture and decor elements.


