Tiled floor in the kitchen with their own hands Tile
The tile has a number of advantages over other materials for the floor. This is a durable, chemical-resistant coating. In addition, tiled floor in the kitchen is practical: it is easy to wash, it is well harmonized with various interior decoration materials. But how to choose the right tile from a variety of collections offered by manufacturers?
Content
How to choose a tile for the kitchen on the floor
The tile for the floor kitchen will last for a long time, if you have the following characteristics:
- hardness of the upper, decorative layer;
- resistance to abrasion.
When choosing a tile, you must pay attention to the information specified on the package. According to the international classification, a tile category is suitable for laying on the floor:
- PEI II - for low-loaded surfaces (with low patency), where they go to home shoes;
- PEI III - for any premises, except corridors and other floors with high patency;
- PEI IV - for the premises of any type, including with a large load (crossing);
- PEI V - for any sexes with the most intense patency.
PEI III and PEI IV category tiles are the recommended material by which tiled floor can be arranged in the kitchen: the price of such a tile corresponds to the required quality.
In addition to mechanical strength, when choosing a tile, pay attention to other characteristics.
- Chemically active substances resistance: This property is important for the kitchen, where it is often necessary to make cleaning with the use of household chemicals. It is important that the floor tile relates to the class "AA" or "A".
- Safety: The surface of the tile should not be slippery. A relatively safe surface has a coefficient of friction in the range of 0.39 - 0.74, and safe - more than 0.75. Lower coefficient of dangerous and very dangerous tiles.
- Tile size: large format stack faster and easier, but when choosing a size, it is necessary to take into account the area of \u200b\u200bthe room. For a small kitchen, it is better to choose a medium-size tile.
- Color range: Tile must be combined with other elements of the interior finish, but it must be borne in mind that the light surface in the kitchen will be a brand.
Rules layout tile
Before you start laying the tile, it is necessary to properly distribute it along the floor area. This will help save material, but the main goal is to avoid narrow "trimming". Otherwise, the tile will not look attractive and can spoil the whole interior.
Methods of layout of the tile are conventionally divided into three types:
- "Primitive";
- "Rustic";
- "Classical".
For example, consider the laying of a tile of 500 × 200 mm in the kitchen semi 2.1 m wide.
Features "Primitive" layouts: Phased description
- The gluing tile begins on the corner at the wall, where the whole tile is stacked.
- The work continues until the entire area of \u200b\u200bthe floor is filled with whole tiles.
- Along the opposite wall, it is necessary to stick the strips of the tile ("trimming") 10 cm wide.
As a result, the surface of the floor looks aesthetically not attractive, primitive. Narrow "trimming" with a width of less than half of the whole tile, spoil the interior.
What is the "rustic" layout
With such a laying of "trimming" divided into two parts: one is placed along the wall, and the other - along the opposite. As a result, a coating of ceramic tiles with two very narrow (5 cm) "trimming" is formed. It looks even worse than in the case of a "primitive" laying. This method can be applied in the event that "trimming" will subsequently hide under kitchen furniture.
"Classic" method of layout tile
This method of layout is considered correct from the point of view of aesthetics. It is performed as follows.
- Whole tiles are laid in one row so as to overlap the area. In the example under consideration, this amount will be four tiles.
- One tile is removed.
- The remaining tiles are distributed from the center to the walls.
As a result, the floor area after cladding ceramics looks better. The remaining spaces along the walls are closed with wide "trimming" 300 mm width, which looks natural.
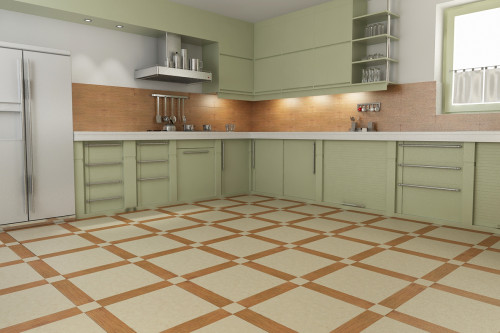
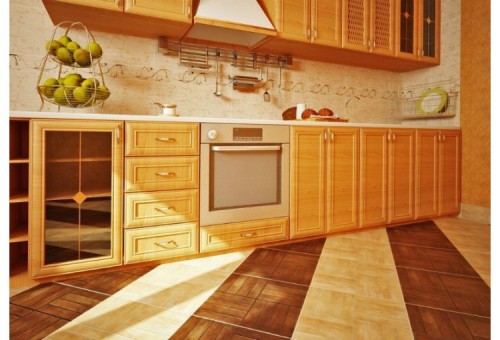
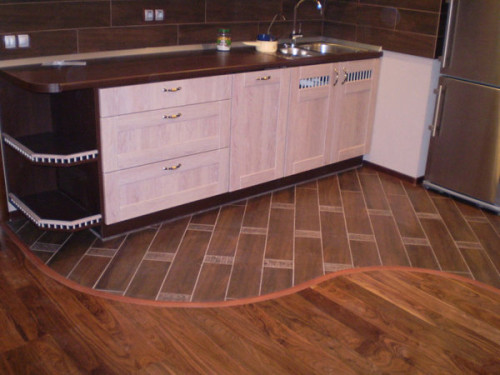
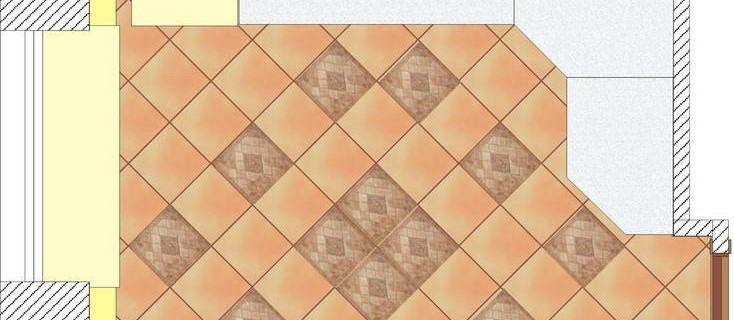
However, the methods described above are not the only possible solution and can only be considered in the case of laying a single-color tile with a small pattern or without it. Tiled floor in the kitchen (photo is presented below) can be laid out:
- diagonally;
- "Christmas tree";
- in a checkerboard;
- with offset.
In addition, the central part can be highlighted, separated from the zone of food from the zone of its preparation. Designers often use the combination of ceramic tiles with other materials, for example, with a parquet board or with laminate.
Important: style, drawing and color of ceramic floor tiles must harmoniously fit into the overall concept of interior decoration, combined with tiles on the walls and furnished.
Tiled floor in the kitchen with your own hands: technology laying on a concrete surface
It should be borne in mind that only a special tile is suitable for laying on the floor, the thickness of which cannot be smaller than 6 mm. The work is performed in stages and consists of the following operations.
- Preparation of the surface. It is necessary to make sure that the base does not have drops horizontally exceeding 5 mm. If such defects are detected - the floor is aligned with a screed. This is necessary to reduce the consumption of tiled glue.
- From the surface of the screed, after drying it, the litter and dust is removed, after which it is processed by the primer of deep penetration.
- The tile is folded on the floor into one row as it will be accomplished. Make the first attack.
- The glue composition is prepared in accordance with the manufacturer's recommendations (indicated on the package).
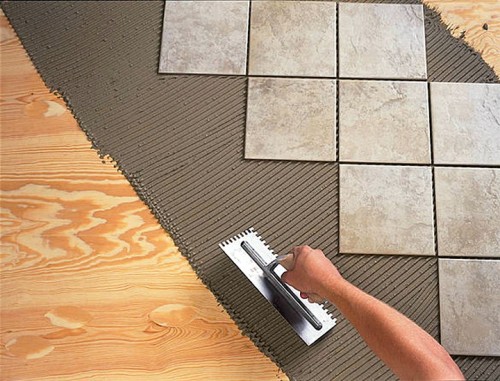
- The glue is applied to the base and are equally distributed to the toothed spatula. One reception is covered by a plot that can be closed with several tiles.
- The tile is placed in place and tightly pressed to the base. You can use a rubber hammer. Control the position of the tiles with a stretched cord and level.
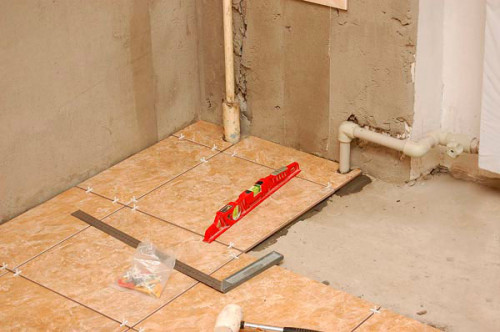
- For the formation of a beautiful and identical seam between tiles, special plastic crosses with a thickness of 2-3 mm are used. After three days (after complete drying of the glue for 2-3 days), they are removed, and the seams are filled with grouting mastic. To apply light tones of mastic, it is recommended to use a spatula of white rubber (dark strips remain after the black).
IMPORTANT: Entreprenerable excess glue from the surface of the tile and in the seams between them are wiping with dry rag. If the glue is frozen, a metal spatula is used.
The laying of the tile is performed at an air temperature not lower than + 5 ° C, all windows must be closed to avoid drafts.
Tile cutting is performed by the following tools:
- tilecase;
- glass cutter;
- bulgarian with a circle around the stone;
- special string.
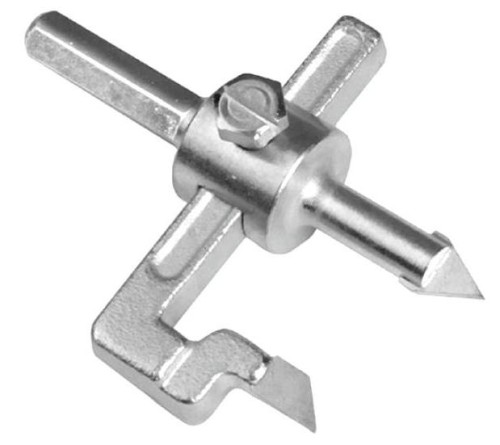
In the event that it is necessary to cut a hole, first a drill with a widdle attack drill a hole, after which it is modified using a string. Also for this can be used "Ballerinka".
Please note: some types of tiles before laying is necessary for a certain time to withstand in water. Such a condition will necessarily be indicated on the package.
Laying tiles on a wooden surface
The work technology is as follows.
- The boardwalk is repaired: change and strengthen the beating boards.
- The floor is equalized: OSB plates or moisture-resistant faeer with a thickness of at least 10 mm. Plates fixed with self-drawing, leaving a compensation gap of 5-7 mm along the walls.
- Tile is glued with special mastic: it goes on sale in the finished form. Mastics are applied to the base with a toothed spatula and are evenly distributed over the surface.
- After drying, the seam mastic between the tiles is filled with "grouting".
Important: not frozen mastic, accidentally hitting the facial surface of the tile, should be removed immediately with a dry vet.
In conclusion, the story about how tiled floors are created in the kitchen, video with specialist comments.


