
How to raise the cargo on the roof. Construction lift do it yourself Useful advice
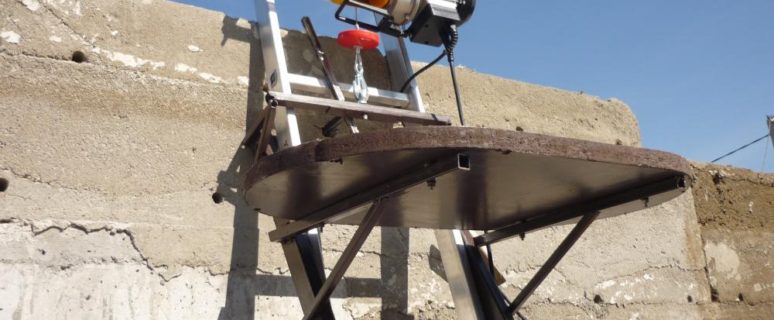
During construction work, the need often appears to raise some large-sized building materials on a specific floor or roof. Without the use of any devices, this is a rather difficult task. A lift will help to cope with her.
Content
How to raise the roof
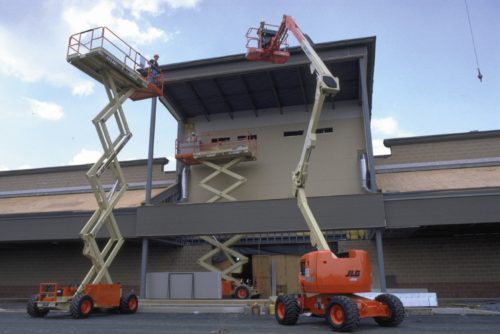
Many people involved in construction are often faced with the problem of transportation and cargo drift at a certain height. It is easiest that this is done with the help of a lift. Such devices are very mobile, they are easily moved to the construction sites using an ordinary passenger car in the presence of an upper trunk.
Building lift
For global construction work in most cases, a mechanism is needed for lifting materials and even oversized furniture to height. The acquisition of a trace system or any other finished adaptation for such a case is the thing is notabled, and indeed, especially unreal. That is why it is best to deal with works on the manufacture of a peculiar external elevator - a lift for construction work, with their own hands.
Make such a design yourself quite simple, having certain skills in the works. It will take to consider the structure of the mechanism, create a clear and detailed drawing of the product, then make all the necessary calculations and purchase the necessary details. Only after that it will be possible to start work on the manufacture of lifting design for its construction site.
Making a building lift do it yourself
First you need to decide on the type and clear assignment of the lift, dimensions and weight of the cargo, which is planned to be moved. Such devices are absolutely different. There are simpler designs, and there are rather complicated not only in the manufacture, but also to use. The main thing is to choose this option that will not cause great difficulties in the construction process, but to collect a mechanism so that it can work as much as possible, easier and more efficiently.
Manufacturing can be based on the organization of the ladder, several pipes and a couple of other items. The most simply constructs the lifts of this type using the winch mechanism.
Lift do it yourself: drawings
Before you start assembling a type of lift, you need to create or get a detailed product drawing. It will help not be mistaken in the manufacturing process, as well as create a solid and reliable design. In the drawing, it is important to fix all the necessary parts and attachments, as well as specify the exactly calculated dimensions of all parts to the assembly.
Construction lift do it yourself: Tools
After drawing up the drawing, you can proceed to the preparation of the necessary materials to start work. For this process will be required:
- plywood;
- cable Kapron;
- bar glued;
- roller on the bearing;
- boards;
- bar;
- rigging block with bearings.
Plywoods on the platform need not less than 1 x 1 m. Kapron cable for our option will require an approximate 12 m. The glued bar must be chosen well succeeded, about 10 m, and the usual - 9 m. Rollers on the bearings will need only 4 pieces, one by one for every corner. Board for consolidation will be needed in length in 16 m.
How to make a lift with your own hands: Basic rules
- Production of pipe-based design does not take long. The basis of this structure will be 2 metal cuts, which are installed in a vertical position. They will perform the role of guides.
- The distance between the racks should be about 47 cm. Between the pipes you need to position the carriage. Her task is to move on special wheels in the upper and lower directions with a manual type winch. It is fixed directly to the foundation. Then you need to attach a basket to this carriage to which the load will be placed.
- At the drum, the winch should be called a rope of cargo destination, pre-checking it in a specialized store of such a focus. In no case do not buy a conventional rope on the market, even if you are told that it is withstanding sufficient weight. This cable in the work will be used to descend and lifting the carriage with the tank of materials.
- One of the ends of the rope to which the upper position is specified should be the guide block, which is located at the top of the design and is attached to the carriage.
- The second end, which is directed in the opposite direction, passes by the suspended block. It must be placed on a moving platform. After that, it is fixed to Talrepa - a special adaptation that is responsible for the required tightening and the slack of the cable tension.
- Then in the pipes are placed special counterweights, which are suspended from different ends of the rope.
- To carry out the rapid and correct lifting of the cargo, you need to rotate the winch handles in the direction from ourselves. At this time, the shaft and the drum rotates with the rope on it. With such a sequential movement and the carriage raising occurs.
- If you stop the handles, the rope will try to deploy the shaft in the opposite direction under the power of the severity of the load. At this point, the special mechanism will not allow the carriage to fall.
- To descend the load, the winch is respectively rotating in the opposite side - to themselves. In such a situation, the loader to the required height occurs.
- If the rope suddenly breaks, the spring on the carriage will slow down at a certain height, which is very important for safety.
- During the active use of the lift for the transportation of building materials on the facility, you need to take care of some important things. It is impossible to make the lubricant to some parts of the lifting mechanism like a washer and gear. Before the direct use of the device, a special cargo rope is stretched so that the reels do not slide on the drum, and small security clearances were formed between the pads for braking.
- If the cargo rope slides on the drum during operation, then it is necessary to wipe it, remove excess lubricant, and increase the tension of the rope slightly.
- If the guide pads suddenly stink between the pipes, then it will be necessary to establish a small space between them, about 3 mm. You can also slightly reduce the number of gaskets separating the parts of the carriage from the pad.
- You can start working with the lift after checking the adequate work of all mechanisms. In the future, additional checks do not need.
Scissor construction lift do it yourself
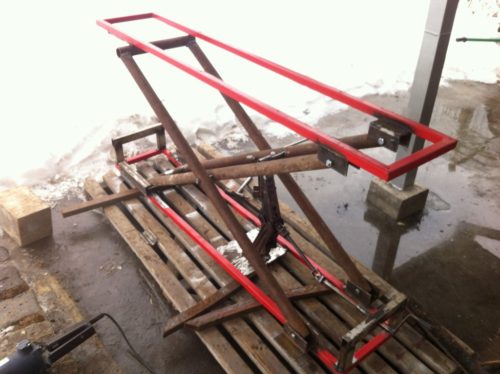
In many situations, the scissory type of the lift becomes a practical option. Especially often they are necessary during the repair work of cars. Acquisition of such a tool in the construction supermarket will cost quite expensive, so much more profitable to engage in its manufacture own.
- The lift must raise the car to the desired height, optimal for all types of repair work, and be absolutely safe for the masters under it.
- The load on this type of lift is usually large enough. Due to active work, the parts can quickly wear out. In addition, the device must be strong enough to prevent the occurrence of accidents and damage cars.
- For work on the manufacture of this type of mechanism, some knowledge is needed in the technical field and the necessary parts.
- For the site and the base of the device, chawllers are usually used - parts in the form of metal profiles with a cross section in the form of the letter "P". To begin the process of manufacturing scissors, we will need 2-letter beams, pump and hydraulic cylinders. It is also necessary to prepare bushings and a distributor into two parts.
- The drive in such a lift can be used hydromechanical or electromechanical. In the first case, when picked up an electric type engine. It works together with hydraulic cylinders, leading "scissors" into action that are connected in advance to the hydrostating. This detail of the device does not have to be new, you can also purchase an old mechanism, the main thing is that it also had the necessary life.
- Before proceeding with the manufacture, it is important to correctly fulfill all the calculations, otherwise the design can be completely not so reliable.
Construction lift for drywall do it yourself
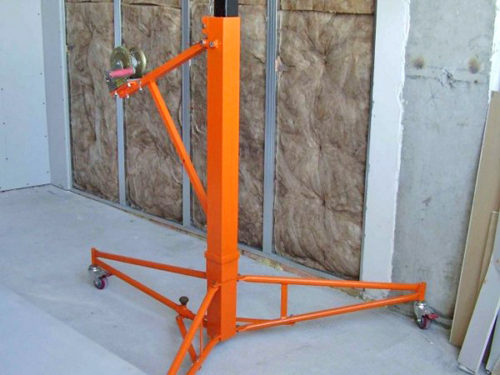
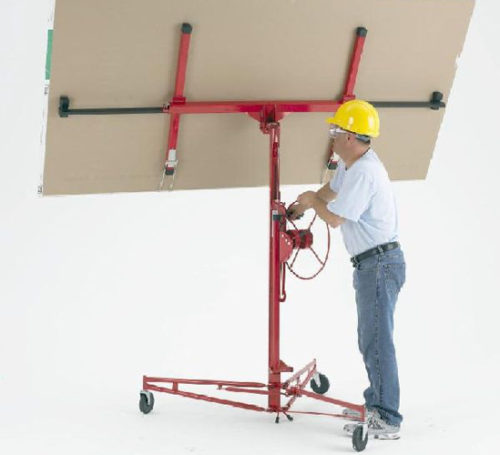
Plasterboard is a pretty heavy building material that is often used to cover the walls or mounting of smooth ceilings. Without the help of the lift alone, it will work with it very hard.
Construction lift device
For such purposes, lifts consisting of 4 parts are used.
- Roller base. This mechanism has a type of tripod on wheels. The part provides the possibility of moving drywall on any distance in different directions. It allows you to move inside the load weighing up to 50 kg, that is, only 1 sheet of material can be moved in it.
- Tripod. This part of the device provides the ability to raise drywall for different heights. Most often, it looks like 2 knees, similar to the tube.
- The winch looks like a manual device for moving plasterboard sheets.
- Freight site. It has the form of a complex tubular frame mechanism in the form of the letter "H". The system supports material on a complete plane. With it, you can raise whole pieces and small segments. This design has a profitable inclination. It helps to significantly expand the capabilities of the lift device. With such a design, it is very easy to sow ceilings and facade walls on quite high altitude.
Automatic lifting and descent system
The mechanisms of lifts manufactured by their own hands can be equipped with electric drives. Consider the process of manufacturing such a system that simplifies the use of them.
- Start need from tripod. You need to make a device for the possibility of fastening a telescopic tripod. 3-4 legs are welded to it, which are subsequently equipped with wheels for convenient movement. In this case, you will need wheels with stoppers. The support for the tripod is manufactured based on data on the size of the holder itself. Its size should be accurately more value than the total area of \u200b\u200bthe tripature base. The place of the joint of these two items must be welded using two corners. After completing work on the production of support, all legs with wheels are welded. Such a mechanism should be very durable, since the main load will have to be on it.
- The tripod is made from the profile pipe, divided into 3 equal segments. The lower section should be 8 x 8 cm, the average is 2 cm less, and the upper - 4 x 4 cm. All 3 pipes are inserted one to another. One of the ends of each of them is drunk to prevent falling down. At the top of the upper part, the mount is made to attach the turntable.
- The manufacture of the table begins with the digestion of "H" with an average jumper having a passage passage. It is needed to secure the backups that can be advanced. Subsequently, they will be a guarantee of the integrity of drywall. So that the backups were able to extend, you need to drill a small hole and welcome the nut over it. After that, the bolt for hard fixation is screwed there.
- A rotating-inclined type device is manufactured by different methods. The simplest thing is in welding to the site of a small cutting pipe and connecting it to the telescope fork.
The simplest building lifts do it yourself: recommendations
- The easiest lift has a design based on the staircase. You can take a ready-made staircase for its manufacture. Its theettes should be strictly parallel to each other, as they will send a transport platform to raise various goods. It will take a staircase from aluminum or steel. Suitable for both ready and self-made.
- The simplest mechanism is also quite simple, so the manufacture does not take much time. Elementary on rails are moving platform with multiple wheels, which cover the guides from several sides. In this variant, the wheel is very firmly and securely fix the location of the platform. Typically use 6 wheels, on each side it is attached 3 pieces. The ball bearings are used as these parts. Such a design is quickly collapsing, which makes it easy and quickly replaced any element.
- The carriage platform can be raised upstream using a cable that throws out through a special block, located on the top of the staircase. It is best to install it on a separate crossbar when planning a design. The drive can be installed both manual and electric. With manual mechanism it is possible to raise the cargo with a maximum weight of 60 kg, and with electric - up to 200 - 300 kg.
- In the upper and lower position of the platform, safety switches are installed. They will stop the electric motor as soon as the platform will reach these positions in height. Otherwise, the cable can break, and the platform will fall. Another option is the combustion of the electric motor due to too much load, which is also not too pleasant and thoughtfully.
- The electric motor can be installed not only below, but on top of the staircase. Then it will not be connected in parallel with it, but to be located separately. In this case, the upper unit will be needed to change the direction of movement of the platform.
- This design is absolutely simple in production, but it is not completely safe. While working with such a lift, you need to be especially careful and neat. It is necessary to pay attention to the staircase and how it is installed, all attachments should be durable and reliable.
Lift do it yourself: video
The network has a variety of video build a construction lift manually. They will help to visually view the described process and not mistaken when performing a phase of work. The information presented in the video, not only tells once again about the sequence and stages of the process, but also help perform work without confusion for a short period of time.


