How to build a gazebo from natural stone with your own hands? Construction,Plot.

Summer gazebo is a great place to relax in nature. It can be used for lunch in the fresh air, and for fun pastime with friends. Gazons for giving with their own hands is simple. But, as in any construction there are certain standards that will make a future building not only beautiful, but also reliable.
Content
Preparatory stage
Before starting work, you must compile a detailed plan. This will help you think over all the details in advance, will significantly reduce the construction time and will save money. Main goals:
- material selection
- type of gazebo
- roof type
- decorative design.
Material for construction stands:
- wood,
- stone,
- foam concrete and ceramzitoblocks,
- natural stone.
Wooden buildings are mounted easier, but they are less reliable and require very careful care. More often, the tree is used only as a decorative element.
Stone buildings are reliable, but have no aesthetic appearance. After the construction is completed, you will need to perform facade work and think through Sidin. As a result, this building will cost more than just.
Foam concrete and ceramzitoblocks are cheaper than stone, but they have all the same minuses. In addition, they are very wide. Therefore, you will have to cut in half.
The best construction material is a natural stone. He durable, does not need additional siding and easy enough to install. The only minus is the cost. But in comparison with the additional costs of plaster, covering with siding panels, processing with protective chemicals is the most favorable option.
By type, the arbors are divided into:
- open
- closed.
In form on:
- round
- square
- polygonal
- rectangular
- oval.
Closed gazebos makes sense to build only at dachas near rivers, lakes or swamps. Where standard means of protection against mosquitoes do not help. In all other cases, they build an open arbor.
The form appropriately choose based on the planned location and number of people who can simultaneously be indoors. For small companies or families make square, round gazebos or polygonal arbors. For larger feasts - oval or rectangular.
The roof type on the straight line depends on the shape of the arbor. For rounded options, it is appropriate to make a conical roof for rectangular - duplex. Single roof looks less aesthetically, moreover, needs a more powerful support system, since the load on it is greater.
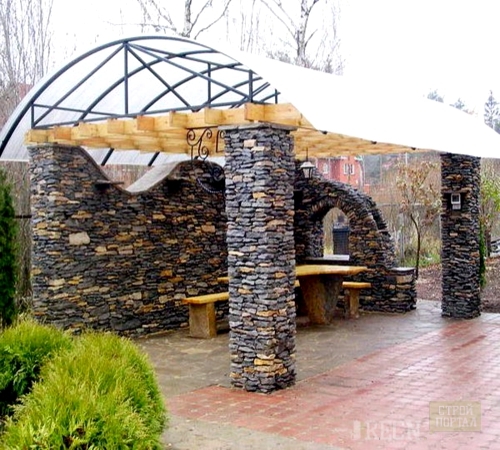
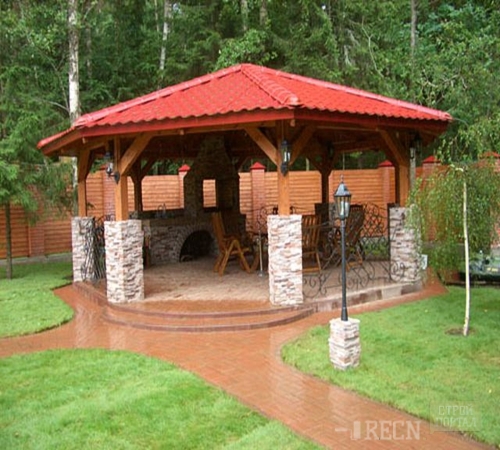
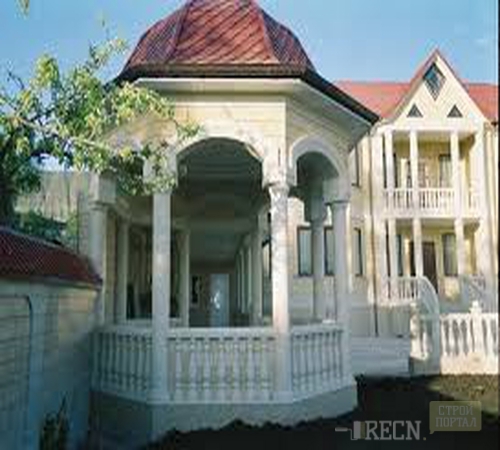
Decorative design options for stone arbors, the photo will show how it is impossible, better. Most often use the following elements:
- forged lamps,
- wooden grids
- wine chests,
- shelves,
- weapons layouts
- stuffed animals.
The question of choice is limited exclusively fantasy.
Stages of construction
The whole process can be divided into the following steps:
- foundation preparation,
- construction of walls
- floor laying
- roof construction
- deco.
In order not to have any difficulties in the construction of a stone arbor, you will need tools:
- shovel,
- corto for a solution
- trowel,
- level,
- rope,
- hammer,
- saw.
The kit is complemented depending on the selected type of arbor and roofing materials.
Preparation of foundation
Like any other construction, a gazebo of a natural stone starts with the arrangement of the foundation. For this:
- digging the pit around the perimeter of the construction depth of 10-15 cm (5 cm below the level of ground freezing),
- fall asleep at the bottom of 2-3 cm rubble and 5 cm of sand,
- poured a mixture of cement, broken stone, rubble or any other construction trash,
- wait 3-5 days to complete solidification of the solution.
- poured and level the base of the floor (1-2 cm of pure cement mortar).
Tip: As for the fill of the foundation and for aligning the surface, the consistency of the solution should be similar to a rare sour cream. In the first case, this will allow the cement to fill out all empties, in the second, it will simplify the styling process.
Make the foundation above the level of the Earth makes sense only if it is not planned to put the tile around the arbor, and it will be located right on the ground. Two rows of tiles around the arbor are recommended to put the dirt from the earth to fall inside. It doesn't matter to do too high the foundation, since it does not carry the load, and the cost of materials will be quite large. The room is elegantly ventilated, and the risk of mold occurs is zero.
Alternatively, instead of a monolithic foundation make pillars or tape. But this is not the best solution. First, the height of the construction is significantly risen and it is necessary to install the steps. Secondly, there is a complexity in the floor mounting. Thirdly, you will have to spend time on the assembly and disassembly of the formwork.
Naturally, it is best to draw drawings for arbors before starting filling the foundation. Make them need several to compare everything and against.
Construction of walls
Walls are the most important moment when building a gazebo from a natural stone. First of all it is worth deciding which material to use. For construction will suit:
- limestone,
- slate
- granite,
- marble,
- quartzite,
- dolomite,
- porphyry.
Limestone without facade processing is suitable only if the arbor architecture is made in the castle style.
Slave rocks although it looks quite attractive, but are mounted only on a pre-prepared surface, so you have to build a stone wall earlier and the slate plate on it.
Granite and marble are similar to among themselves, by the exception that marble also shines. They can be applied both in the form of false plates and independent building materials.
Quartzite, dolomite and porphyr are the most expensive species of natural stone. It is rarely used as a building material. As a rule, they are commercially available in the form of bricks of different sizes.
Consider the construction of a marble and granite arbor. Since the remaining materials are mounted on the technology of laying ordinary brick, you do not need to stop at this in detail.
Marble and granite are found in the form of a block, but if the goal is to create an unusual arbor from the natural stone, then buying better not a blank, but a solid breed. It is pieces of various shapes and sizes with an average diameter of 10 cm.
Stones are selected in size and shape, then stacked with rows. Cement mortar acts as a binder. The seams between the stones are squeezed out with a finger, the result is a beautiful semicircular hollow. The height of the walls depends on the preferences. There is no minimum, as recommended to do not more than 1 m. Another option is a gazebo with columns. Columns erect in any case will have, as they serve as a roof support. Therefore, if you wish to expand free space, you can refuse the walls at all.
There is a more complex way to install granite and marble stones. It allows you to get rid of the seams between the stones. The secret is simple enough:
- the wall consists of two rows of stones of smaller fraction,
- before starting the installation, the design must be assembled on the ground and check the stones to make the most tightly,
- next, the in the middle of each stone is drilled through a hole,
- in the foundation, at the appropriate distance, iron rods are mounted,
- dress up stones
- a stone that dresses the latter is not worn until the end, a little cement is added to the hole and dresses on the rod.
At the beginning, the outer part of the wall is collected, then internal. The thinner the metal rod, the better. The titanium wire is perfect. Another secret is that between the inner and outer layers, it is necessary to make a fill of sufficiently liquid cement. It will connect the inner parts of the stone, not at least without revealing outside. The wall collected in this way will be reliable and easy to withstand all the same loads as the usual one.
The next element is columns. They usually have either in the corners of the arbor, or under the supporting points of the conical roof. The columns begin to build from the end of the wall along the same technology as the wall itself.
Important: If an option with hidden installation is used, the wire for a column should be attached to the foundation and inextricably go to the top of the gazebo. Otherwise it is impossible to maintain the strength of the structure.
Roof mounting
Since the device of the pitched and the conical roof is fundamentally different from each other, consider each of the options separately.
The scope roof consists of:
- rafter bases
- insulation
- roofing material.
Installation work is as follows:
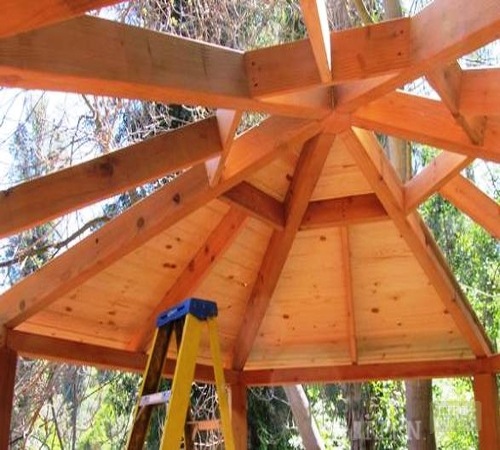
- on parallel columns laid carriers wooden beams,
- the beams are fixed using dowels or anchors (depending on the type of stone), one more option is to drown the beam in the column,
- collected rafters with an angle of a slope of at least 30 degrees,
- rafters are mounted to the beams,
- they are fixed to the crate,
- over the waterproofing layer
- the roofing material is mounted.
Usually use:
- ceramic tile
- metal tile
- bituminous tile
- ondulin.
Purely from aesthetic preferences are recommended natural tiled. For all other parameters, these materials (specifically in the case of a gazebo) are absolutely identical.
The conical roof is mounted a little more complicated and divided into several types:
- cylindrical
- flat.
Flat cone roof is mounted as follows:
- the carrier beam is put on each of the support columns,
- all beams are associated with each other over the center of the arbor,
- between parallel beams, the jumpers are slightly mounted, evenly distributing the load,
- the resulting spans are sewn with a fusion board,
- a layer of waterproofing is stacked on top
- next roofing material,
- the shelves are connected by special elements (depending on the type of roofing material).
The cylindrical roof is relevant if you want to create an atmosphere of an old castle. It is also mounted, as well as flat, only the exception that the beams are not mounted on the columns, but on the pre-installed wooden frame. The more the beams, and the thinner they will be, the more round the roof will acquire the roof. The perfect distance of no more than 5 cm at the base.
If the arbor area is large enough, then a special trick is used. Make the same frame as for a flat conical roof, only raise it to the height necessary to create a cylindrical roof. Next, instead of the binder, metal sheets attached to the carrier beams giving them the shape of the circle. The width of the metal strip is 10-15 cm, the distance is 40-50 cm. The roofing material is only metal tile. In addition, the bottom will have to close the roof of the ceiling, because from the inside the roof will not look pretty.
Deco
The gazebo is ready, but it looks not over. In order to visually arrange the construction will have to show fantasy. Main elements:
- table,
- seating.
They are made of either stone or wood. On stone benches it will be necessary to provide for seating cushions. Mass execution options, to determine better to revise several photos or enable imagination.
But that's not all. The gazebo should be cozy. Various wooden grids, flowers with flowers, forged elements come to help. The choice depends on the stylization. We recommend familiar with:
- greek
- roman,
- japanese
- castle options.
Greek style assumes space for philosophizing and conducting various discussions. Consequently, the minimum of deco items, a small table and very comfortable seating places. Ideal for stone chairs.
Roman style involves the presence of a large number of colors. It is even possible internal painting of walls by various motives of wildlife. As true gourmets, the Romans loved to eat tightly. Therefore, the main element of the entire exterior is the table.
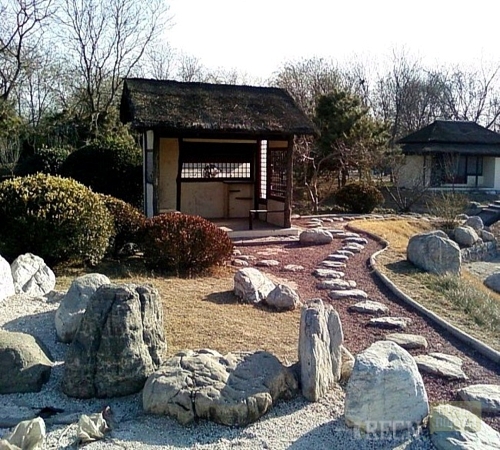
Japanese asceticism assumes the easiest design. Seats are large boulders, the table is generally not needed from the interior items - only decorated lamps. Effective this composition will look only in the garden of stones, in any other place there will be a sense of incompleteness.
Castle options transfer you and your guests in the Middle Ages. Accordingly, there must be mockups of cold weapons, stuffed animals, and the real candle chandelier. Furniture for tradition is made of wood.
And of course lighting. Electrical cables are better carried out underground and hide into the walls. The output is done on columns either on the ceiling. If the question of connecting the lamps arose after the construction of the arbor, then the tail of the cable is better to carry out the outer part of the rear of the arbor. Use special boxes is not recommended, since they are very stronger.
Tip: The gazebo will be completed only if it is not only inside, but also outside. It should be paved track (suitable, just, a major slate), make a stuffing ring around the building, to protect against dirt and the opportunity to walk around the construction and inspect the area, to improve the rest of the territory. The simplest way to plant a lawn. Next - the garden, pond, alpine slides, in general, everything that will bring aesthetic pleasure.


