How to make a partition in the bath. Material selection and master class Baths, saunas and pools

Because The square of the bath includes several rooms, such as a steam room, dressing room, shower, etc., then when it is built, there is a need for partitions to create and split all these rooms. Before building partitions in the bath with your own hands, you need to choose the material for this, and it can be different.
Content
Materials that build bath partitions, their advantages and disadvantages
Most often for self-building partitions, materials are used as:
- brick;
- bars;
- wooden boards.

All these materials have their advantages and disadvantages. Consider some of them more than them. The advantages of the brick partition in the bath:
- strength and long service life;
- environmentally friendly material;
- incruitance of rotting;
- high thermal insulation.

Disadvantages of brick partitions:
- the material is very heat, because of this heats up much longer than, for example, a tree;
- a brick partition will cost much greater labor and means than a wooden, as well as a high solution flow;
- brick partitions are very heavy, create an additional burden on the foundation;
- low steam conductivity.
The advantages of the partition from the bar in the bath:
- material is environmentally friendly;
- brous partitions are very easy to mount, for this not need special knowledge and skills;
- minor damage can be eliminated independently;
- it has low compared to brick cost.

Disadvantages of partitions from timber:
- bad noise insulation;
- moisture is afraid;
- dISTRIBUTY;
- susceptibility to burning;
- exposure to rotting, thanks to which all parts of the design have to handle appropriate impregnations.
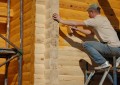
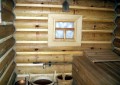
Partition in a bath from bars and boards
Tools and materials that will be required to work:
- for the construction of the partition, the edged boards 40-50 mm thick and 10-20 cm wide are used. Thicatous and widespread take it, because they can be swore. Most of all suitable boards, which will ensure the stiffness and the absence of cracks;
- bars with a cross section of 4x4 cm;
- spikes from wood having a diameter from 8 to 12 mm;
- fasteners;
- drill and drill;
- lobzik electric or hacksaw;
- plumb;
- hammer.

The partition is performed as follows:
- Boards are connected to each other with round spikes from 8 to 12 mm in the diameter. They are placed in increments of 1 m, pushing out from the height of the board. Instead of spikes, nails can be used 6-8 cm long.
- On the wall in those places where the partition will be faced, the bands are bought off the vertical direction, using a lace and a plumb. The same bands must be carried out on the ceiling and on the support.
- Brux with a cross section of 4x4 cm is nauseated to the strips, so that they formed the grooves. The width of the grooves should be equal to the width of the boards used. It is necessary that one of the bars did not reach the wall at 20-30 cm, due to this it will be possible to freely enter into the groove of the partition board.
- Each board is inserted into its groove and shifts in the direction of the wall, which is previously installed. At the bottom of the already mounted partition, the baseboard is nourished on both sides. To block small smokers between the partition and the wall, use the pass, exposed in the gypsum substance.
Double partitions are made in the same way: two walls are built in the one described above, leaving a 4 cm distance between them, and then fill it with insulation.
There is also a second option to manufacture a wooden partition in the bath , for this you need:
- mount the framework of the partition frame, using wooden bars and fix it between the walls;
- inside the frame to lay the insulation, and on top of it waterproofing;
- on both sides to see the frame of the clapboard, pre-building the crate.

Brick partition in the bath
Consider the process on the example of the branch of the steam room from the rest room. Before you start laying out the brick partition, you should try on the furnace, because If one later will come out not very correctly, then the wall will have to handle. The furnace must be centered and check the axis of the chimney pipe in the place where it will be located. Next, the actions must be implemented in the following order:
1. First of all marking. It is better to be 780 mm for greater convenience, the brick silence is 780 mm in width. In this case, 250 mm bricks will be laid with the least amount of waste, they will be cut to minimize them. In the simplest fit in exactly three bricks.
2. To reduce the loss of time and effort on the running of the construction behind the brick and back, you should count how many rows it turns out and how many bricks will go to them, as well as the number and size of each workpiece. When the quantity becomes known, you just need to cut everything at once.
3. The resulting cuts are better rounded with grinding.
4. So that in case of needing, the furnace could be easily pulled out from the occupied location, the size of the flue channel inserting the foil channel from all sides to the centimeter to exceed the size of the fuel channel itself.

5. Additional ventilation at the bottom of the simplest is better to leave a small window, which during the procedures in the bath will be subject to something.
6. For masonry, a heat-resistant solution is prepared according to the instructions. So that the erected design is durable and after a while did not collapse, it is necessary to take the following measures:
- to attach strips to the casing brusade, the width of which coincides with the width of the wall, carved from fire-resistant drywall. They, clutching with the solution, will not let the wall be tilted relative to the opening;
- in the simpleness at different levels of brickwork, right through drywall, reinforcing nails are driven, which will perform the function of hooking for masonry.
7. In order for all seams of partitions to be the same and looks aesthetic, there are either crosses, or gaskets from a girlfriend, such as chips of the same diameter between the rows. They are better to have it so that each brick accounted for two pieces on both sides.
8. After the wall is posted, and the solution will freeze, you need to abdolute the seams with a metal brush.
9. The sides of the erected partition in the bath adjacent to the wooden wall, it is better to close with platbands.
Calculators


Correct tool sharpening. How to sharpen the tool with your own hands 29.01.2017
In the process of operation, the cutting edges of the instruments are stupid, which leads to a decrease in the quality of processing parts and blanks, to a decrease in labor productivity, as well as to the wear of the tools themselves. Right ...

Themed photos